
User Guide


222 Developing Web Applications with ColdFusion
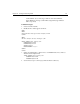
3. Change the following line to point to an appropriate location on your server:
DESTINATION="c:\inetpub\wwwroot\HR\"
4. Save the file as uploadfileaction.cfm in myapps under the Web root directory.
5. View
uploadfileform.cfm in your browser, enter values and submit the form.
6. The file you specified is uploaded.
Code Review
Note This example performs no error checking and does not incorporate any
security measures. Before deploying an application that performs file
uploads, be sure to incorporate both error handling and security.
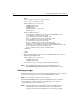
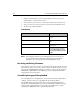
Resolving conflicting file names
When a file is saved to the server, there is a risk that another file may already exist with
the same name. In the event of this occurrence, there are a number of actions you can
take using the NAMECONFLICT attribute. For example, you can specify the parameter
NAMECONFLICT="MAKEUNIQUE" in the CFFILE tag to create a unique file name while
keeping the file extension the same.
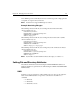
Controlling the type of file uploaded
For some applications, you might want to restrict the type of file that is uploaded. For
example, you may not want to accept graphic files in a document library.
The ACCEPT attribute is used to restrict the type of file that will be allowed in an
upload. When an ACCEPT qualifier is present, the uploaded file’s MIME content type
must match the criteria specified or an error will occur. ACCEPT takes a comma-
separated list of MIME data names, optionally with wildcards.
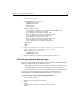
Code Description
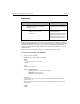
<CFFILE ACTION="UPLOAD"
Prepare to upload a file to the
server.
DESTINATION="c:\inetpub\wwwroot\HR\"
Specify the destination of the
file.
NAMECONFLICT="Overwrite"
If the file already exists,
overwrite it.
FILEFIELD="FiletoUpload">
Specify the name of the file to
upload. Note that you do not
enclose the variable in pound
signs.