
User Guide


Chapter 14: Managing Files on the Server 221
Code Review
HTML forms can be designed in most browsers to give users the ability to upload files.
Setting the HTML INPUT tag type to "file" instructs the browser to prepare to read and
transmit a file from the user’s system to your server. Setting the ENCTYPE FORM
attribute to "multipart/form-data" tells the server that the form submission contains
an uploaded file.
The user can enter a file path or browse the system and pick a file to send.
To create an action page to upload the file:
1. Create a new file in Studio.
2. Modify the file so that it appears as follows:
<HTML>
<HEAD>
<TITLE>Upload File</TITLE>
</HEAD>
<body>
<H2>Upload File</H2>
<CFFILE ACTION="UPLOAD"
DESTINATION="c:\inetpub\wwwroot\HR\"
NAMECONFLICT="Overwrite"
FILEFIELD="FiletoUpload">
<CFOUTPUT>
You uploaded the file #File.ClientFileName#.#File.ClientFileExt#
successfully to
#File.ServerDirectory#\#File.ServerFileName#.#File.ServerFileExt#.
</CFOUTPUT>
</BODY>
</HTML>
Code Description
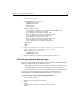
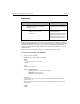
<FORM ACTION="uploadfileaction.cfm"
ENCTYPE="multipart/form-data"
METHOD="post">
Create a form that contains file
selection fields for upload by the
user.
<INPUT TYPE="file"
NAME="FiletoUpload"
SIZE="45">
Allow the user to input a field.
(The File input type
automatically includes a Browse
button to allow the user to look
for the file instead of entering
the entire path and file name.)