
User Guide


232 Administering ColdFusion Server
• Configuring the communications port on your Web server
• Opening the Web Explorer
• Creating clusters
• Adding cluster members
• Deleting cluster members
• Configuring server load thresholds
• Configuring the ColdFusion probe
• Configuring session-aware load balancing
• Integrating ClusterCATS with a load balancing product
• Configuring alarm notifications
• Configuring administration e-mail support
• Configuring administrator authentication
• Changing cluster members’ state
• Restricting cluster members
Configuring the communications port on your Web server
Before you can open and use the ClusterCATS Web Explorer, you must ensure that a
communications port is configured to listen for HTTP requests on the Netscape or
Apache Web server on which you installed ClusterCATS. You can only access the
ClusterCATS Web Explorer through the defined communications port on your Web
server. You configure this user-defined port using the Netscape Enterprise Server
Administrator — not the ColdFusion Administrator.
By default, Netscape Enterprise Server will assign your Web server a random, six-digit
communication port number. You can either use this assigned number or change it to
something easier to remember, like port 81.
If you are not familiar with configuring your Web server’s communications ports, see
the Netscape Enterprise Server Administrator online Help for instructions.
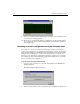
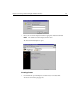
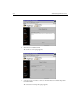
Opening the Web Explorer
1. Open a browser.
2. Enter the following URL in the browser’s address field and press Enter:
http://hostname:12345/admin-serv/btweb/index.html
where hostname is the name of the Web server on which you installed ClusterCATS
and
:12345 is the communication port number that the Web server has been
configured to listen for HTTP requests.
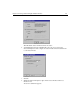
The Enter Network Password dialog box appears.