
User Guide


30 Chapter 3: The Participants List Pod
To change your status:
1 Click the arrow in the bottom right corner of the Participants List pod.
This displays a pop-up menu with a list of the available statuses.
2 Select the status you want displayed to presenters.
Participant bandwidth
There are two colored indicator shapes for participant bandwidth. When bandwidth performance
meets requirements, no symbol will be displayed.
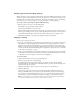
Orange triangle The participant is on a connection that is less than the current room
bandwidth, the participant has high latency (between 0.2 and 4 seconds), or the participant is
dropping between 5% to 20% of packets.
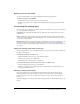
Red square The participant is on a connection that approximates a modem connection, the
participant has high latency (greater than 4 seconds), or the participant is dropping over 20% of
packets.
Rolling over a participant name in the Participants List pod brings up a tooltip that lists
additional information about a participant’s connection and bandwidth; however, participants
will only be able to see the other participants’ names. The tooltip allows presenters to clear a
participant’s status by clicking the Clear Status link if they have it set to anything other than “I am
fine.”
You can configure the network connection status indicators to be on or off anytime during a
meeting. There is also a Promote/Demote button to change user status from participant to
presenter and vice versa.
To show users’ connection status indicators:
1 Click the arrow in the upper left corner of the Participants List pod.
2 From the pop-up menu, click the Show Connection Status option.
The network connection status is now enabled and will display network connection status for
all users in your meeting.
To hide users’ connection status indicators:
1 Click the arrow in the upper left corner of the Participants List pod.
2 From the pop-up menu, click the Show Connection Status option.
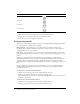
Go faster
Go slower
Thumbs up
Thumbs down
Participant Status Icon