
User Guide


284 Chapter 19: Working with Users and Groups
11.
Click Add.
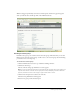
The message “Submitting Request” appears, and then the message “Operation Successful”
appears. After this, the groups you added appear in the Current Group Membership window;
to remove a group from this window, select it and click Remove.
12.
Click Finish.
The User Information page reappears for this user.
Next, you can perform one of the following procedures:
• “Selecting a manager for a user” on page 284
• “Adding team members for a user” on page 285
Selecting a manager for a user
Use this procedure to designate a user’s manager. You can only select one manager for a given user;
when you select another manager’s name, it replaces the first one that you added.
To select a user’s manager:
1.
Click the Administration tab at the top of the Breeze Manager window.
2.
Click Users and Groups.
The list of all users and groups with Breeze accounts appears.
3.
If necessary, click Search and enter the user’s name in the Search text box to locate the name in
the list.
4.
Select the user’s name and click Info at the bottom of the list.
The User Information page appears for this user.
5.
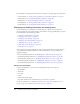
Click the Select Manager link to select a manager for this user.
The Select Manager page appears, with the Possible Managers list on the left and the Current
Team Manager list on the right.
6.
In the Possible Managers list, select the manager to whom you want to assign this user; to search
for a name in the list, click Search button at the bottom of the window and enter the name to
display it in the list, and then select it.
7.
Click the Set Manager button.
The message “Submitting Request” appears, and then the message “Operation Successful”
appears. After this, the name you selected appears in the Current Team Manager list; to remove
this manager from list, select it and click Remove; to replace the manager, repeat step 6 and
step 7.