Breeze Meeting User Guide for Meeting Participants
Trademarks 1 Step RoboPDF, ActiveEdit, ActiveTest, Authorware, Blue Sky Software, Blue Sky, Breeze, Breezo, Captivate, Central, ColdFusion, Contribute, Database Explorer, Director, Dreamweaver, Fireworks, Flash, FlashCast, FlashHelp, Flash Lite, FlashPaper, Flex, Flex Builder, Fontographer, FreeHand, Generator, HomeSite, JRun, MacRecorder, Macromedia, MXML, RoboEngine, RoboHelp, RoboInfo, RoboPDF, Roundtrip, Roundtrip HTML, Shockwave, SoundEdit, Studio MX, UltraDev, and WebHelp are either registered tradema
CONTENTS INTRODUCTION: Overview of Breeze Meeting. . .......................... 5 About Breeze Meeting . . . . . . . . . . . . . . . . . . . . . . . . . . . . . . . . . . . . . . . . . . . . . . . System requirements . . . . . . . . . . . . . . . . . . . . . . . . . . . . . . . . . . . . . . . . . . . . . . . . What’s new in Breeze Meeting. . . . . . . . . . . . . . . . . . . . . . . . . . . . . . . . . . . . . . . . . Intended audience . . . . . . . . . . . . . . . . . . . . . . . . . . . . . . . . . .
CHAPTER 6: Using the Camera and Voice Pod. . . . . . . . . . . . . . . . . . . . . . . . . . . 37 About attendee roles and broadcast capabilities . . . . . . . . . . . . . . . . . . . . . . . . . . . 38 Setting up your camera and microphone . . . . . . . . . . . . . . . . . . . . . . . . . . . . . . . . 38 Controlling audio and video during live broadcasts . . . . . . . . . . . . . . . . . . . . . . . . 39 CHAPTER 7: Using the File Sharing Pod . . . . . . . . . . . . . . . . . . . . . . . . . . . . . . .
INTRODUCTION Overview of Breeze Meeting Macromedia Breeze is a rich web communication system that lets you view presentations, attend meetings, and receive training over the Internet using the familiar Microsoft PowerPoint application, a web browser, and the Macromedia Flash plug-in. Breeze includes a set of components that provides an integrated solution. Breeze can be deployed with some or all of these components: Breeze Meeting Lets you view and participate in a meeting over the Internet in real time.
System requirements To participate in a Breeze meeting, you need the following requirements: • • • • An Internet connection One of the supported operating systems listed at www.macromedia.com/go/breeze_sysreqs One of the supported browsers listed at www.macromedia.com/go/breeze_sysreqs Macromedia Flash Player 6.0.65 or later as a browser plug-in Note: Macromedia Flash Player is standard in most browsers. You can find out what version of Flash Player you have at the Test Macromedia Web Players page at www.
Guide to instructional media Breeze Meeting offers a variety of media to help you quickly learn the program. About the electronic manuals and lessons The following electronic manuals are available through the Help menu in a Breeze meeting: Quick Start See and hear instructions on “How Do I...” in Breeze Meeting. Troubleshooting Find information on common problems and current known issues with Breeze Meeting.
Introduction: Overview of Breeze Meeting
CHAPTER 1 Attending a Breeze Meeting A Macromedia Breeze meeting is an online event at a scheduled time and date, but it is also a meeting room with various display panels (pods) and components. A meeting room can have various layouts for different meeting needs—for example, one layout for presenting and another layout for collaborating. Your ability to view and use the pods, layouts, and components depends on your role in the meeting.
About meeting roles and permissions There are three roles for meeting room attendees: the Host role, the Presenter role, and the Participant role. Each role has different rights in a meeting room. Hosts Can set up a meeting, invite guests, add content, and add or edit layouts in a meeting room. They can promote other participants to be hosts or presenters, and while a meeting is in progress, they can switch to preparing mode to create or edit a layout for a different presentation.
The menu bar displays meeting information and contains buttons for managing your room. The menu bar is located at the top of the meeting room window. Stage area Participant’s view of a meeting The meeting name is located at the top of the meeting room window. The name is assigned by the room’s creator. Meeting room menu bar The menu bar contains two menus: a presenter or participant sees the Meeting and Help menus. All attendees see the meeting room status indicator.
Meeting room status Indicates the connection status of the meeting room. A green bar indicates that the room connection is optimal. A yellow bar means network congestion. A red bar indicates that you have been disconnected because of network problems, and Breeze Meeting is in the process of trying to reestablish your meeting connection. Clicking the connection indicator when it is green or yellow displays information about your connection (for example, its current data-transmission rate).
Application sharing A presenter can share the functionality of an application with another presenter. One presenter can take control of another presenter’s desktop and open windows or applications. Whiteboard Meeting presenters can annotate text and drawings collaboratively, in real time. Whiteboard overlay A whiteboard can also be placed on top of content for adding text and other drawing annotations.
About the Chat pod The Chat pod lets you send text messages to other meeting participants. If you include URLs, the Chat pod automatically creates live links, making link content easy to access. You can broadcast a message to all meeting attendees, or you can restrict it to presenters or to individual participants. For more information, see Chapter 5, “Using the Chat Pod,” on page 35. About the Note pod The Note pod displays a text message to all meeting participants.
For more information, see Chapter 6, “Using the Camera and Voice Pod,” on page 37. About the File Sharing pod The File Sharing pod provides a method for presenters to distribute files to meeting participants. Participants can download files for shared use. For more information, see Chapter 7, “Using the File Sharing Pod,” on page 43.
About the Poll pod The Poll pod lets presenters conduct polls or ask questions of the participants. About the Web Links pod The presenter can add a list of web links to share with the meeting room attendees. Clicking a name in the Web Links pod opens a browser and displays the corresponding page. Entering a meeting room You enter a meeting from its Breeze Meeting login page.
To log in to a Breeze meeting as a registered user: 1. To access the login page, do one of the following: ■ ■ From the Home page in Breeze Manager, click the Enter Meeting Room button for the desired meeting. From the Meeting Information page in Breeze Manager, click the Enter Meeting Room button. ■ Click the URL in the email invitation that you have received. ■ Enter the URL in your browser.
Chapter 1: Attending a Breeze Meeting
CHAPTER 2 Viewing Content in a Meeting While in a meeting, you have several options available to you when viewing content, shared screens, or Macromedia Breeze Presentations. To optimize your view, you can show the Stage full screen, and to focus on the content in a Share pod, you can display a pod full screen. You have a variety of options for viewing a Breeze Presentation. To add an annotation or make a free-hand drawing, you can use the whiteboard feature of the Share pod.
To display the Stage in the restored view: 1. Click Meeting in the menu bar. 2. Select Full Screen. The Stage area is restored to its original size. Displaying a pod full screen To enhance the viewing experience, you can display a pod full screen, so it becomes the only pod seen on the Stage. You can also restore the pod to its original size. To display a pod full screen: • Click the Full Screen button in the control strip. You cannot move or resize a full-screen pod.
• “Navigating between slides” on page 25 • “Navigating within the current slide” on page 25 • “Adjusting the presentation audio” on page 26 Breeze Presentation layout The layout of a Breeze Presentation consists of the following parts: Presentation The main part of the window, which displays the presentation slides.
■ The duration of the slide is shown next to each slide. ■ You can move to any slide in the presentation by clicking the slide title in the Outline pane. The Outline pane lists the title and duration of each slide. Users can click on a title to display the slide. Using the presentation Thumb pane Presentations can have a Thumb pane on the sidebar. The Thumb pane shows a small picture of each slide, the slide title, and the slide duration.
When slide notes appear, they are located on the right side of the presentation window. You cannot change the size of the slide Notes pane. To view slide notes: • Click the Notes pane in the sidebar on the right side. The Notes pane contains the following features: ■ The complete notes text is displayed. (The text is unformatted and cannot be edited directly on the pane.
Using the presentation toolbar You can control the presentation appearance and playback by using the toolbar located at the bottom of the presentation. The toolbar that appears in the published presentation contains useful buttons, controls, and messages. The presentation toolbar includes the following items: Play/Pause button Back button Lets you pause and then resume play of the current slide. Lets you move to the previous slide in the presentation.
2. Click the Full Screen button again to change viewing modes. If presentation controls are originally visible, the Breeze Presentation switches to full-screen mode without a presentation outline or presentation toolbar. If a presentation toolbar is not originally visible, the Breeze Presentation switches to normal viewing mode with or without a presentation outline.
To move to a specific location in the slide playback: 1. Click the slide playback Back button on the slide progress bar to move your playback location backward by a specific amount. 2. Click the Back button multiple times to continue moving farther back in the slide playback. Adjusting the presentation audio You can turn the presentation audio on and off by using the audio button on the presentation toolbar. Note: Not all slides or presentations contain audio.
To add a whiteboard to the Share pod: 1. Click the Share button in the control strip. 2. Select Whiteboards from the pop-up menu. 3. Select New Whiteboard from the pop-up menu. A whiteboard fills the Share pod. The Whiteboard Tools and Whiteboard Toolbar buttons appear at the bottom of the whiteboard. To add a whiteboard overlay to content: • Click the Whiteboard Overlay button. The Whiteboard Tools button appears in the lower-right corner of the display area. To draw on a whiteboard: 1.
Ellipse tool Creates circle and ellipse shapes. You can customize stroke color, fill color, and stroke weight by using the color picker and stroke weight pop-up menu. Drag to expand the shape. Holding down the Shift key while drawing causes the ellipse to change into a circle. Text tool Creates a floating multiline text character. You can customize fill color, font face, and font size by using the color picker, font pop-up menu, and font size pop-up menu. Drag to create a text area where you can type.
CHAPTER 3 Using the Attendee List Pod From the Attendee List pod, you can quickly see who is logged in to a meeting and monitor everyone’s name, role, and status. You can also communicate with the presenter by displaying your participant status next to your name. If conference calling is enabled, you can view your conference call status, dial out to yourself to enter the phone conference, and mute your phone connection.
About Breeze Meeting roles The names in the Attendee List pod are grouped by role. They appear in the following order: host, presenter, participant, and offline users. A host can manage attendance and control conference call features from the Attendee List pod. Presenters and participants can view a participant’s name, status, and conference call status, but they cannot control options. Offline users are in a queue for dial out or are phone-only users.
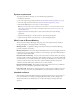
Attendee status Icon Speak quieter Thumbs up Thumbs down Stepped away To change your status: 1. Click the My Status bar in the Attendee List pod. A pop-up menu appears with a list of the available status settings. 2. Select the status that you want to show to the presenters. About audio conference status When an attendee dials in or a host dials out, a conference call status icon appears to the right of the attendee’s name, so that you can quickly see the status of the attendee’s conference call.
Dialing and muting your phone conference call From the Attendee List pod, you have two options for controlling your own conference calls: dialing yourself and muting your connection. After logging into a Breeze Meeting room, you can dial out to your own telephone number to join the audio conference call. You can also mute your connection so that you can hear but cannot be heard. To join the audio conference call by dialing out from the Attendee List pod: 1.
CHAPTER 4 Viewing Meeting Recordings A presenter can record a meeting room session. When the recording is played, it shows exactly what the participants saw and heard during the meeting. A presenter can create a reference archive of meetings and make the recordings available to participants. Participants who missed a scheduled meeting or who would like to see and hear a presentation and discussion again can watch the recordings.
Navigating recorded meetings Certain events are indexed for each meeting recording, including layout changes, chat messages, slide changes, and users joining or leaving the Attendee List or Camera and Voice pod. Each event is represented by an item in the Recording Index and is followed by a time stamp. By navigating the Recording Index for a meeting, you can filter and search recorded meetings. To navigate the archive folders: 1.
CHAPTER 5 Using the Chat Pod By using a Chat pod to send or receive a text message, you can communicate with other attendees while a meeting is progress. If you have a question and do not want to disturb the meeting flow, or if you cannot speak in a meeting because sound is not enabled on your computer, you can send a text message to the presenters or to another meeting participant.
To send a text message: 1. Select one of the following options from the pop-up menu at the bottom of the Chat pod: ■ The name of a specific participant to whom you want to send a message ■ Presenters ■ Everyone 2. Click the text box in the Chat pod. An insertion point appears in the text box. 3. Enter your message. 4. Do one of the following: ■ Click the Send Message button next to the text box. ■ Press Enter or Return.
CHAPTER 6 Using the Camera and Voice Pod Using the Camera and Voice pod in Macromedia Breeze Meeting, you can broadcast and view live video and audio. As a participant, you must request permission from a host to broadcast video and audio. With permission, you can select to broadcast both audio and video or limit your broadcast to only video or only audio.
About attendee roles and broadcast capabilities In a meeting, your broadcast capabilities are determined by your attendee role—participant, presenter, or host, and whether participant broadcasting is enabled.
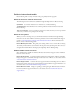
Controlling audio and video during live broadcasts During a live broadcast, you can start, stop, and pause video from the Camera and Voice pod. To speak in the meeting, you can hold down the Talk button or click once on the Hands-Free button. You can change the video image ratio and set camera and voice options from the Pod Options pop-up menu. Broadcasting live video and voice With one click, you can start broadcasting both video and audio.
Controlling your video and audio broadcast You can pause your video and audio broadcast and resume broadcasting at any time. To broadcast your voice in a meeting, you can choose between the Talk or Hands-Free button. To broadcast your voice, do one of the following: • Hold down the Talk button to speak during a meeting. When you release the Talk button, you are no longer broadcasting audio. • Click the Hands-Free button (lock icon) in the control strip of the Camera and Voice pod.
Selecting the broadcasts that you receive From the Camera and Voice pod, you can select to receive or block a video or audio broadcast. Using this feature, you can improve the video and audio response time in a meeting. For example, to improve video and audio quality, you could block the broadcast from participants who are not speaking, while allowing a broadcast from the speaker. To block or unblock audio broadcasts from a participant: • Click the Microphone icon next to the participant’s name.
Chapter 6: Using the Camera and Voice Pod
CHAPTER 7 Using the File Sharing Pod Using the File Sharing pod in the Macromedia Breeze Meeting application, you can download files from a presenter. If you want to distribute files to meeting attendees, you must make a request to the host. Only the host can grant you permission to control the File Sharing pod to upload files. You must have the Macromedia Breeze Meeting Add-in installed to upload files.
Uploading a file Presenters can upload files to share with meeting attendees either from their computers or from the Content library. Meeting participants cannot upload files; however, the host can change the participants’ status to allow them to upload files. Participants who want to upload files should request the host to change their attendee role or to grant enhanced rights for the File Sharing pod.
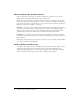
Removing a file If you do not want to share a file, you can remove it from the File Sharing pod. To remove a file: 1. In the File Sharing pod, select the file that you want to remove. 2. In the lower-right corner, click Pod Options. 3. From the pop-up menu, select Remove Selected. The filename disappears from the list of files.
Chapter 7: Using the File Sharing Pod
INDEX A Attendee List pod about 13, 29 names, about 29 role icons 30 status, attendee 30 attendee status changing 31 icons 31 attendees broadcasting permissions 38 defined 10 permissions, about 10 permissions, broadcasting 38 roles 30 roles, about 10 status of 30 audio blocking 41 broadcasting 37 muting 26 volume 26 audio conference Call My Phone 32 calls 6 dialing 32 Mute Myself 32 muting 32 status 31 B blocking a broadcast 41 Breeze presentation toolbar in 24 searching presentations in 23 viewing present
Content library adding files to File Sharing pod 44 customer support 7 D documentation 7 downloading files from the File Sharing pod 43 drawing on a whiteboard 26 E Ellipse tool 28 entering a meeting room 16 events, filtering 34 exiting a meeting room 17 F File Sharing pod about 15, 43 adding file from Content library 44 downloading a file 43 removing a file 45 renaming a file 44 uploading a file 44 files adding from Content library 44 downloading from the File Sharing pod 43 removing from File Sharing pod
mode full-screen 24 normal 24 muting audio 26 N names attendee 29 files in File Sharing pod 44 normal viewing mode 24 Note pod about 14 O online help 7 operating systems supported 6 Outline pane 21 P participant role 10 participants blocking broadcasts by 41 unblocking broadcasts from 41 See also attendees 41 pausing broadcasting 40 Pencil tool 27 playback recording 33 recording navigation bar 33 pods about 12 Attendee List pod 13, 29 Camera and Voice pod 14, 37 Chat pod 14, 35 defined 11 File Sharing pod 1
T technical support 7 text messages clearing from all Chat pods 36 Text tool 28 Thumb pane 22 toolbar 24 tools Ellipse tool 28 Line tool 27 Marker tool 27 Pencil tool 27 Rectangle tool 27 Selection tool 27 Stamper tool 28 Text tool 28 Undo tool 28 U unblocking broadcasts 41 Undo tool 28 uploading files to File Sharing pod 44 user guides 7 V video blocking 41 broadcasting 37 broadcasting live 39 viewer navigating slides 25 Outline pane 21 search pane 23 sidebar 21 slide notes 22 thumbnails 22 viewing present