
User Manual


Master Fader and My Fader Reference Guide
58
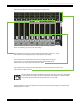
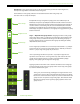
Step 2 — Tap the “Assign” button:
The assignment panel slides into view when the assign
button is tapped. As seen below, doing so opens up a world of view group possibilities!
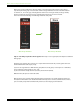
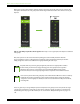
Step 3 — Name the view group:
Each view group may given a personal name; it’s much easier to recall
a view group that you named versus just “view group x”. In this example, it’s simply a singer-songwriter show
at a local café. We named it as such.
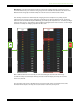
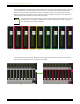
Step 4 — Tap the channels to assign:
Tap the channels you wish to assign to a view group. In this case,
tap channels 1 (Yairi acoustic guitar) and 2 (female vocals). FX and backing tracks will only enhance the
performance, so tap the reverbs, delay and return1-2 channel buttons, as well. Notice in the screen shot
above that each assigned channel button turns green when selected.
You may notice in the image above that the button of linked channels (Return 1-2, Return 3-4)
is twice the size of unlinked channels.
Step 5 — Tap the “Close” button:
Close the assignment panel by tapping the close button.