Trio V5000 Instruction Manual Congratulations on purchasing your Trio Personal Media Player! To get the most out of your purchase, please take the time to carefully read through this manual.
Foreword If any problems occur during while using your Trio, please feel free to contact Mach Speed technical support at 580-272-0035, or sending an email to mssupport@machspeed.com. Thank you for your support and cooperation! Mach Speed Technologies bears no responsibility for any damage or loss of personal data due to misuse of software and/or hardware, damage to the player caused by human factors, replacement of battery, or other unforeseen circumstances.
Note: ● The playback times listed refer to the maximum playback times possible, using the best power savings. The actual playback time may differ as adjustments to screen brightness, power savings modes, volume, etc are made. ● As there are many brands of Micro SD cards in market, using different quality and speed standards.
Contents Foreword……………………………………………………………………… 1 Kind reminder….……………………………………………………….…….. 2 Contents.....………………………………………….………………...……… 3 Key Functions……………………………………………..………….….…… 4 Points for Attention………………………………………….…………...…… 5 Shapes and Keys…….……………………………………………...………… 6 Display Screen…………………………………………………...…………… 7 Basic Operation…………………………………………………..…………… 9 Main Interfaces……………………………………………………………… 18 Playing Music………………………..……………………………………… 18 Playing Video…………………………..……………………………….
Features · 5.
Caution 1. Do not use the player in exceptionally cold or hot, dusty, damp or dry environments. 2. Do not drop, strike, or throw your player. Physical damage to your player will void ALL warranties. 3. Please charge your battery when A. Battery power icon shows an empty icon; B. The system automatically shuts down and the power is soon off when you switch on the unit once again; C.
Shapes and Keys 1. Volume + 2. Volume 3. Power on/off 4. HDMI out 5. Micro SD 6. Play/pause 7. Charging jack 8. EAR/ AV jack 9. Exit 10. Wheel key 11. USB 12.
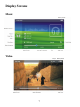
Display Screens Music Video 7
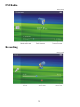
FM Radio Recording 8
Basic Operations Power on When powered off, slide the power switch to the ON position, and then press and hold the PLAY button for 5 seconds. Power off When powered on, press and hold the power switch for 5 seconds to power off. Please note that if you set the power switch to the OFF position, you will lose any saved settings. Volume Control When playing music, FM radio, and video, you can perform volume control using the "+/-" button. "+" button is for increased volume and "-" key is for reduced volume.
Inserting and removing the Micro SD card Inserting: Ensure that the player is powered off, and disconnected from the computer. Hold the Micro SD card face up (side with words) (with the direction of the display screen as the face), and slide the card into the socket on the player, slightly past flush. When you hear the card click into place, you can access the Pulling: Ensure that the player is powered off, and push the SD card just past flush.
1. Open Windows Media Player and connect the player to a working USB port. Windows Media player will prompt you with a setup screen asking you to name the MP3 player. 2. Once you have named your MP3 player, select Finish, and your Windows Media Player will open to the Sync tab.
3. Drag your music to the sync list (on the right of the screen) from the list on the left. Once you have selected the music you wish to add to the player, press Sync. 4. Windows Media player will load the songs on to your player.
5. Once all the songs you have added are synced to the unit, and Windows Media Player says that is safe to disconnect your MP3 player, disconnect the device. COPY AND PASTE Note- This alternate method is used to load videos, pictures, and ebook files as well as audio files 1. Connect the MP3 player to a working USB port.
2. When the unit is connected to your computer, it will create a gray and green icon in the system tray (lower right hand corner of your desktop). The icon will be called safely remove hardware. 3. Go to the “My Computer” section of your computer.
4. Locate the drive created by the unit, generally just called Removable Disk, with a letter in Parenthesis. Drive letters vary depending on your system configuration. 5. Open the drive by either double left clicking on the drive itself, or by right clicking to open the option menu then left click on the desired drive.
6. Locate the music stored on your computer. Generally this is stored in the “My Music” folder of your computer. NOTE: if you are unable to locate the music on your computer, click on start, search, files and folders, then search for “*.MP3, *.WMA”.
7. Once you have located the song files, you can right click on the song itself, and select “copy”. Open the removable disk drive, right click on in the empty space, and select Paste. This will transfer the song on to your player. 8. Repeat step 7 for as many songs as you want to copy on to the unit. NOTE: MAC Computers When connected to your MAC computer, the device will act as a removable drive. Simply drag your files to the device.
Main Menu Functions of keys in the master interface list: z Wheel key: roll the wheel up or down to move the selection left or right z Wheel key: briefly press the button to select your item. z Exit key: briefly press this button to return the last menu, or press and hold this button to return to the main menu. Playing Music In the main menu, select the "Music" option and briefly press the wheel button to access the Music library.
z Local disk Allows you to browse your drive using a standard folder structure.
Music Submenu: 1. Playmode Allows you to set your playmode, including, "Once", "Repeat One", "Repeat All", "Sequence" and "Random". 2. Speed mode Allows you to adjust your Tempo rate, creating some neat effects. Select either "Very slow", "Slow", "Normal", "Fast" and "Very fast"; 3. EQ select Allows you to select one of seven equalizer settings, such as Normal, Pop, Classic, Jazz, Rock, Soft and DBB. 4.
Playing Video In the main menu, select the "video" option and briefly press the wheel button to access the video library. This menu list includes 4 options; Media library, Local disk, SD Card and External Disk Description of functions: z Media library Allows you to update your media library after adding videos, or sort your video files by several categories such as, "All video", "Directory", "Disk", "Star", "Format" etc. z Local disk Allows you to browse your drive using a standard folder structure.
Video playing interface Functions of keys: z "+/-" key: to control the volume up/down; z Wheel key: Briefly roll the wheel up or down to select the next or previous video, or roll and hold the wheel to fast forward or rewind the current video; z Wheel key: briefly press the wheel key to enter the video submenu; z " " key: briefly press it to play or pause the current file, press and hold the button to power the player off; z Exit key: briefly press this button to return to the video library, or press and ho
File information can display the currently playing video file information, including the file name, file directory location, stars and other information 5. Setting stars Allows you to rate the file by giving a number of “stars” which will allow you to sort your files in the Video library Note: z Subtitle display This player supports "*.SRT" subtitle files for displaying subtitles when a video is playing. To display subtitles, the .
Picture In the main menu, select the "Photo" option and briefly press the wheel button to access the photo library. This menu list includes 4 options; Media library, Local disk, SD Card and External Disk Description of functions: z Media library Allows you to update your media library after adding pictures, or sort your video files by several categories such as, "All video", "Directory", "Disk", "Star", "Format" etc. z Local disk Allows you to browse your drive using a standard folder structure.
Picture submenu: 1. Setting the wallpaper Allows you to set the current picture as the desktop background 2. Rotating pictures Allows you to rotate the current picture 90 degrees clockwise 3.
Reading Text In the main menu, select the "Book" option and briefly press the wheel button to access the ebook library. This menu list includes 4 options; Media library, Local disk, SD Card and External Disk. Description of functions: z Media library Allows you to update your media library after adding eBooks, or sort your video files by several categories such as, "All video", "Directory", "Disk", "Star", "Format" etc.
E-Book viewing interface Functions of keys: z "+/-" key: to control the volume up/down (if a song is playing while you read your eBook); z Wheel key: roll up or down to “turn the page” forward or backward; z Wheel key: Briefly press this button to enter the eBook submenu; z " " key: Press and hold this button to power the player off; z Exit key: briefly press this button to return to the ebook library, or press and hold this button to return to the main menu. eBook submenu: 1.
8. Set Bookmark Set the current page as a bookmark, which will allow you quickly return to this page in the future 9. Manage mark Lists all of your current bookmarks, which will allow you to easily swap between files. 10. File Information File information can display the currently book file information, including the file name, file directory location, stars and other information Note- this player will only display ebooks in .txt format.
Record In the main menu, select the "Record" option and briefly press the wheel button to access the Recording menu. This menu list includes 3 options such as Start record, Quality and Record Files Description of functions: 1. Start record Select the "Start Record" option and press the wheel key to access the recording interface; 2. Recording Quality Allows you to create different quality of recording files. The higher quality you set, the larger the file will be once saved. 3.
FM Radio NOTE-Before entering the FM Radio mode, ensure that you connect your headphones. These will act as the antenna for the player, and FM Radio will not function without them. In the main menu, select the "FM" option and briefly press the wheel button to access the FM menu. This menu list includes 6 options such as Manual play, Auto play, Scan, Set channel, Frequency and Stereo Adjusting the frequency or “band” (1) Manual play Rolling the wheel button up or down will adjust your current frequency by .
System Settings In the main menu, select the "Settings" option and briefly press the wheel button to access the Settings menu. 1. About this Unit In this interface you can view the information on the capacity of the disk, the available capacity of your SD card, model and firmware version of the player. 2. Language Allows you to change the display language. 3. Key sound Allows you to set whether an audio sound will play when a button is used 4.
TV-out This player support TV output function. You can use wither AV or HDMI outputs AV OUTPUT (1) Connects one AV cable terminal to the player’s “earphone/ AV” port. The other terminal’s three connecters connect to your TV sets’ input ports. (2) Set your television’s signal input as AV IN. (3) Under the “setting” function the main menu, set “display output” as “AV output”, the player screen will power off, and the interface will display on your television’s screen.
OTG OTG is an abbreviation for “On-The-Go”. This technology allows two hard disks to communicate without a go between or “host” item such as your computer. In other words, you can simply connect your external hard disk to the player and access the memory on the drive, allowing you massive storage options! OTG Connection Steps: 1. Power on the external drive you will be connecting to the player. 2. Connect the device using the OTG cable to your player. 3.
34