
User`s guide
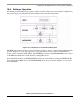


Setting Up the Keypad Port (KPP)
i.MX53 System Development User’s Guide, Rev. 1
Freescale Semiconductor 17-3
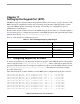
3. Add the keymapping matrix as follows:
static u16 keymapping[16] = {
KEY_UP, KEY_DOWN, KEY_MENU, KEY_BACK,
KEY_RIGHT, KEY_LEFT, KEY_SELECT, KEY_ENTER,
KEY_F1, KEY_F3, KEY_1, KEY_3,
KEY_F2, KEY_F4, KEY_2, KEY_4,
};
4. Change the KEYS according to input.h labels and your keypad layout.
5. Add the following structure to configure the keypad:
static struct keypad_data keypad_plat_data = {
.rowmax = 4,
.colmax = 4,
.learning = 0,
.delay = 2,
.matrix = keymapping,
};
6. Register the keypad device. On the same machine layer file, add the following line on function
mxc_board_init:
mxc_register_device(&mxc_keypad_device, &keypad_plat_data);
The new keypad is now implemented.
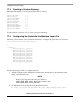
17.4 Enabling the Keypad
Select the keypad on Linux menuconfig. This option is located at:
---> Device Drivers
---> Input device support
---> Keyboards
---> MXC Keypad Driver
Build the Linux kernel and boot the board.
17.5 Testing the Keypad
There are two simple ways to test the keypad: using cat and using Evtest.
17.5.1 Using cat to Test the Keypad
On the i.MX53 Linux command line, type the following:
cat /dev/input/keyboard0
ASCII characters are displayed when keys are pressed.
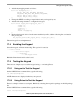
17.5.2 Using Evtest to Test the Keypad
Evtest is a simple software to test inputs. Build it by selecting the respective package on the ltib package
list.
On the i.MX53 Linux command line, type the following:
evtest /dev/input/keyboard0