
Instruction manual


13
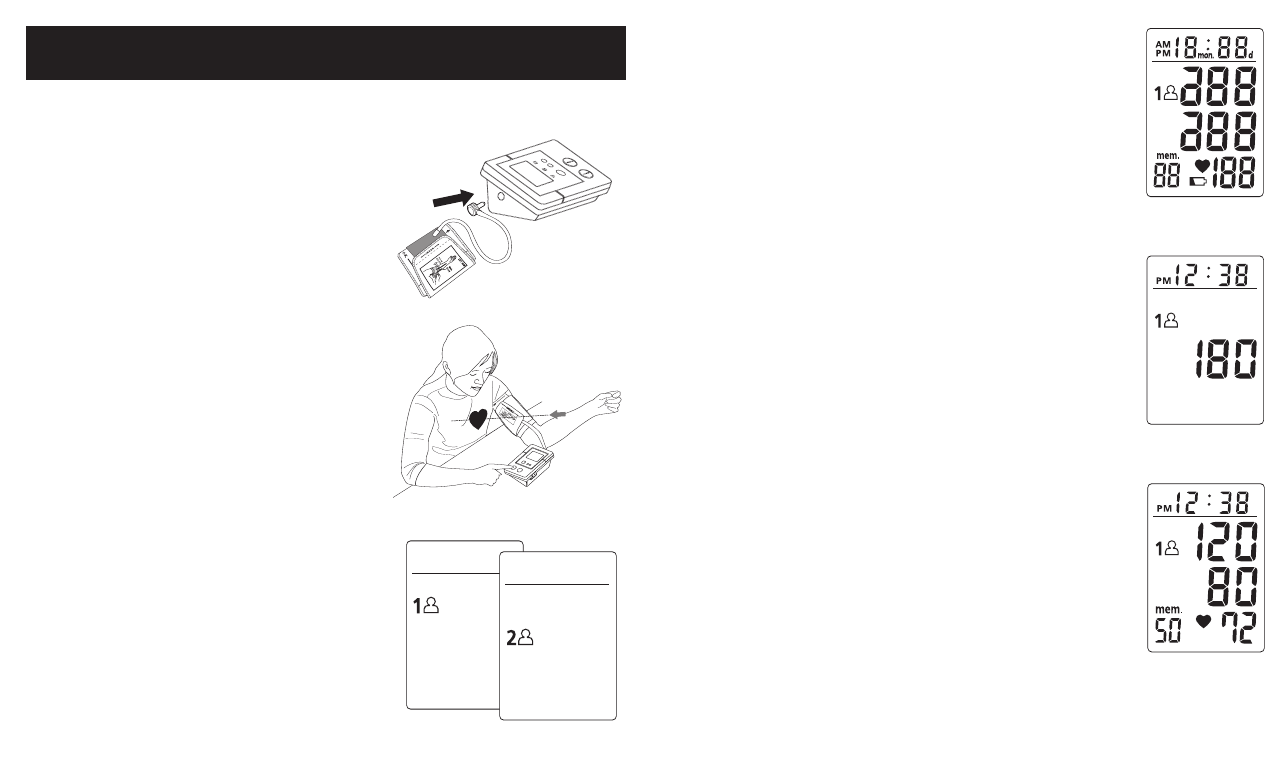
4. Press the POWER button again to turn the unit on.
The unit will run a self-test,
Fig. 4.
5. The cuff will automatically begin to inflate, with
varying speeds of inflation.
6. The display will show the increasing pressure in the
cuff,
Fig. 5.
7. Once the systolic pressure is reached, the cuff will
exhaust all air.
8. Your blood pressure (systolic and diastolic)
measurement and pulse rate will display
simultaneously,
Fig. 6.
9. Your reading will be automatically stored in memory.
10.To conserve energy, press the POWER button to
turn the unit off. Otherwise, the unit will automatically
shut off after approximately 1 minute.
11.Disconnect the tubing from the monitor prior to
storing.
12
Taking Your Blood Pressure Reading
Proceed only after reading the previous sections of this manual.
Remember! Do not talk during the measurement.
1. Position the monitor on a flat, stable
surface with the digital display in view.
Insert the cuff tubing connector into the
left side of the monitor,
Fig. 1.
2. Rest your elbow on a solid surface with
your palm facing upward. Elevate your
arm so that the cuff is at the same level
as your heart,
Fig. 2. Relax your left
hand.
3. Select the memory bank you want your
reading to be stored in by pressing the
User-Select button to alternate between,
memory bank 1 or 2,
Fig. 3. Press the
POWER button to confirm your selection.
Fig. 1
Fig. 2
Fig. 5
Fig. 6
Fig. 4
Fig. 3