
Instruction manual


To change the batteries:
1. Press down and lift the cover in the direction of
the arrows as shown,
Fig. 2.
2. Insert or replace 4 AA batteries into the
compartment, matching the indicated polarity
symbols.
3. To close, match up and connect the bottom hooks
of the cover, then push the top end.
NOTE: It is recommended to remove the
batteries if the unit will not be used for an
extended period of time.
9
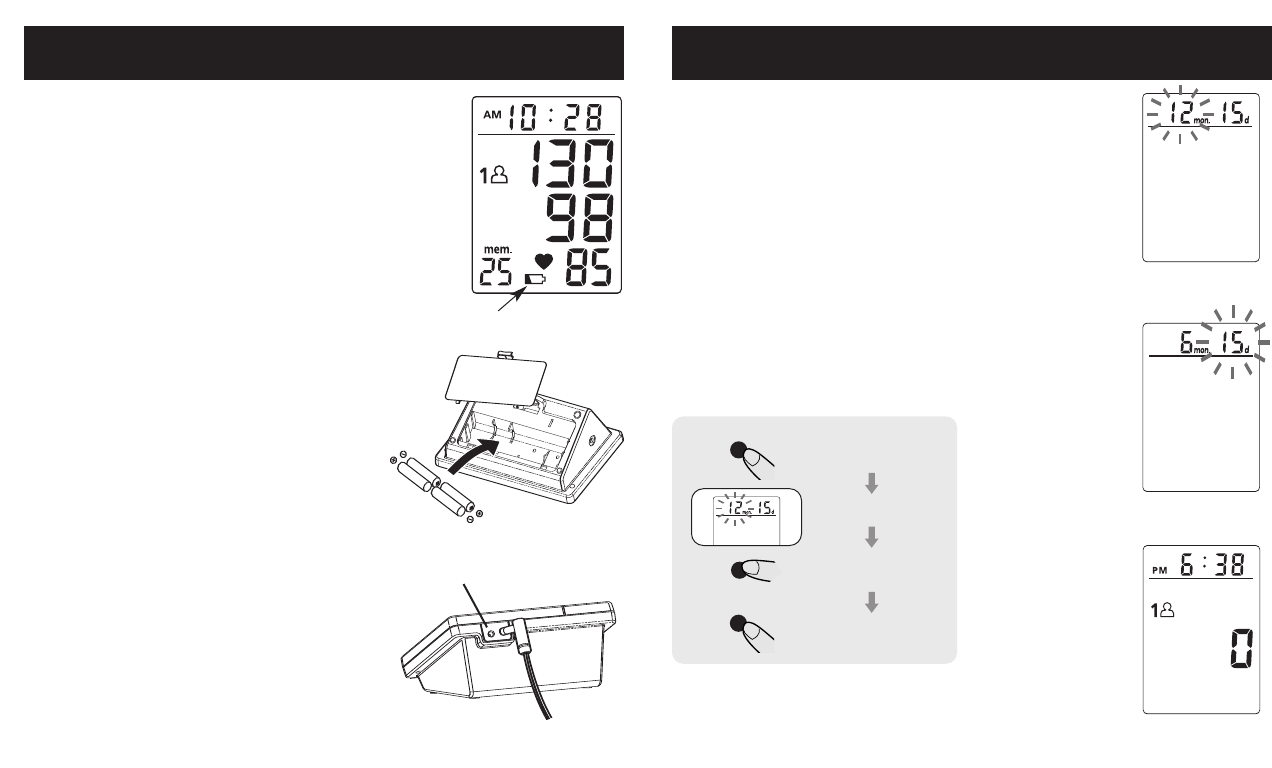
Setting the Date/Time
1. Press the Set Button to enter into the Time
Adjustment mode. The blinking Month will
display,
Fig. 1.
2. Press the Time Button to change.
3. Press the Set Button to confirm entry.
4. The blinking Date,
Fig. 2, followed by Hour and
Minutes will display. Repeat steps 2 and 3 to
adjust the date/time setting.
5. After setting the time and date, the time will
appear on the display,
Fig. 3. Press the POWER
button to turn the unit off. Press the POWER
button again to turn the unit on to take a reading.
Press Set button
Blinking Month
Press Time button to
change Month
Press Set button
confirm the entry
8
Battery Installation/Replacement
Replace the batteries when the Low Battery symbol
appears on the display,
Fig. 1, or when the display
remains blank when the POWER button is pressed.
Fig. 1
Fig. 2
AC Adapter Connection
Fig. 2
Fig. 1
Fig. 3
AC Power Adapter (optional)
An AC adapter is available separately for
battery-free operation. The AC adapter
plugs into the back of the unit as shown.
Please remember to practice electrical
safety precautions while using the adapter.
AC Adapter
Output: 12V DC 600mA (3.8Ø/1.3Ø)
SET
SET
TIME