
User Manual


18
Figure 23
Figure 24
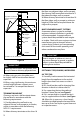
3. Slide the plate of the anchor plate support
over the coupling.
4. Apply a second bead of sealant on the
plate around the male coupling where the
ange of the female coupling of the next part
will mate.
5. Place the second part over the plate.
Make sure the sealant completely lls joints
between the plate and the female coupling.
6. Use eight clamp anges and bolts to
tightly clamp the parts to the support.
7. Insert the assembly on the support
structure and x the plate to the structure
using the supplied hardware.
6.2 The second method is applicable when
the plate of the anchor plate support needs
to be installed rst, as when there is a tee or
elbow upstream of the support. May require at
least two persons to complete the installation.
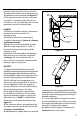
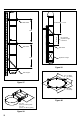
INSTALLATION STEPS FOR SECOND
METHOD (refer to gure 23)
1. Fix the plate of the anchor plate support to
the structure using the supplied hardware.
2. Apply a bead of inner joint sealant on the
male coupling ange of the part before the
support.
3. Insert the male coupling of the part in the
plate opening.
4. You may hold it using two clamp anges
placed at 180° and bolted to the anchor
plate.
5. Apply a bead of sealant on the plate
around the male coupling.
6. Place the second part over the plate. Make
sure the sealant completely lls the joint
between the plate and the female coupling.
7. Fix the assembly by clamping it with four
clamp anges on the unused ange positions.
8. Remove the rst two clamp anges and
nish clamping the assembly.
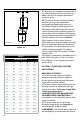
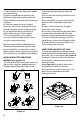
VENTILATED ANCHOR PLATE APV
1. Use for same application as the anchor plate,
but can be attached to combustible construction.
2. Usually uses as roof support. See Section D
for details on how to install at the roof level.
3. Installation is done the same manner as
the anchor plate.
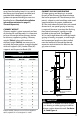
4. See Figure 24 for opening dimensions
through combustible construction.
5. Do not block or obstruct openings in the
plate. They are intended to minimize
heat accumulation.
Sealant
Bead
Method #2-
Step 1
Method #2-
Step 2
Method #2-
Step 3 and 4
Method #2-
Step 5
Method #2-
Step 6 and 7
Method #2-
Step 8
I.D. + 8" (DIS)
I.D. + 12" (DAS)
I.D. + 8" (DIS)
I.D. + 12" (DAS)