
User Guide Keyboard KeyStudio 25


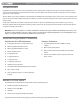
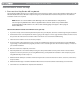


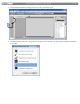
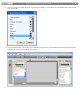
Table Of Contents
- Session KeyStudio 25 User Guide
- Introduction
- Session KeyStudio Features
- What’s in the Box?
- Minimum System Requirements
- Installation and Setup
- Getting Started Making Music with Session
- More Information on Configuring Session
- Using KeyStudio with GarageBand
- About MIDI and Software Synthesis
- The KeyStudio 25 Keyboard
- Using the KeyStudio 25 Keyboard
- KeyStudio 25 Advanced Features
- Recalling Presets
- Storing Presets
- Duplicating and Organizing Presets
- Enigma Software
- Sending a Snap Shot
- Muting All Controllers
- Program Mode Overview
- Assigning MIDI CCs
- Assigning MIDI Channels
- Reassigning MIDI CC for the Modulation Control
- Reassigning MIDI CC for the Pitch Control
- Reassigning MIDI CC for the Sustain Pedal input
- Limiting the Range of the Controls
- Setting Toggle Values for the Buttons
- Assigning MIDI Machine Control (MMC) Commands to a Button
- Assigning a Note to a Button
- Assigning RPN/NRPN to a Fader or Knob
- About SysEx Messages and Device ID
- Assigning the Device ID
- Memory Dump
- MIDI Messages In-Depth
- Troubleshooting
- Appendices - Useful MIDI Data
- Appendix A: MIDI Implementation Chart
- Appendix B: Assignable MIDI CC’s on KeyStudio 25
- Appendix C: Hexadecimal Conversion Chart
- Appendix D: General MIDI Preset Specification
- Appendix E: MIDI Note Numbers
- Appendix F: Standard MIDI Controller Numbers (MIDI CC’s)
- Appendix G: Roland GS and Yamaha XG NRPN Support
- Appendix H: General MIDI Reverb and Chorus Types
- Technical Info
- Warranty
- Contact

|
5
Session KeyStudio 25 User Guide
Installation and Setup
1. Connect the KeyStudio 25 keyboard.
The KeyStudio 25 USB keyboard is class-compliant. This means that you may simply connect the KeyStudio 25 keyboard to your
Windows XP, Windows Vista or Mac OS X computer using the provided USB cable and switch the keyboard on. No additional
installation or drivers are required.
NOTE: Windows users who would like to take advantage of the more advanced features of KeyStudio 25,
such as using the keyboard with more than one application at the same time (multi-client), should install the
optional M-Audio KeyStudio 25 drivers. These drivers can be found by going to the Support > Drivers page at
www.m-audio.com.
Advanced installation instructions for Windows users (optional):
1. If you have already connected the KeyStudio 25 keyboard to your computer, disconnect it before beginning the installation.
2. Download the most recent KeyStudio 25 drivers by going to the Support > Drivers page at www.m-audio.com. This ensures
that you have the newest drivers available. Double-click the le once it has nished downloading.
3. Follow the driver installer’s on-screen direction prompts.
4. At various points in this installation process, you may be notied that the driver being installed has not passed Windows
Logo Testing, or asked whether the program you wish to run is a trusted application. Click “Continue Anyway” or “Install” to
proceed with installation.
5. Once the installer has completed, click “Finish.”
6. Attach KeyStudio 25 to an available USB port using the cable provided. Make sure the power switch on the back of the
keyboard is in the “on” position. If you are using Windows Vista, your KeyStudio 25 installation is now complete. If you are
using Windows XP, proceed to steps 7-9.
7. Windows XP will identify the controller and will ask if you want to search the Internet for a driver. Select “No, not this time,”
and press “Next.”
8. Windows XP will display a Found New Hardware Wizard. Choose “Install the software automatically,” and click “Next.”
9. Click “Finish” once the Wizard has completed the installation.