
User Guide Keyboard KeyStudio 25
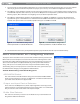
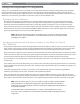
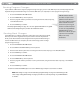

Table Of Contents
- Session KeyStudio 25 User Guide
- Introduction
- Session KeyStudio Features
- What’s in the Box?
- Minimum System Requirements
- Installation and Setup
- Getting Started Making Music with Session
- More Information on Configuring Session
- Using KeyStudio with GarageBand
- About MIDI and Software Synthesis
- The KeyStudio 25 Keyboard
- Using the KeyStudio 25 Keyboard
- KeyStudio 25 Advanced Features
- Recalling Presets
- Storing Presets
- Duplicating and Organizing Presets
- Enigma Software
- Sending a Snap Shot
- Muting All Controllers
- Program Mode Overview
- Assigning MIDI CCs
- Assigning MIDI Channels
- Reassigning MIDI CC for the Modulation Control
- Reassigning MIDI CC for the Pitch Control
- Reassigning MIDI CC for the Sustain Pedal input
- Limiting the Range of the Controls
- Setting Toggle Values for the Buttons
- Assigning MIDI Machine Control (MMC) Commands to a Button
- Assigning a Note to a Button
- Assigning RPN/NRPN to a Fader or Knob
- About SysEx Messages and Device ID
- Assigning the Device ID
- Memory Dump
- MIDI Messages In-Depth
- Troubleshooting
- Appendices - Useful MIDI Data
- Appendix A: MIDI Implementation Chart
- Appendix B: Assignable MIDI CC’s on KeyStudio 25
- Appendix C: Hexadecimal Conversion Chart
- Appendix D: General MIDI Preset Specification
- Appendix E: MIDI Note Numbers
- Appendix F: Standard MIDI Controller Numbers (MIDI CC’s)
- Appendix G: Roland GS and Yamaha XG NRPN Support
- Appendix H: General MIDI Reverb and Chorus Types
- Technical Info
- Warranty
- Contact
|
10
Session KeyStudio 25 User Guide
9. Try playing notes on your KeyStudio 25 keyboard. If you can hear instrument sounds,you may skip steps 10-12. If your computer
does not yet generate sounds when KeyStudio 25 is played, proceed to step 10 for additional conguration instructions.
10. Go to Options > Audio Hardware and make sure the sound card you wish you use (i.e., your computer’s built-in sound card or an
installed ASIO compatible audio interface) is selected in the Output Device and Input Device pull-down menus. Click OK. See the
following chapter, ”More Information on Conguring Session,” for further explanation of this.
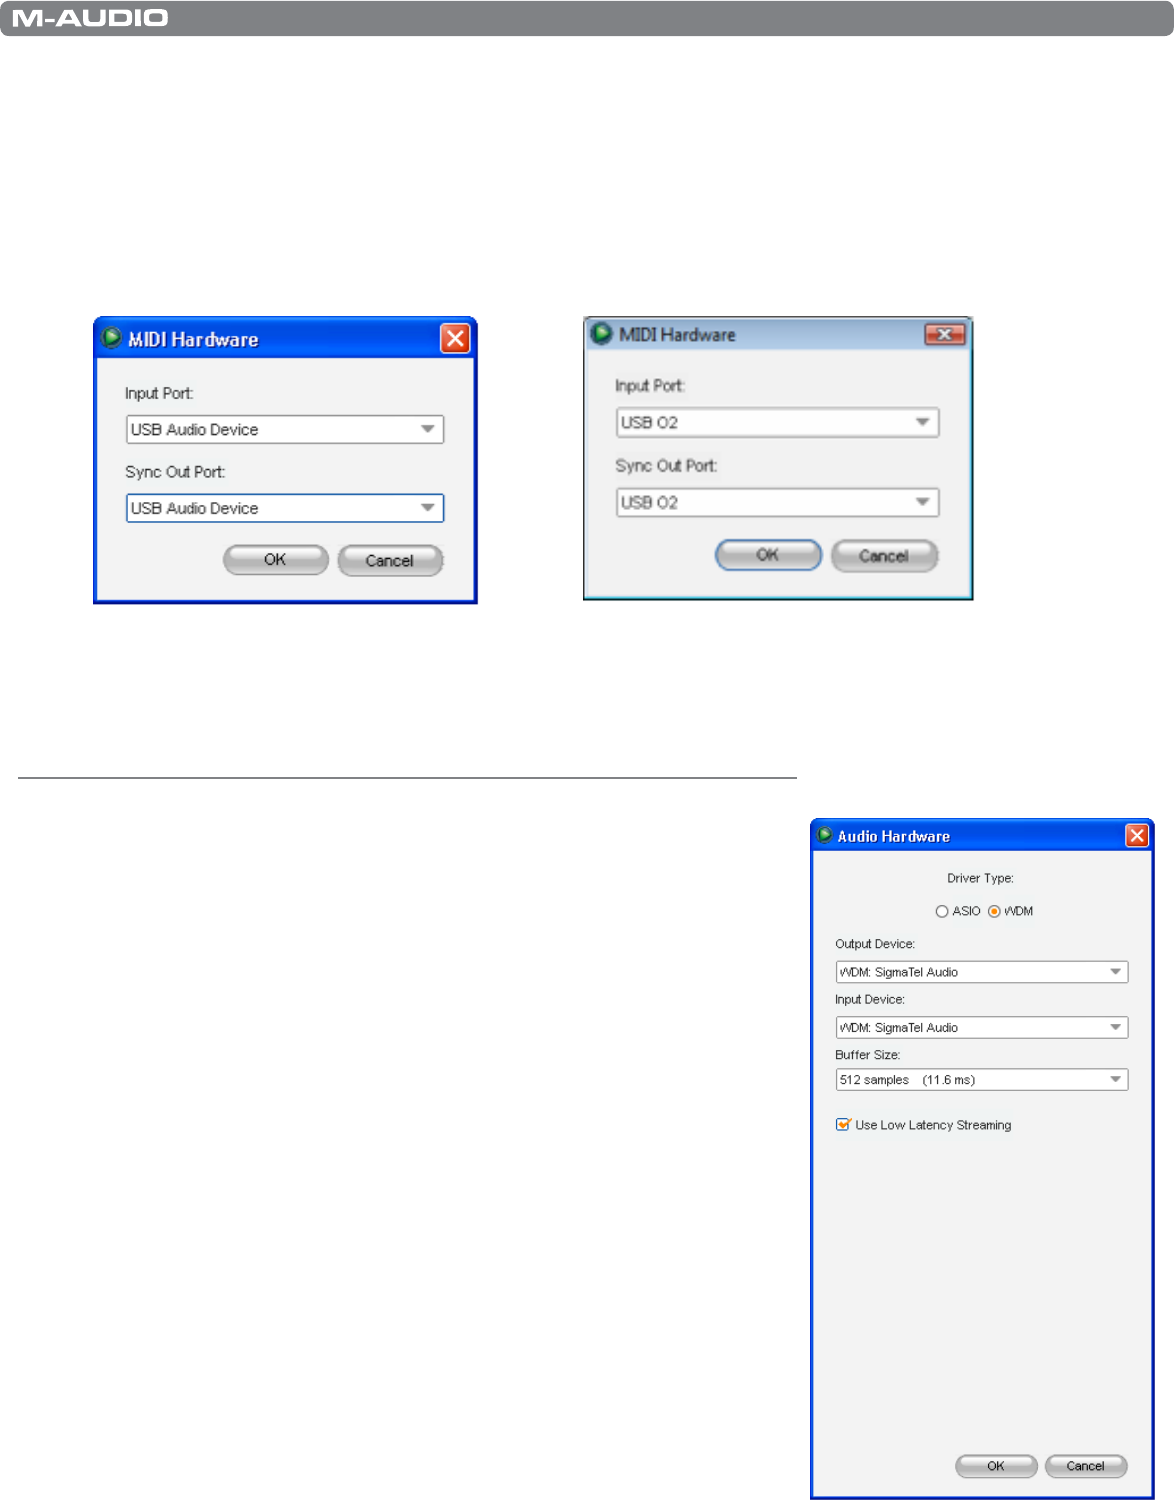
11. Go to Options > MIDI Hardware and make sure “USB Audio Device,” “USB O2,” or “USB O2 In” is selected in the Input Port box.
KeyStudio will appear as “USB Audio Device” in Windows XP and “USB O2” in Windows Vista if additional drivers have not been
installed. If the optional drivers are installed, KeyStudio will appear as “USB O2 In.” Click OK.
Figure A: Session MIDI Hardware dialog window
without optional drivers installed in Windows XP.
Figure B: Session MIDI Hardware dialog window
without optional drivers installed in Windows Vista.
12. You should now be able to use your KeyStudio keyboard to play instruments from the Session instrument library.
More Information on Configuring Session
To play back and record audio in Session, Session must communicate with your sound card.
On rst launch, Session attempts to choose the rst sound card containing both an audio
input and audio output, eectively making this connection automatically. If Session is not
able to select audio inputs and outputs automatically, it will open the Audio Hardware
dialog. If the process is successful (Session does not open the Audio Hardware dialog
automatically), but you cannot play back or record audio with Session, you’ll need to open
the Audio Hardware dialog by choosing Options>Audio Hardware.
The Audio Hardware dialog contains the following options:
ASIO/WDM Switch
This control switches the Audio Hardware dialog of Session between ASIO and WDM
mode. For best performance in Session, use ASIO mode. Consult the documentation for
your sound card to determine if it supports ASIO.
Output and Input Device Selectors
These controls set the Output Device (sound card) through which Session plays audio,
and the Input Device (sound card) from which Session records audio. It is recommended
that you select the same sound card for audio input and output.
Buffer Size Selector
This control sets the latency of Session. See the “About Latency” section found later in
this guide for additional information.