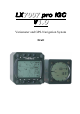
LX7007 pro IGC V1.
LX 7007 pro IGC V1.0 Apr.2005 Contents 1 GENERAL...........................................................................................................................................................................4 1.1 TECHNICAL DATA ...........................................................................................................................................................4 1.2 ROTARY SWITCHES AND KEYS (BUTTONS) ..........................................................................
LX 7007 pro IGC V1.0 2.2.6.1 2.2.6.2 Apr.2005 Statistics during flight ....................................................................................................................................................... 41 Statistics after flight........................................................................................................................................................... 42 2.3 VARIOMETER AND ALTIMETER ........................................................................
LX 7007 pro IGC V1.0 Apr.2005 1 General The instrument consists of two units, the LX 7007 DU main unit, and the LX 7007 AU LCD Vario indicator unit. The 80mm diameter (3") main unit LX 7007 DU is fitted with an integral 12 channel GPS receiver and a high resolution display with 160x240 pixels. The 57 mm diameter (2 1/4") LX 7007 AU is a new design with its own integral micro processor and communicates with the LX 7007 DU via the RS 485 system bus.
LX 7007 pro IGC V1.0 Apr.2005 1.2 Rotary switches and keys (buttons) The following controls are mounted on the front face of the LX7007 DU • • Four rotary selector switches Six push buttons The LX7007AU is an indicator only and has no controls; the displayed information being controlled from the LX7000DU START/ON button ENTER button VOLUME selector MODE selector ZOOM selector UP/DOWN selector MC button 1.2.
LX 7007 pro IGC V1.0 1.2.2 Apr.2005 MODE selector (rotary switch) The mode selector is used to change modes of operation. This switch has the highest priority in the system. Whenever it is operated, a mode change will occur. 1.2.3 UP/DOWN selector (rotary switch) This rotary switch has a lower priority than the mode selector switch and is active all the time in the selected mode. It is mainly used for selecting sub menus during navigation and to scroll in the edit menu. 1.2.
LX 7007 pro IGC V1.0 Apr.2005 2 Operating modes The LX 7007 PRO IGC has 7 modes or main menus. All of them are selectable directly by rotating the MODE switch. The diagram shows the menu (mode) structure of LX 7007 PRO IGC. ⇐MODE⇒ GPS NEAR APT TP TSK STAT SETUP ⇓ ⇓ ⇓ ⇓ ⇓ ⇓ ⇓ ⇓ ⇓ ⇓ Navigation menus (APT, TP and TSK) have sub menus, which can be selected using the Up/Down switch.
LX 7007 pro IGC V1.0 2.1.1.1 Apr.2005 QNH RES (QNH and Safety Altitude) Input Procedure: • • • • Use the UP/DOWN selector to choose the item it is required to change (QNH, MG.VAR, ALT.R. or BUGS) Press ENTER Use UP/DOWN to select the value required and press ENTER to input it Once all changes are complete, press ESC top return to SETUP menu QNH: Using this feature it is possible to offset the altitude datum, which could have changed due to pressure changes during the flight.
LX 7007 pro IGC V1.0 Apr.2005 Note!: The instrument is cabable of storing up to 30 different pilot's names. Each pilot's name, which can be password protected, can have different flight information programmed into it. This is useful if one likes to fly with a custom polar, fly the glider in different configurations, or fly in decentralized competitions, Online-Contest, Barron-HiltonCup, etc. For more information on configuring pilot names see 3.4.1, and for for setting custom polars see 3.1.2.10.
LX 7007 pro IGC V1.0 Apr.2005 K-RECORD: This record can be used to store non-essential flight parameters and is not active by default. It should not be activated unless the IGC record format is fully understood. If required to be activated, the J-Record (see below) will select the flight parameters that are stored in the K-Record. NEAR TP INT: This setting enables the fixing rate set by the B-Record to be increased close to a turnpoint to ensure that a fix is obtained in the observation zone.
LX 7007 pro IGC V1.0 2.1.1.3 Apr.2005 INIT The following parameters can be set using this option. • • VARIO FIL: S.V. : • • • • VARIO INT: VARIO RNG: TAB: ETA: This sets the time constant of the vario from 0.5sec up to 5 secs; the default setting is 2.0 secs S.V. means Smart Vario, giving four levels of dynamic damping of the vario indication and off.
LX 7007 pro IGC V1.0 2.1.1.4 Apr.2005 DISPLAY This option sets the contrast of the LC display. The actual contrast can vary with viewing angle, ambient light level and temperature. The contrast is changed by rotating the UP/DOWN selector. Default contrast setting is 50%. 2.1.1.5 TRANSFER This option initiates the transfer of data between the instrument and a connected PC, PDA, LX 20 or Colibri. Data transfer is started by pressing ENTER with TRANSFER selected.
LX 7007 pro IGC V1.0 Apr.2005 2.1.2 SETUP of Options Requiring Access by Password, After entering the password, 96990, a further 21 system settings are available. During flight the password is not required, which means that when ENTER is selected in the Password option during flight, the LX 7007 PRO IGC goes immediately into the following setup menu! 2.1.2.
LX 7007 pro IGC V1.0 Apr.2005 TP-QUICK POINT – AUTO When SELECT: OFF is selected, the actual position will not be selected for navigation When SELECT: ON is selected, the actual position will be selected automatically and displayed in the navigation page. NEAR RADIUS The setting has nothing to do with the setting described in LOGGER. The LX 7007 PRO IGC has a very useful feature named “Simple task” which is active when a regular task is not set.
LX 7007 pro IGC V1.0 • Apr.2005 A21: Orientation ( Options: TO NEXT, RAD.1. TP, and USER VALUE). If TO NEXT or RAD.1.TP are selected, then AUTO is also displayed not permitting any rotation. If USER VALUE is selected, the sector can be rotated. • A1: First angle • R1: Radius of the sector having angle A1, e.g. 3km for the FAI photo sector. • A2: Like A1, used for creating combined sectors.
LX 7007 pro IGC V1.0 Apr.2005 Start 1: not valid with start Start 2: valid with start Start 3: valid with start Start 4: not valid with start It is therefore recommended that the graphics page is displayed during the start procedure to ensure that a good start is achieved. Other possible options for the setting of A21 are: • RAD.1.TP: This type of start sector was used in the 1999 World Gliding Championships in Bayreuth.
LX 7007 pro IGC V1.0 Apr.2005 Note!: All the examples discussed are intended to explain the programming procedures and present capability of the LX 7007 PRO IGC and do not claim to be comprehensive. Each competition will have its own rules regarding the definition of sectors, which can be found in the particular competition rules. In case of doubt, the rules defined in the FAI Sporting Code Section 3 should be used.
LX 7007 pro IGC V1.0 Apr.2005 Note!: While the combined sector is used in many National competitions, it is emphasised that for record flights, FAI badges, 1000/2000km-diplomas and for the Barron-Hilton-Cup, only the FAI 90°-photo sector is valid! 2.1.2.3.3 FINISH ZONE This setting defines the FINISH ZONE or Line.
LX 7007 pro IGC V1.0 2.1.2.4 Apr.2005 WARNINGS - Airspace Penetration and Height Warnings The LX 7007 pro IGC monitors the glider’s position both horizontally and vertically in relation to SUA, and will give both an acoustic and visual warning prior to the airspace being penetrated. The warning will be activated a specified number of seconds before entering the airspace – Warn me xxx seconds before, where XXX is the desired input between 20 and 600 seconds. The default value is 120 seconds.
LX 7007 pro IGC V1.0 Apr.2005 Note!: Use the DISMISS function to temporarily deactivate individual airspace warnings. All warnings can be reinstated using the RESET WARNINGS command in the SETUP/Warnings screen. ALTITUDE warnings can be setup in a similar way and inform the pilot that he is approaching pre-selected altitude limits. The warning altitude is always above MSL (Mean Sea Level). The warning will be activated at a specific time before reaching the altitude limitation.
LX 7007 pro IGC V1.0 • • • • • • • • • LAT/ LON: DIST: SP (Speed) VARIO: HDG: WIND: ALTITUDE: QNH: LOAD: Apr.
LX 7007 pro IGC V1.0 Apr.2005 Class A will only be shown when the ZOOM scale is 100km or lower Note!: If, for instance, 100 km is selected, then the airspace will only be shown when the ZOOM range is 100 km or lower. When the ZOOM range is greater than 100 km, the particular airspace will not be shown. The LX7000 allows the following types of airspace to be shown: • Class A • Class B • Class C • Class D • Class E • CTR. Control zone • R.
LX 7007 pro IGC V1.0 Apr.2005 APT ZOOM: The airport zoom setting defines the ZOOM range under which the airports will be displayed. For instance, a 50 km setting will only show the airports when the selected ZOOM range is 50 km or lower; at greater ZOOM ranges, the airports will not be shown. The permitted settings are: ON, OFF, 5, 10, 20, 50 and 100 km.
LX 7007 pro IGC V1.0 Apr.2005 Each pilot has the capability, if needed, of protecting his configuration by means of a personal password. This ensures that a particular pilot's configuration cannot be selected and altered by another pilot. If no pilot's name has been programmed, then UNKNOWN will be displayed and the settings made during the last flight will be recalled.
LX 7007 pro IGC V1.0 2.1.2.9 Apr.2005 SETUP NMEA The LX 7007 PRO IGC is capable of outputting positional data sentences in the NMEA format for use by other devices. The various output configurations are shown below and by placing the cursor on any one and pressing ENTER, the individual NMEA sentences will be displayed. If Winpilot is used, then WINPILOT should be selected in this option. 2.1.2.
LX 7007 pro IGC V1.0 Apr.2005 2.1.2.13 LOAD Each time the instrument is powered up, the ballast settings are set to the minimum. By setting the SWITCH ON LOAD: SET, the ballast setting will remain at the last setting made on the previous flight and will not be zeroed on instrument power up. 2.1.2.14 SETUP TE COMP. The LX 7007 PRO IGC offers two methods of vario TE compensation.
LX 7007 pro IGC V1.0 Apr.2005 2.1.2.15 SETUP INPUT The LX 7007 PRO IGC has an input for an external speed command switch. Using the external switch it is possible to switch between SC and Vario manually. Setting the SC INPUT to ON means that closing the switch will cause the instrument to enter SC mode, and setting SC INPUT to OFF means that closing the switch will select Vario mode.
LX 7007 pro IGC V1.0 UPPER NUMBER SHOWS INTEGRATOR Apr.
LX 7007 pro IGC V1.0 Apr.2005 Upper numerical line: • Integrator, time, flight time, leg time Lower numerical line: • ALT (NN altitude), distance, GL DIF. (final glide altitude difference), SPEED (TAS), LEG S. (speed on leg). 2.1.2.17 COMPASS This unit is an optional extra. The compass module is connected by the 485 bus to the LX 7007 PRO IGC. If the compass is connected, this setting enables the compass to be calibrated and is described in Chapter 7.
LX 7007 pro IGC V1.0 Apr.2005 2.1.2.20 PAGE 3 (Additional Navigation Page) This page can only be activated or disabled. Default set is ON. 2.1.2.
LX 7007 pro IGC V1.0 Apr.2005 GPS status Battery indicator Coordinates IGC altitude By rotating the UP/DOWN selector the displayed altitude will appear in both m and ft at the same time. The TIME display can be changed to a Stop watch as follows: • • • • • Press START Press START Press START Press START Press ENTER 2.2.
LX 7007 pro IGC V1.0 2.2.3.1 Apr.2005 Navigation in APT, TP or TSK There are five navigation pages; the first one is described below. Airport name and ICAO Bearing Distance Ground track Vario average Wind Final glide indicator Altitude AMSL or glide ratio indicator in SC MC and Ballast Course corr. arrow Note!: The glide ratio indicator consists of two numbers separated with an E (43E77).
LX 7007 pro IGC V1.0 Apr.2005 Desired track input (OBS similar) Using ZOOM Off course deviation VOR similar indicator Further rotation of the UP/DOWN selector will call up the fourth, or arrival page. Time ETE Wind, direction and speed, minutes since the last update ETA OAT and battery voltage ETA (estimated time of arrival) and ETE (estimated time enroute) define the arrival time and the time needed to reach the destination. Both depend on the settings in the INIT menu.
LX 7007 pro IGC V1.0 Apr.2005 If an incorrect letter is entered, then either press START or rotate the ZOOM selector to move the cursor back so that the letter can be re-entered. If the ICAO locator is unknown, then the following method should be used. With the cursor on ICAO, press ESC to move the cursor to the country. Select the required country with the UP/DOWN selector and press ENTER. Four stars will now be displayed at the airport name.
LX 7007 pro IGC V1.0 Apr.2005 Offset input Method GSPEED DIF. is the simplest method. The calculation is based on measuring ground speed changes while circling. A minimum of two full circles are necessary to obtain an accurate wind. The message WAIT2 or WAIT 1 informs the pilot how many circles are left to get the result. It is very important to keep the speed constant while circling to ensure that accurate results are obtained.
LX 7007 pro IGC V1.0 2.2.4.2 Apr.2005 TP EDIT This option allows the pilot to change TP data at any time. The turn points used in LX 7007 PRO IGC have four attributes. Using attributes, when the turn points are displayed in graphic pages, they will be represented by different symbols. The four different types of turn points are as follows: • • • • T.
LX 7007 pro IGC V1.0 Apr.2005 On activating the procedure, the present position is displayed with the name defined in one of two forms; AP (actual position), or TIME (date and time), depending on which option has been selected in the setup (through password) menu. Once selected, the data can be edited if required. This procedure is useful to store convenient landing places noted during flight, thermals etc.
LX 7007 pro IGC V1.0 Apr.2005 The tasks are numbered from 00 to 99 and the turn points building a task numbered from 0 to 9. Point 0 is always the start point. 2.2.5.1 TSK - SELECT All stored tasks can be viewed by choosing SELECT and pressing ENTER. All pre-programmed tasks can now viewed by rotating the UP/DOWN selector; once the required task is displayed, it is selected with ENTER. Note!: Using the ZOOM knob is possible to select tasks by simply rotating the knob.
LX 7007 pro IGC V1.0 Apr.2005 tasks are already modified for AAT. The AAT modified tasks are active for three flights only. After the third flight all sectors are set back to the default settings (as defined in SETUP/OBS.ZONES). This feature allows the competition pilot to make three take offs without loosing the AAT information. • ZONE- Using this faction, an individual sector can be defined for each turn point of the task.
LX 7007 pro IGC V1.0 Apr.2005 Having used MOVE-function, the “new” point has a '#' as the first character (very significant). The sector and the reference point stay unchanged, but all navigation data is modified corresponding to the new (virtual) point. For example, the final glide is now calculated around the new point, and the statistics are modified in the same way. The point is moved using the rotary knobs UP/DOWN (vertical) and ZOOM (horizontal). It is not possible to MOVE outside the sector.
LX 7007 pro IGC V1.0 Apr.2005 All known methods (select, insert, and delete) can be used to change the declaration at this stage. Changing of declaration will not change the TSK. The take off and start points as well as finish and landing points will usually be the same. If these points are not identical in your task you have to change either start point or take off point as necessary. The normal procedure for declaration is: • Prepare TSK in TSK/EDIT menu (you will need it for navigation later).
LX 7007 pro IGC V1.0 Apr.2005 Average speed on leg Time of confirmation During leg Completed leg During an active task leg, the time will remain blank as it is the TP confirmation time and is never shown until the TP is confirmed. The completed leg display shows time turn made, the time spent completing the leg (duration), average speed on leg and % of time spent climbing. The last shown screen always shows the task statistics from the start to the current position. 2.2.6.
LX 7007 pro IGC V1.0 • Apr.2005 ROUTE - route flown will be shown On pressing ENTER with the cursor on ROUTE, the display shows: after ZOOM To program ZOOM, press ENTER and a small cross will appear in the middle of the screen. Move the cross by rotating ZOOM and the UP/DOWN selector. Press ENTER when the cross is positioned at the start of the area to be zoomed. Repeat the procedure for a second cross and place at the end of the area to be zoomed. Press ENTER and the expanded area will be displayed.
LX 7007 pro IGC V1.0 2.3.1 Apr.2005 Smart Vario description The LX system incorporates two configurable electronic filters in the circuitry. The first filter adjusts the time constant and is adjustable between 0.5 and 5 seconds. The 0.5 setting is the fastest while the 5 setting provides maximum damping. The second filter, called the Smart Vario, is a dynamic filter and controls the rate at which the vario indication moves.
LX 7007 pro IGC V1.0 • • Apr.2005 Continuous audio signal in + possible (other kinds of signals can be chosen, see setup) No audio at correct speed (dead band). 2.3.4 Final glide calculation The final glide calculator calculates the final glide altitude difference to the selected point (APT, TP). In the task mode the final glide is always calculated from the current position, round all uncompleted turn points to the goal.
LX 7007 pro IGC V1.0 Apr.2005 The password prevents another pilot from changing the configuration settings that have been set up by the named pilot. As soon as a pilot has been selected, the LX 7007 PRO IGC switches into the SET ELEVATION menu. In Summary: • • • If UNKNOWN pilot name is selected, then the FLIGHT INFO settings from the last flight, irrespective of the pilot, will be used If a Pilot without a password is selected, then the FLIGHT INFO settings of the last flight by that pilot will be used.
LX 7007 pro IGC V1.0 2.4.3 Apr.2005 Preflight check It is strongly recommended to check all settings in the setup mode access able without the password in case they have been changed by a previous pilot. All parameters remain unchanged after switching off, with the exception of: • • • QNH BUGS Ballast if not defined with set in setup LOAD It is recommended that a task is set up prior to take-off.
LX 7007 pro IGC V1.0 Apr.2005 Radial 300 Radial 700 Turn point For that sector enter: • A21 USER VALUE 230° ( 50° + 180°); 50° is the symmetric axis between the two radials (30° + 20° = 50°, because the complete sector has 40°) • A1 20°, because the sector angle is 40° • R1 is 20km • A2 and R2 are 0 2.4.4.
LX 7007 pro IGC V1.0 Apr.2005 Confirming RESTART with Y will restore the actual task. The task is now ready for new start. The restart has no influence on recorded data or declaration. 2.4.4.3 Automatic swap on reaching a TP using standard task and AAT By default, the LX 7007 PRO IGC switches over to the navigation data of the next turn point, as soon as a fix is recorded in the sector of the destination TP.
LX 7007 pro IGC V1.0 Apr.2005 Example: Before press on Start 2.4.4.5 After TSK END On entering the finish zone the task stops automatically and a message TSK END will appear. If you want to fly a new task without landing, then it is necessary to use RESTART and SELECT. If the MOVE function has been used on the finish point, then it will be necessary to finish the task by using the START button as in the AAT sector.
LX 7007 pro IGC V1.0 2.4.4.7 Apr.2005 SIMPLE TASK The simple task feature is active prior to a regular task being started. The feature is very useful for pilots who do not fly tasks but fly from TP to TP (or to an APT). Simple task permits statistics to be stored like a real task and which can be displayed on the Statistics page and also evaluated by a PC after flight. Immediately after take off, the current position will be considered to be a start point.
LX 7007 pro IGC V1.0 Apr.2005 3.1 Communication with PC After PC communication art was chosen by the pilot, a PC connected to the 5P round connector normaly positioned on the instrument panel, can be used. All kinds of PC communication can be provided using of IGC port available on the rear side of he unit. Use standard IGC cables. Note!: The LX 7007 pro IGC uses .CUB format of airspace data structure.
LX 7007 pro IGC V1.0 Apr.2005 CONNECT indicates that both LX 7007 PRO IGC and PC have established connection and and are ready for data exchange. Note! IGC Shell program (developed by IGC) in conjunction with LXN-IGC.DLL can be used for flight download, convert to IGC and validate. Both programs are available on www.fai.org/gliding/gnss/freeware.asp. This kind of communication is mostly used by competitions, for private use we recommend LXe. 3.1.1 3.1.1.
LX 7007 pro IGC V1.0 3.1.1.2 • Apr.2005 Troubleshooting with LXE Available communication ports for LXE (Setup→Comm. Port) Highlighted ports are ready to be selected. 5 Means that LXE will use checked port for communication with LX, there is no automatically selection by LXE. Selection of comm. port should be done after first run of LXE. • No ports available After such message, no communication will be possible.
LX 7007 pro IGC V1.0 Apr.2005 How to disable Active Sync ? After right mouse click on ActiveSync symbol in task bar, choose Connection settings... and disable it. (PC's with only one comm. port). Problems caused by USB to 232 adapters. Normally PC has more than one USB port. On first use of USB/232 adapter, operating system will detect new USB device. Wizard will guide you through setup process of drivers for specified USB/232 adapter.
LX 7007 pro IGC V1.0 3.1.2 Apr.2005 Having problems downloading flights (read selected flight-command). Symptoms: • Baud rate speed is not constant (oscillating from 0k to 19k) • More retries downloading blocks Result could be unsuccessful downloading of the flight. Workaround: • Reduce communication speed to 9600 bps or lower and do the same on LX unit. (that is a typical problem by laptops using USB adapter ) • Reduce block size (Options/ Advanced) 3.1.
LX 7007 pro IGC V1.0 Apr.2005 3.2 Communication with PDA A completely separated com. port with his own 9P sub D connector is situated on the rear side of the unit. LX 7007 has a built in DC/DC converter which ensures 5V power for PDA. A standard LX cable (1638 or 1636) will connect practically all iPAQ devices to LX 7007 without any additionally works.
LX 7007 pro IGC V1.0 Apr.2005 3.3 Communication between LX 7007, Colibri or LX 20 The LX 7007 PRO IGC is able to exchange data (bi-directional) with the LX 20, Colibri and Posigraph. The following data can be transferred: • • • *.DA4 files (TP and TSK) Flight info confirmation procedures (ZONES) Note! LX 7007 powers Colibri or LX 20-2000 units connected to the LX 7007 IGC port. For older LX 20 versions order appropriate cable. 3.3.
LX 7007 pro IGC V1.0 Apr.2005 4 Installation The LX 7007 PRO IGC main unit (LX 7000 DU) needs one standard 80mm cut-out. The Vario sensor unit (LX 7007 AU) and any additional vario indicators need a standard 57mm cut-out each. Three pressure connectors are fitted to the back of the LX 7007 AU. A label shows their functions.
LX 7007 pro IGC V1.0 Apr.2005 Installation of the LX 7007 PRO IGC • Prepare the cutout in the instrument panel according to the drilling template. • Remove the press-in covers from the four main selectors on the LX 7007 PRO IGC. You can now see the mounting screws. • While holding the knobs, slacken the screws with a screwdriver. Now the knobs can be removed (never use power to remove the knobs, you can damage rotary switches). By problems hit on the slacken screw a little bit.
LX 7007 pro IGC V1.0 Apr.2005 4.
LX 7007 pro IGC V1.0 Apr.2005 4.3 Wiring LX 7007 ANALOG UNIT Wiring red white 7 30 cm LX7007 ANALOG UNIT SUBD15 Connector / female black 8 15 7 14 6 13 5 12 4 11 3 10 2 9 1 GND +1 2 V DC IN 1 6 RS485 - IN +12V A B shield 4 9 5 SUBD9 / male 1 yellow Chinch 30cm AUDIO OUT Speaker SC B A SP EA KER RXD T XD VP 0.
LX 7007 pro IGC V1.0 Apr.
LX 7007 pro IGC V1.0 Apr.2005 4.
LX7007 pro IGC V1.0 Apr.
LX7007 pro IGC V1.0 Apr. 2005 6 Options 6.1 LX 7007 PRO IGC - Compass Module Magnet field sensor LX 485 Bus 6.1.1 General The compass module is an electronic compass (magnetic field sensor), which was developed for the LX 7007 PRO IGC. The LX 7007 PRO IGC recognizes the compass module automatically when it is coupled onto the 485 bus. The only configuration settings needed relate to the compensation procedure.
LX7007 pro IGC V1.0 Apr. 2005 The angular difference between HDG and TRK depends on the magnitude of the wind vector and is normally quite small, which means that the measurement has to be quite precise if accuracy is to be achieved. While the GPS data (TRK and GS) is precise, small inaccuracies in the heading of about 5° can cause errors of up to 25km/h in the wind strength.
LX7007 pro IGC V1.0 Apr. 2005 Switch the LX 7007 PRO IGC back to Nav.-Page 3 and check again all 8 directions. The error should now be less than 10 – 20 (better to have 10 !). If the errors are larger, then one should search for faults in installation or in the adjustment procedure. When the final test is satisfactory, your LX 7007 PRO IGC is ready to calculate the wind with the compass method.
LX7007 pro IGC V1.0 Apr. 2005 6.2 LX 7007 PRO IGC – Remote control units 6.2.1 6.2.1.1 Remote control keyboard type General The unit consists of aluminum housing (80x60x20 mm), a keyboard and a micro controller. The keys are made of rubber and have a tactile feel. All LX 7007 PRO IGC units are ready to support the LX Remote without any modification. There are no additional settings needed on the LX 7007 PRO IGC or on the LX Remote.
LX7007 pro IGC V1.0 6.2.1.3 Apr. 2005 Electronic connection The LX Remote should be connected to the LX 7007 PRO IGC via a free RS485 BUS port on the back of the digital vario (9 P female). If there are no free ports because other devices have been connected, then it is necessary to order a RS485 Splitting Unit to split one input into 3 outputs. When the unit is connected correctly, the LX Remote will be detected automatically by the LX 7007 PRO IGC when it is switched on. 6.2.2 6.2.2.
LX7007 pro IGC V1.0 Apr. 2005 7 Revision history Apr 2005 1.