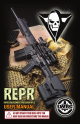
LWRC INTERNATIONAL INTRODUCTION Thank you for purchasing the LWRCI Rapid Engagement Precision Rifle (R.E.P.R.). LWRCI’s goal with the R.E.P.R. was to design and deliver a self-loading rifle that is more reliable, user friendly, and has accuracy comparable to a bolt-action sniper rifle. R.E.P.R. is loosely based on the proven Stoner AR architecture of modular upper and lower receiver groups. Rapidly interchangeable Upper Receiver Groups from the short R.E.P.R. 12 (12.7” barrel) to the R.E.P.R.
R.E.P.R. MANUAL enhance accuracy. Finally the barrel is finished with the NiCorrtm surface conversion process both internally and externally. As a surface conversion, NiCorrtm does not require micro-relief of the bore with hard chrome nor does it suffer galling and flaking at high temperature. It is also harder/more wear resistant, has a lower coefficient of friction, holds structural integrity at higher temperatures, and is more resistant to corrosion.
LWRC INTERNATIONAL 4.6 Tactical Reload........................................................................................37 1.1 ABOUT THIS MANUAL: 4.7 Operating Cycle............................................................................... 38-39 5.0 Immediate and Remedial Actions........................................... 41 5.1 Immediate Action................................................................................. 41 5.2 Remedial Action..............................................
R.E.P.R. MANUAL WARNING! ONLY USE AUTHORIZED AMMUNITION THAT IS OF THE CORRECT CALIBER AND IN SERVICEABLE CONDITION. DO NOT LUBRICATE AMMUNITION. WARNING! WHEN USING A BLANK FIRING ADAPTER (BFA), ENSURE ALL MAGAZINES TO BE FIRED AND EVERY ROUND IN THEM ARE INDEED BLANK AMMUNITION PRIOR TO USING A BFA.
R.E.P.R. MANUAL LWRC INTERNATIONAL The Rapid Engagement Precision Rifle (R.E.P.R.) series are gas piston operated, rotary bolt, magazine-fed, air-cooled, self-loading rifles chambered in 7.62x51mmNATO/.308 Winchester from LWRC International, LLC. R.E.P.R.s are available in a number of configurations to fill a variety of mission profiles: R.E.P.R. 20 – Fitted with a heavy profile 20”(508mm) barrel, 2-stage adjustable match grade trigger and PRS butt stock with adjustable cheek piece and length of pull.
R.E.P.R. MANUAL 2.0.1 LWRC INTERNATIONAL TECHNICAL DATA: Caliber 7.62x51mm NATO (.308 Winchester) R.E.P.R. 12 R.E.P.R. 16 R.E.P.R. 18 R.E.P.R. 20 - 8.9lbs. (4.03kg) - 9.37lbs (4.25kg) - 10.5 lbs (4.76kg) - 11.17 lbs (5.07kg) R.E.P.R. 12 R.E.P.R. 16 R.E.P.R. 18 R.E.P.R. 20 - 31.3 inches (795mm) - 34.5 inches (876mm) - 36.4 inches (925mm) - 40.5 inches (1029mm) Barrel Length R.E.P.R. 12 R.E.P.R. 16 R.E.P.R. 18 R.E.P.R. 20 - 12.
R.E.P.R. MANUAL 2.1.2 R.E.P.R. 20 LWRC INTERNATIONAL 2.1.3 R.E.P.R. 18 Fig. 2c: R.E.P.R. 18 Left and Right Profile Views Fig. 2b: R.E.P.R. 20w. PRS stock - Specific Features and Controls 2.1.4 R.E.P.R. 12 28. QD Sling Mount 29. Cheek Piece Adjustment 30. Cheek Piece 31. Length of Pull Adjustment 32. Sling Loop 33. Configurable Rail Sections Items 29-32 apply only to PRS stock. Fig. 2d: R.E.P.R.
R.E.P.R. MANUAL 2.1.5A 14 R.E.P.R. 16 DISASSEMBLED LWRC INTERNATIONAL 2.1.5B R.E.P.R.
R.E.P.R. MANUAL 2.1.6 LWRC INTERNATIONAL OPERATING CONTROLS 2.1.6.1 SELECTOR LEVER (14.) Located on the left side of the lower receiver, the selector lever functions as the manual safety of the R.E.P.R. and also the fire control selector on select fire weapons. The receiver is marked with pictograms of all three modes, SAFE SEMI-AUTOMATIC AUTOMATIC Prevents trigger from releasing the hammer. Allows one shot per pull of the trigger.
R.E.P.R. MANUAL controls on both left (Fig 17) and right (Fig 25) sides of the Lower Receiver. They are used to release the Bolt Carrier Group from the locked open position or to lock the Bolt Carrier Group back when there is a filled magazine or no magazine loaded in the Magazine Well. This is done by depressing the lower portion of either Bolt Catch/Release while retracting the Charging Handle all the way to the rear. Return the Charging Handle to the forward position after.
R.E.P.R. MANUAL Normal setting is the default setting for non-suppressed operation. R.E.P.R.s are tuned for operation with match grade ammunition with heavier weight bullets like M118LR or Federal Gold Medal Match 168gr. Ejection with these loads should be at the 4 o’clock position (with muzzle at 12 o’clock). With higher pressure loads , the ejection pattern should shift to the 2-3 o’clock position.
R.E.P.R. MANUAL LWRC INTERNATIONAL These apply to the PRS stock on the R.E.P.R. 20 only 29. 31. 2.1.6.8 CHEEK ADJUSTMENT (29.) This knob is used to raise or lower the height of the Cheek Piece (30.). Facing the left side of the weapon with the stock to the right, the knob is rotated to the left to raise the Cheek Piece and the right to lower it. 2.1.6.10 EJECTION PORT COVER (21.) The ejection port cover is spring loaded with a closing detent.
R.E.P.R. MANUAL These apply to the UBR stock on the R.E.P.R. 18 only 34. 35. 2.1.6.12 STOCK RELEASE LEVER (34.) The length of the UBR stock is adjusted by pulling back on this lever and then moving the lower part of the stock to the desired location. Release to lock. 2.1.6.13 STORAGE COMPARTMENT (35.) Depress the latch to open the storage compartment.
R.E.P.R. MANUAL READ THIS MANUAL COMPLETELY PRIOR TO OPERATING YOUR WEAPON. THE FOUR FIREARMS SAFETY RULES 1. 2. 3. 4. Treat every weapon as if it were loaded at all times. Never point your weapon at anything you don’t intend to shoot. Keep your finger straight and off the trigger until you intend to fire. Keep your weapon on safe until you intend to shoot. 3.1 GENERAL SAFETY PROCEDURES: 3.1.
R.E.P.R. MANUAL 3.2 WEAPON CONDITIONS: Condition 4: Bolt forward on an empty chamber, ejection port cover closed, no magazine inserted, and selector lever on fire (will not engage safe). See 3.3 Condition 3: Bolt forward on an empty chamber, ejection port cover closed, magazine inserted, and selector lever on fire (will not engage safe). Condition 2: Not applicable. Condition 1: Bolt forward with a round chambered, ejection port cover closed, magazine inserted, and selector lever on safe.
R.E.P.R. MANUAL 3.4.2 Insert an empty Magazine fully into the Magazine Well and pull downward. The Magazine should remain locked into the magazine well. 3.4.3 Grasp the Charging Handle and pull it firmly to the rear. The bolt carrier should lock to the rear. Return the charging handle to its forward and locked position by pushing it forward. 3.4.4 Depress the magazine release. The magazine should eject from the magazine well and the bolt carrier should remain locked to the rear. 3.4.
R.E.P.R. MANUAL 3.5.5 Re-assemble the weapon inserting the Bolt Carrier Group. Pivot the Lower Receiver back up to the Upper Receiver and press in the Rear Take Down Pin. 3.5.6 Ensure that the Gas Regulator is in the appropriate detent position as dictated by use. 3.5.7 Inspect the Magazines for the following: Ensure the Magazines are clean and not dented (particularly the feed lips).
R.E.P.R. MANUAL 4.0.1 Choice of Ammunition Although the R.E.P.R. is designed to cycle with a broad spectrum of ammunition, it is optimized for use with heavy bullet loads. With a 1-in-10 inch rate of rifling, the barrels are designed to stabilize heavy bullets up to 190 grains. The design ammunition is M118LR Match ammunition with the 175 grain Sierra Match King bullet. The factory recommends the use of this ammunition or similar loads such as the Federal Gold Medal Match (GMM) and Black Hills 175gr Match.
R.E.P.R. MANUAL 4.4 Firing in Automatic Mode (only in Select Fire weapons) Starting with a weapon in Condition 1: CAUTION: Auto should only be considered operationally if the user has had sufficient training and practice on this setting LWRC INTERNATIONAL 4.5.3 Insert loaded Magazine into Magazine Well. Ensure the magazine is fully seated by tugging on it. 4.4.1 Bring Weapon to the “Ready” position. 4.5.4 Depress the Bolt Catch from either side of the weapon.
R.E.P.R. MANUAL LWRC INTERNATIONAL 4.7 OPERATING CYCLE The following describes the operating cycle of the R.E.P.R. in semiautomatic mode. Firing When the Trigger is depressed, the sear is disengaged from the Hammer allowing the hammer to be driven by the Hammer spring to strike the Firing Pin. The Firing Pin strikes the primer, firing the chambered round. Unlocking Propellant gasses are tapped off at the gas port and travel trough the gas block to the nozzle.
R.E.P.R. MANUAL LWRC INTERNATIONAL 5.1 IMMEDIATE ACTION Immediate Action is defined as the prompt action taken by the operator to reduce a stoppage without investigating the cause. A stoppage is defined as any interruption in the operating cycle. It is suggested to transition to a secondary weapon if cover is not available, or if the situation permits perform the following: 5.1.1 Keep the weapon shouldered and in the ready position pointed downrange. 5.1.
R.E.P.R. MANUAL 5.2.2 Lock the Bolt Carrier Group to the rear by depressing the bottom segment of the Bolt Catch and pulling the Charging Handle to the rear. Return the Charging Handle to the forward position. 5.2.3 Remove and discard the Magazine. 5.2.4 Roll the rifle 60 degrees counter-clockwise to visually inspect the chamber for obstructions. 5.2.5 Shake or attempt to clear any stoppage via the Magwell or Ejection Port. 5.2.6 Check Gas Regulator to ensure it is at an appropriate setting. 5.2.
R.E.P.R. MANUAL Proper maintenance of a weapon requires not only immediate pre and post firing cleaning but also the replacement of consumable parts to ensure 100% of the reliability and accuracy of the product throughtout its lifetime. Keep an accurate log of every round fired through the weapon. Even writing down an estimate of the number of rounds fired on a given day will help you perform scheduled maintenance on the system. LWRC INTERNATIONAL 6.1.2. (Fig.
R.E.P.R. MANUAL 6.1.3 (Fig. 6b) Pivot the Lower Receiver until it is 90° to the Upper Receiver. Pull out the front take down pin and disconnect the upper from the lower completely. LWRC INTERNATIONAL 6.1.5 Remove the Buffer and Buffer/Recoil Spring by depressing the buffer detent (Fig. 6c) Pull the buffer and spring from the lower receiver (Fig. 6d). Fig. 6C: Depress the Buffer Detent Fig. 6B: Pivot apart the receivers 6.1.
R.E.P.R. MANUAL LWRC INTERNATIONAL DUPLICATE PHOTO 6.2 DETAILED DISASSEMBLY This level of disassembly is for Detailed Operator Level Maintenance of the R.E.P.R. Care must be taken to ensure that small parts are not lost. The use of a cloth or tarpaulin to catch them is encouraged. Further disassembly is not required for operator authorized maintenance and should only be performed by higher echelon maintenance personnel. 6.2.
R.E.P.R. MANUAL LWRC INTERNATIONAL 6.2.2c Once the Cam Pin is removed, pull forward on the Bolt Assembly to remove it form the Carrier. 6.2.3a (Fig. 6m) Utilize the Firing Pin to push the Extractor Pin and start it out of the bolt. Fig. 6K: Remove the Bolt Assembly Fig. 6L: (L-R) Bolt, Extractor, Extractor Pin, Extractor Spring 6.2.3 Bolt Disassembly At the Operator level, no further disassembly of the bolt beyond removing the Extractor is necessary. 6.2.
R.E.P.R. MANUAL 6.2.4 LWRC INTERNATIONAL Upper Receiver Group Disassembly Start from a Field Strip condition. Pull out the Forward Take-down Pin to its stop. Start by pushing the pin from the left side of the receiver. Then pull from the right. Separate the upper and lower receiver. 6.2.4a (Fig. 6n) Remove the Top Rail by loosening the two Pusher Screws and pushing the upper rail forward (Fig. 6p) then lift up (Fig. 6q) and remove.
R.E.P.R. MANUAL 6.2.5 LWRC INTERNATIONAL Piston Operating Group Disassembly 6.2.5a To disassemble the Piston Operating Group assembly, grasp the front of the operating rod and pull firmly to the rear compressing the piston spring while pulling forward on the Piston Cup (Fig. 6r). Ensure to pull it straight back into the receiver or it will bind. The front of the operating rod will disengage from the piston cup.
R.E.P.R. MANUAL 6.3.4 While reinstalling the Firing Pin Retaining Pin ensure the Firing Pin is fully forward and the Firing Pin Retaining Pin is installed from left to right when looking from the rear of the weapon. While Bolt is pushed rearward into Carrier, push end of Firing Pin toward front of Bolt and ensure it protrudes through the face of the Bolt. 6.3.5 When reinstalling the Bolt Carrier Group into Upper Receiver, ensure that the Bolt is fully extended. 6.3.
R.E.P.R. MANUAL 6.4.7 Apply point lubricant to the Extractor, Bolt Cam Pin, Hammer pivot point, and Trigger pivot point, Charging Handle Knob, Bolt Catch, and Carrier sear. (NOTE: Do not lubricate the face of the bolt.) 6.4.8 Reassemble weapon and perform functions check as detailed in Section 3.4 and 3.5. 6.5 DETAILED OPERATOR’S MAINTENANCE Perform Detailed Maintenance every 2,000 rounds or once weekly while operating in normal field conditions. Ensure weapon is clear prior to performing any maintenance.
R.E.P.R. MANUAL 6.6.2 Pay particular attention that the Ejection Port Cover is closed at all times when not firing your weapon. If weapons must be grounded stuff a rag into the Magazine Well. 6.6.3 In blowing sand or snow conditions conduct frequent functions checks of your weapon and take every opportunity to remove sand or snow from your weapon. A small paint brush is highly recommended for this task. Blow sand from weapon with compressed air if available. 6.6.
R.E.P.R. MANUAL 6.9 RAIL MAINTENANCE AND NOTES The R.E.P.R. features a free floated user configurable rail system. The rail does not come into contact with any part of the barrel allowing the use of accessories, a bipod or the rail itself as a support surface without affecting the point of impact of the bullet. The rail has a monolithic profile 12 o’clock rail that perfectly mates to the rail on the upper receiver allowing the stacking of sighting devices.
R.E.P.R. MANUAL LWRC INTERNATIONAL 7.0 TROUBLE SHOOTING NOTE: When shooting with a silencer or suppressor please note the following: Leading of feed ramps from use of NonFMJ (Full Metal Jacket) ammunition Disassemble and clean feed ramps and use jacketed ammunition Failure to Lock CAUSE CORRECTION 7.1 Follow Manufacturer’s instructions for mounting/ dismounting suppressor, for care and use. Wrong ammunition for chamber Use proper SAAMI/CIP/ NATO Spec. Ammunition. 7.
R.E.P.R. MANUAL LWRC INTERNATIONAL WARRANTY Failure to Extract CAUSE CORRECTION Worn/Broken extractor/spring Replace extractor/springs. Corroded/Out of specification ammunition Inspect all ammunition prior to use and ensure SAAMI/CIP/NATO compliant. Worn or damaged piston return spring Replace Piston Return Spring. Torn case rim Defective ammunition or dirty chamber – clean chamber and inspect ammunition. FOD / Dirty Bolt/Extractor Disassemble and clean.
EXPORT CONTROL User acknowledges that any technical data furnished by LWRCI™ in connection with this order may be subject to U.S. export control laws, including but not limited to the Arms Export Control Act, 22 USC § 2778, (AECA) and the International Traffic in Arms Regulations, 22 CFR 120-130, (ITAR) promulgated pursuant thereto. In this regard, User agrees that, unless it has obtained prior written consent from the U.S.
LWRC I N T E R N AT I O N A L LWRC INTERNATIONAL, LLC 815 CHESAPEAKE DRIVE CAMBRIDGE, MD 21613 410.901.1348 410.228.1775 FAX WWW.LWRCI.COM 015-0002 01/04/11 Rev.