Lum/nex i ® Lum/nex® 100 IS™ Developer Guide to xMAP™ Technology Version 2.
© LUMINEX CORPORATION, 2001. All rights reserved. No part of this publication may be reproduced, transmitted, transcribed, or translated into any language or computer language, in any form or by any means without prior express, written consent of: LUMINEX CORPORATION 12212 Technology Boulevard Austin, Texas 78727-6115 U.S.A. Voice: (512) 219-8020 Fax: (512) 219-5195 Luminex100 IS Developer Guide to xMAP Technology Version 2.2 PN 89-00002-00-032 Rev.
Contents Luminex xMAP™ Technology 1 Luminex 100 IS xMAP Technology . . . . . . . . . . . . . . . . . . . . . . . . 1 Overview. . . . . . . . . . . . . . . . . . . . . . . . . . . . . . . . . . . . . . . . . . . 1 About This Guide . . . . . . . . . . . . . . . . . . . . . . . . . . . . . . . . . . . . 1 Performance Specifications . . . . . . . . . . . . . . . . . . . . . . . . . . . . . . 2 Speed. . . . . . . . . . . . . . . . . . . . . . . . . . . . . . . . . . . . . . . . . . . . . .
Luminex100 IS Developer Guide to xMAP Technology Version 2.2 xMAP Technology Developer Workbench Toolbar . . . . . . . . . . . . . . . . . . . . . . . . . 12 New Product . . . . . . . . . . . . . . . . . . . . . . . . . . . . . . . . . . . . 12 Create Template . . . . . . . . . . . . . . . . . . . . . . . . . . . . . . . . . 12 Edit Template . . . . . . . . . . . . . . . . . . . . . . . . . . . . . . . . . . . 12 Import Template . . . . . . . . . . . . . . . . . . . . . . . . . . . . . . . . .
xMAP Technology B xMAP Protocols 75 Microsphere Handling . . . . . . . . . . . . . . . . . . . . . . . . . . . . . . . . . 75 Microsphere dispersion. . . . . . . . . . . . . . . . . . . . . . . . . . . . . . . 75 Probe sonicator . . . . . . . . . . . . . . . . . . . . . . . . . . . . . . . . . . . . . 76 Bath sonicator . . . . . . . . . . . . . . . . . . . . . . . . . . . . . . . . . . . . . . 76 Enumeration of microsphere suspensions. . . . . . . . . . . . . . . . . 76 Microsphere separation methods . .
Luminex100 IS Developer Guide to xMAP Technology Version 2.2 iv xMAP Technology PN 89-00002-00-032 Rev.
L Luminex xMAP™ Technology Luminex 100 IS xMAP Technology The Luminex 100 IS uses software specially developed to increase efficiency in the clinical laboratory and in research and development. It assumes that end users in the laboratory are running microtiter plates using xMAP-based assay kits developed for use with xMAP technology. Include in your end user kits a template on floppy disk or CD along with instructions.
Luminex100 IS Developer Guide to xMAP Technology Version 2.
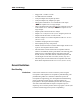
xMAP Technology General Guidelines • • • • • • • • • • • • • • • Floppy Disk: 1.
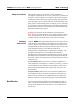
Luminex100 IS Developer Guide to xMAP Technology Version 2.2 Safety Precautions xMAP Technology Although this product is not known to contain hazardous or carcinogenic components at toxic levels, it may be toxic if inhaled, if it comes in contact with skin, or if swallowed. There may be danger of cumulative effects. Keep away from food, drink, and animal food items. If product comes in contact with skin, wash immediately with plenty of water. Wear suitable protective clothing.
xMAP Technology General Guidelines Table 1: Bead Selection Bead Concentration 033 034 035 036 037 038 042 043 044 045 046 047 051 052 053 054 055 056 061 062 063 064 065 066 072 073 074 075 076 077 017 018 019 020 021 024 025 026 027 028 029 032 041 011 012 013 014 006 007 008 083 084 085 086 087 088 089 090 048 057 058 067 068 069 078 079 080 002 003 004 009 015 022 030 039 049 050 059 060 070 071 081 082 001 005 010
Luminex100 IS Developer Guide to xMAP Technology Version 2.2 xMAP Technology Table 2 displays acceptable reporter fluorochromes wavelengths excitation/emission. Table 2: Reporter Fluorochromes RPhycoerythrin Sample Size Alexa 532 Formula weight (Daltons) 240,000 470 Absorbance max (nm) 480, 546, 565 531 Extinction max (M-1cm-1) 1,960,000 83,800 Emission max (nm) 578 554 Quantum yield 0.82 0.8 Sampling volume or sample size can range from 20 to 200 microliters.
xMAP Technology Sample Timeout General Guidelines Sample Timeout is the amount of time in seconds that the instrument will read the sample to detect the specified number of events. Specify a timeout for assay wells. If sufficient events are not collected in the specified time, the Luminex 100 IS system logs an error, flags the sample, and goes on to the next well. Set sample timeout to several times longer than the expected read time of the well. Set to zero to not use the timeout property.
Luminex100 IS Developer Guide to xMAP Technology Version 2.2 Plates xMAP Technology Heated assays: select one of these recommended plates: • • Polyfiltronics 96-well plate, 200 µL, catalog #7703-1902, black. CoStar® Thermowell® 96-well plate, thin-wall polycarbonate, model P. Nonheated assays: select a 96-well plate with an overall height no greater than 0.75 inches (19 mm). When using uncovered plates, use black opaque plates if possible to reduce photobleaching of beads.
xMAP Technology Acquisition Detail Tab Overview Acquisition Detail Tab Use the Acquisition Detail tab to develop your assays, create products, and templates. The Acquisition Detail Tab displays the batch statistical data from processed batches. You can also process new advanced batches, which allow sample acquisition without using a template. The Acquisition Detail Tab provides a histogram and a dot plot display view of the sample test results.
Luminex100 IS Developer Guide to xMAP Technology Version 2.2 IS Toolbar Batch Name and Batch Data Table and Description Buttons field Status Bar Histogram xMAP Technology DWB Toolbar. DWB Software must be installed to display toolbar. Acquisition Detail Toolbar. Dot Plot Figure 1. Acquisition Detail Tab Acquisition Detail Toolbar 10 Acquisition Detail Tab displays the progress of sample acquisition and analysis as the system collects data from the sample.
xMAP Technology Acquisition Detail Tab Resume Pause Eject Cancel All Cancel Command Start View Batch Data New Advanced Batch Replay Batch Figure 2. Acquisition Detail Toolbar Replay Batch Select to replay a batch to show its activity. All the batch commands are replayed while you dynamically watch their execution on the screen. This is convenient for running demos. Note: You cannot replay New Advanced Batches.
Luminex100 IS Developer Guide to xMAP Technology Version 2.2 Eject (Retract) Pause Resume Developer Workbench Toolbar xMAP Technology If retracted, select to eject the microtiter plate. If ejected, select to retract the microtiter plate. Select to pause or interrupt the command. The system pauses (goes into standby) after completing current command that is processing. Select to resume or continue the process that was paused. Use this toolbar to perform the Developer Workbench software activities.
xMAP Technology Acquisition Detail Tab Help Select Help to display the Help menu. From the menu, select the desired item to open the associated on-line help. See Figure 4. Figure 4. Acquisition Detail Help Menu Main Functions The main Acquisition Detail functions are: • • • Replay Batch (File Mode) Replay Batch New Advanced Batch View Batch Data You can reprocess batches through the system multiple times using Replay Batch.
Luminex100 IS Developer Guide to xMAP Technology Version 2.2 xMAP Technology When you replay a batch it labels unknown samples as Pa1, Pa2, Pa3, and so on. If you replay a batch containing replicates, replicate averaging will not be calculated in data analysis. A number of variables can affect the final test results. You may also change the standards or controls processed with the batch or multibatch.
xMAP Technology Acquisition Detail Tab Note: The Open Batch dialog box does not list or show the templates associated to the batches. Figure 5. Analyze Open Batch The Analysis window appears presenting the Error tab, Standards tab, and Sample tab data. See Figure 6 for an example of the Standards tab. To close the Analysis window click Close. See the Analyze Batches and Multi-Batches section in the Luminex 100 IS User Manual. Figure 6. Analysis Window—Standards Tab PN 89-00002-00-032 Rev.
Luminex100 IS Developer Guide to xMAP Technology Version 2.2 New Advanced Batch xMAP Technology This feature is only available on the Acquisition Detail screen. For detailed guidelines for determining specific parameters see “General Guidelines” on page 3). A New Advanced Batch is a simple mechanism for assay developers to acquire data without having to build a template. It does not store results in the Luminex 100 IS data base or allow developer to perform data analysis on acquired batches.
xMAP Technology Acquisition Detail Tab . Figure 7. New Advanced Batch—General Tab 7. Click the Bead Set tab. See Figure 8. The Options Bead Set tab dialog appears. Select the checkboxes next to each desired bead set for this batch. Click Select All to select all the listed bead sets. Click Deselect All to deselect all selected bead sets. Figure 8. New Advanced Batch—Bead Set Tab PN 89-00002-00-032 Rev.
Luminex100 IS Developer Guide to xMAP Technology Version 2.2 xMAP Technology 8. Edit the Events and Caption field for each bead set. Use the Default Events field to change the default value. Click Apply to All to apply the default value to all bead sets. Table 3 lists selection shortcuts. Table 3: Bead Set Tab—Selection Shortcuts Selected Column Highlight/Select desired rows under column and right-click. You may select or deselect.
xMAP Technology Acquisition Detail Tab Legend shows available commands and their coloredcoded symbols. Symbol appears in the well when selected from Command Menu Table 4: Symbol Color Codes Symbol Color Blue A Red C1 Green C2 Teal N1 Purple N2 Olive W Black D Fuchia S Figure 9. New Advanced Batch—Plate Layout Tab 12. To select a single well, click the well. To select multiple wells in a group, click and hold the mouse button over the first well, then drag the cursor around the desired wells.
Luminex100 IS Developer Guide to xMAP Technology Version 2.2 xMAP Technology 14. Preliminary Off-Plate commands are performed before the first selected well on the plate and are indicated by a green square in the top left corner of the plate. To configure a Preliminary OffPlate command select Preliminary Off-Plate Cmd(s) from the menu or right-click on the corner marker. The command list dialog box appears similar to Figure 12. Double-click the desired commands to select and click OK when done.
xMAP Technology Acquisition Detail Tab Square corner indicator turns green when Preliminary OffPlate command is defined Right-click well to display Command Menu Figure 11. New Advanced Batch—Command Menu 15. You can define Off-Plate commands following an acquisition. Double-click a well or select Insert Off-Plate Cmd(s) from the menu. See Figure 11. At the Off-Plate menu double-click the desired Cmd Name to perform. This displays the desired command in the command list.
Luminex100 IS Developer Guide to xMAP Technology Version 2.2 xMAP Technology 16. After you define the desired fields on the General, Bead Set, and Plate Layout tabs click OK. Click Cancel to abort. Note: You can edit settings after selecting OK. View Batch Data You can only view batches that were acquired using templates. You cannot view the batch data for batches that were acquired using the New Advanced Batches function of Acquisition Detail.
xMAP Technology Acquisition Detail Tab Batch Name and Description: The Batch Name and Description are displayed in the upper left corner of the Acquisition Detail tab. See Figure 14. Figure 14. Batch Name, Description, Autosize, and Statistics Autosize. This button automatically adjusts column widths to fit the data and header sizes. Statistics. Defines which statistic you use to display your sample data. Select an entry from the scroll list.
Luminex100 IS Developer Guide to xMAP Technology Version 2.2 xMAP Technology remaining numbers for the %CV, Count, Mean, Peak, or StdDev calculations. Maximize. Click this button to expand the Batch Data to full screen. After you click the button it changes to the Minimize button. Thus, you can toggle the display. Batch Data Area. The Batch Data area displays the sample results. The left column displays the plate location. The remaining columns display selected bead sets for the assay.
xMAP Technology Acquisition Detail Tab Table 6: DD Gate Relationships Gate Width: Wider Narrower %CV (within sample) Higher Lower Sample Acquisition Speed Faster Slower To determine and set optimal gate settings: 1. Create a New Advanced batch with DD gate settings at 0 - 32767 (make sure all other settings are appropriate for your sample). 2. On plate layout choose a single well with the Acquire command to obtain a single sample. Note: The sample is representative of the expected assay samples.
Luminex100 IS Developer Guide to xMAP Technology Version 2.2 Histogram Buttons and Field xMAP Technology There are four buttons and the Show Bead field at the top of the histogram: Show Bead. Select an entry from the drop-down list to define how you want to display events. You can define: only one bead set [bead set number], events, or events. Typically, select (default) to set the gates. Note: The calculated data uses only events to determine the final result.
xMAP Technology Acquisition Detail Tab At the Acquisition Detail tab, hover the mouse pointer over a region and click mouse to display the bead name Figure 16. Dot Plot Example The Density Dot Plot displays a constant accumulation of events. Increasing density is indicated by contrasting colors. See Table 7 for the density dot plot color legend. Table 7.
Luminex100 IS Developer Guide to xMAP Technology Version 2.2 xMAP Technology Figure 17. Dot Plot Pull-Down Menu 2. Select the Y Axis entry, then select the desired value from the list. To change the X axis category: 1. Right-click anywhere in the Dot Plot to display the pull-down menu. 2. Select the X Axis entry, then select the desired value from the list. Dot Plot Buttons Use the four buttons at the top of the frame to control the display: Density/Decaying.
xMAP Technology Luminex 100 IS Developer Workbench Software Luminex 100 IS Developer Workbench Software After developing an assay, use the Developer Workbench software to create the template file that accompanies the assay kit to the end user. You can access the Developer Workbench software with or without the Luminex 100 IS software running: 1. With the Luminex 100 IS software running, the Developer Workbench toolbar appears on the Acquisition Detail Tab.
Luminex100 IS Developer Guide to xMAP Technology Version 2.2 xMAP Technology When entering information into the various system dialog boxes, you may see an asterisk at the top-right corner of the entry field, indicating that the information is required. If a field does not have an asterisk by it, then the information is optional. For example, in Figure 19 you must enter the Template Name and Version No. Asterisk indicates required field Figure 19.
xMAP Technology Definitions Create Products See the Glossary in the Luminex 100 IS User Manual Version 2.2 for complete detailed definitions. Analyte. Any substance which is detected through assay analysis. Typically, each bead set represents a single analyte. In this application, there is one test or bead set associated with an analyte. Bead Set. A set of xMAP microspheres that have a uniquely identifiable ratio of two classification dyes. The unique ratio is identified by a unique spectral address.
Luminex100 IS Developer Guide to xMAP Technology Version 2.2 Assay Standards xMAP Technology To create a product that consists of only standards: 1. Click Create New Product on the Developer Workbench toolbar. The Create New Products dialog box appears with a list of current products. See Figure 20. Note: When the system is started for the first time, the New button is grayed out. At this point, the system is ready for entry of a new product. Figure 20. Create New Product Dialog Box 2.
xMAP Technology Create Products 6. Enter the Test Name (analyte) and Test Units used for each test. Note: If the test name is similar and the units are the same for each test, after entering the first test name and unit, click the Apply Suffix or Apply Unit buttons as appropriate. Apply Suffix—this button applies the number one to the first test name. For each successive test name it applies the test name and number at one increment higher than the previous test name.
Luminex100 IS Developer Guide to xMAP Technology Version 2.2 xMAP Technology Cyberxlabs xt Cyberxlabs xt Select Control Figure 21. Create New Product—Create Control Products 3. Select Control. 4. Enter the Product Number, Product Name, and Manufacturer Name for the product. 5. Enter the Number of Tests for this product and press Enter key. Each test represents a bead set (the bead ID for each test is selected when creating the template using this product). 6.
xMAP Technology Create Products Apply Unit—this button applies the same unit value that you entered on the first line to all other tests. For example, if you enter the mg/uL value for the first Test Unit, then select the Apply Unit button to make all test units mg/uL. 7. Enter the Number of Controls (assay) for this product and press Enter key. 8. Enter the Reagent Name for each control in this product. Each control reagent must test for every analyte (bead set) used in the assay.
Luminex100 IS Developer Guide to xMAP Technology Version 2.2 xMAP Technology Cyberxlabs xt Cyberxlabs xt Cybexrlabs xt Cyberxlabs xt Cyberxlabs xt Select Both Figure 22. Create New Product—Create Products With Standards and Controls 4. Enter the Product Number, Product Name, and Manufacturer Name for one of the product. 5. Enter the Number of Tests for this product and press Enter key.
xMAP Technology Create Products Apply Suffix—this button applies the number one to the first test name. For each successive test name it applies the test name and number at one increment higher than the previous test name. For example: Suffix = Protein, then Test 1 is Protein 1, Test 2 is Protein 2, and so on. Apply Unit—this button applies the same unit value that you entered on the first line to all other tests.
Luminex100 IS Developer Guide to xMAP Technology Version 2.2 Create Templates xMAP Technology There are four template types: • • • • Quantitative Qualitative Data Collection Only Maintenance (no tests) You can create each Quantitative and Qualitative template using one product that is composed of a definable number of standards and controls.
xMAP Technology Create Templates 2. Fill in the general information about your company, the author of the template, the name and version for the template you are creating, and a brief description. The version number of the template, which is required, is very important because it is automatically included in the template name that the lab personnel see when they select the template to use with a kit. Note: The information included on the screen will be seen and used by the end-user of the kit. 3.
Luminex100 IS Developer Guide to xMAP Technology Version 2.2 xMAP Technology Apply Standard/Control button Figure 24. Next Template Setup Wizard Dialog Box 8. Click Apply Standard/Control to add a standards product to your template. The Open Reagent Product dialog box appears. See Figure 25. Cyberxlabs xt Cyberxlabs xt Cyberxlabs xt Cyberxlabs xt Cyberxlabs xt This list shows all saved products you created. Select the desired product from the list Cyberxlabs xt Figure 25.
xMAP Technology Create Templates 9. Highlight the product that you want added to the template. The test and reagent information appears for the highlighted product to help you make your selection. You cannot edit this information here. Note: If the desired product is not present in the list, select New to create a new product. 10. Select the product to add to your template and click Open. 11. The system applies the standards and/or controls in the product to the template.
Luminex100 IS Developer Guide to xMAP Technology Version 2.2 xMAP Technology 13. In the Min Beads field, enter the number of beads to collect for each test. The Apply Min Beads button applies the same min bead requirement that you entered on the first line to all other tests. 14. Click a Curve Fit field to see a list of formulas. Select one of the curve fit formulas for each test. The available curve fit formulas are listed in Table 8.
xMAP Technology Create Templates If desired, you can use the Apply Curve Fit button to apply the same formula, that you selected on the first line, to all other tests. 15. Click Next to move to the next Template Setup Wizard dialog box. See Figure 28. Figure 28. Template Setup Wizard Dialog Box—Select Template Commands 16. Select commands from the Available Commands list and move them to the Template Commands list using the single arrow pointing toward the template command button.
Luminex100 IS Developer Guide to xMAP Technology Version 2.2 xMAP Technology Table 9: Available Commands Command 44 Definition Acquire Acquires an unknown sample. Acquire Background Acquires a background sample from a well. The background results are automatically subtracted from standards, controls, and samples. If you are running more than one background well, the software will subtract the average of the background samples. Acquire Control Acquires the specified control from a well.
xMAP Technology Create Templates Table 9: Available Commands (Continued) Command Definition Sanitize Acquires sanitizing solution from the reservoir to sanitize or eliminate air in the cuvette. Skip Program a well skip into template Verify CON 1 Acquire CON 1 beads from a well to verify that the system is working within the calibrated settings. Verify CON 2 Acquire CON 2 beads from a well to verify that the system is working within the calibrated settings.
Luminex100 IS Developer Guide to xMAP Technology Version 2.2 xMAP Technology Select Qualitative Figure 29. Template Setup Wizard Dialog Box 2. Fill in the general information about your company, the author of the template, the name and version for the template you are creating, and a brief description. The required version number of the template is very important because it is automatically included in the template name that the lab personnel sees when they select the template to use with a kit. 3.
xMAP Technology Create Templates 7. Click Next. The next Template Setup Wizard dialog box appears. See Figure 30. Select Apply Standard/ Control Figure 30. Template Setup Wizard Dialog Box—Apply Standards or Controls 8. Click Apply Standard/Control to add a product. The Open Reagent Product dialog box appears. See Figure 31. PN 89-00002-00-032 Rev.
Luminex100 IS Developer Guide to xMAP Technology Version 2.2 xMAP Technology Cyberxlabs xt Cyberxlabs xt Cyberxlabs xt Cyberxlabs xt Cyberxlabs xt This list shows all saved products. Select the desired product from the list Cyberxlabs xt Figure 31. Open Reagent Product Dialog Box 9. Highlight the product to add to the template. The test and reagent information appear for the product highlighted to help you make your selection. You can not edit the information here.
xMAP Technology Create Templates down chart (optionally, select the first bead ID then click Apply Bead ID Increment +1 to auto fill the remaining entries with sequential bead IDs). See Figure 32. Figure 32. Template Setup Wizard Dialog Box—Select Bead IDs 13. In the Min Beads field, enter the number of beads to collect for each test. The Apply Min Beads button applies the same min bead requirement that you entered on the first line to all other tests. 14. Select one of the qualitative formulas listed.
Luminex100 IS Developer Guide to xMAP Technology Version 2.2 xMAP Technology Use formula as is: The Lum Qual Ki (Quali) values should be entered in lot information as “1”, while the “Ki” (Quali) value for the Adv Lum Qual should be entered as “20” to correspond to the example’s default value and ranges. See Table 10 on page 52. Edit Formula: To edit, select/highlight Adv Qual Formula under Qualitative Analysis Method of the Template Setup Wizard. See Figure 36. Select the Edit Formula button.
xMAP Technology Create Templates e. For this example, type Non-reactive in the Range Name: field. Type 0 in the Low Value field and 25 in the High Value field. Select OK. The new range is added to the Range Editor dialog box. f. Select Add Range again. The Range dialog box appears. This time, type Reactive for the range name, 25 for the Low Value and 75 for the High Value. Select OK. The new range is added to the Range Editor dialog box. g. Verify ranges and select Exit.
Luminex100 IS Developer Guide to xMAP Technology Version 2.2 xMAP Technology Table 10: Algorithm Formulas Qualitative Analysis Method Algorithm Lum Qual Formula FI sample -----------------------× Ki FI s tan dard Adv Qual Formula FI sample -----------------------× Ki FI s tan dard Default Values Default Ranges 0 to .9 .9 to 1.1 1.
xMAP Technology Create Templates template. Each well command is automatically assigned to the next available well. Laboratory personnel can select the starting location on the plate during batch setup, but cannot change these commands. Remember, if you have more than one command that involves the reservoir, those actions must use the same solution. For a complete list of command descriptions see Table 9 on page 44. 17. After entering all the information for your template, check it carefully.
Luminex100 IS Developer Guide to xMAP Technology Version 2.2 xMAP Technology Select Data Collection Only Figure 38. Template Setup Wizard Dialog Box—Select Data Collection Only 3. Select Data Collection Only for the Template Type. 4. Enter the Sample Vol (uL) for this template. This is the amount of sample that will be tested. The volume in the wells must be at least 25 uL greater than the sample volume. 5. Enter a Sample Timeout (sec) for this template.
xMAP Technology Create Templates In the Tests field, enter desired number of tests. Figure 39. Template Setup Wizard Dialog Box—Enter the Number of Tests 8. Select the Tests field and enter the number of desired tests and then press the Enter key. A blank entry for each test appears in the adjacent area (each test represents an analyte bound to a unique bead set). 9. Enter the Name, Units, and Description fields for each test.
Luminex100 IS Developer Guide to xMAP Technology Version 2.2 xMAP Technology Figure 40. Template Setup Wizard Dialog Box—Define Test Parameters 10. Select the Bead Id for each test. Type the Bead Id or select it from the drop-down chart (optionally, select the first bead ID then click Apply Bead ID Increment +1 to auto fill the remaining entries with sequential bead IDs). See Figure 41. Figure 41. Template Setup Wizard Dialog Box—Select Bead IDs 56 PN 89-00002-00-032 Rev.
xMAP Technology Create Templates 11. In the Min Beads field, enter the number of beads to collect for each test. The Apply Min Beads button applies the same min bead requirement that you entered on the first line to all other tests. 12. Click Next to move to the next Template Setup Wizard dialog box. See Figure 42. Figure 42. Template Setup Wizard Dialog Box—Select Template Commands 13.
Luminex100 IS Developer Guide to xMAP Technology Version 2.2 Maintenance Template xMAP Technology Create a Maintenance Template for an easy startup procedure, shutdown procedure, troubleshooting, or calibration. Make sure that any maintenance template you create is consistent with instrument operations and maintenance requirements. See the Luminex 100 Integrated System User Manual Version 2.2 for more information. To create a Maintenance template: 1. Click the Create Template button on the toolbar.
xMAP Technology Create Templates 5. Click Next to move to the next Template Setup Wizard dialog box. See Figure 44. Figure 44. Template Setup Wizard Dialog Box—Select Template Commands 6. Select commands from the Available Commands list and move them to the Template Commands list using the single arrow (>) pointing towards the template command field. These commands are then part of the template and are always performed in the order specified for any batch that uses this template.
Luminex100 IS Developer Guide to xMAP Technology Version 2.2 Template Maintenance xMAP Technology The Luminex 100 IS system allows you to edit and delete existing templates. Note: If a batch is associated with a template, then the template ID is shown in light blue. You can only edit these templates if they are given a new template name. We also recommend assigning a new version number to the template. You can only delete these templates if the associated batches are deleted first.
xMAP Technology Template Maintenance Figure 46. Template Setup Wizard Dialog Box—Select Template Information 3. Locate the information that you want to change using the Next and Back buttons at the bottom of all the Template Setup Wizard dialog boxes. 4. Change the template information or settings and click Next, then click Save. Click Close to exit. The system saves the changes that you make.
Luminex100 IS Developer Guide to xMAP Technology Version 2.2 xMAP Technology Figure 47. Open Template Dialog Box—Select a Used Template to Edit 2. Select the template to edit (the template ID cell is blue) and click Edit. The Template Setup Wizard dialog box appears showing the selected template. See Figure 48. Figure 48. Template Setup Wizard Dialog Box—Select Template Information 3. Define the Template Name and assign a new Version number to the template. 62 PN 89-00002-00-032 Rev.
xMAP Technology Template Maintenance 4. Locate the information to change using the Next and Back buttons at the bottom of all the Template Setup Wizard dialog boxes. 5. Change the template information or settings and click Save, then click Close to exit. The system saves the changes. Delete an Unused Template (No Associated Batches) To delete templates that do not have batches associated. 1. Click Edit Template. An Open Template dialog box appears. See Figure 49. Figure 49.
Luminex100 IS Developer Guide to xMAP Technology Version 2.2 xMAP Technology 3. Click Cancel to close the dialog box. Delete a Used Template (with Associated Batches) To delete templates that do have batches associated with them: If the template has batches associated the template ID cell is blue and the Delete button for that entry is grayed out. In this case, use the Delete Batch button on the left side of the screen. You must delete associated batches, then you can delete the template.
xMAP Technology Print Template Information Template Maintenance The Luminex 100 IS system allows you to print information and details about a template. There are two ways to print templates. The first method is the easiest and preferred method. The second method allows you to print a template during creation or editing. To print template information: 1. Click Edit Template. The Open Template dialog box appears. See Figure 52. Figure 52. Open Template Dialog Box—Select Template To Print 2.
Luminex100 IS Developer Guide to xMAP Technology Version 2.2 xMAP Technology Figure 53. Template Setup Wizard Dialog Box—Select Template Information 3. Edit the desired template fields. Click Next. The next Template Setup Wizard dialog box appears. See Figure 54. The Print button is grayed out and not usable until the edits are saved. The Print button is grayed out and not usable. Save during the edit or create process Figure 54.
xMAP Technology Template Maintenance 4. Click Save. The Print button becomes active. 5. Click Print at the bottom of the Template Setup Wizard dialog box. A Template Report dialog box appears displaying information about the open template. See Figure 55. Figure 55. Template Report Dialog Box 6. Click the Print icon at the top of the Template Report dialog box. The Microsoft Windows Print dialog box appears. See Figure 56. Figure 56. Print Dialog Box PN 89-00002-00-032 Rev.
xMAP Technology Template Maintenance 7. Select the desired printer and other options. Click Print. 8. Click the X at the top-right corner of the Template Report dialog box to close the dialog box. Import a Template To import a template: 1. Click Import Template on the toolbar. Then, navigate to the file or disk location containing the template using “Look In”. The Import Template dialog box appears listing the available templates with the idt extension. See Figure 57. 2.
xMAP Technology Help Figure 58. Open Template Dialog Box 2. Select the template to export and click Export. The Template Saved dialog box appears listing the path to the exported template location. See Figure 59. In this example, the path is: C:\Program Files\Luminex\Luminex 100 IS\ExportedTemplates. Figure 59. Template Saved Dialog Box 3. Click OK. 4. Copy the template from the folder to a diskette or CD.
xMAP Technology Help 2. From the drop-down menu select About Developer Workbench. See Figure 60. Figure 60. Help Menu 3. An About Developer Workbench dialog box appears listing the Developer Workbench name, version, and copyright information. See Figure 61. Version 2.0.315 Figure 61. About Developer Workbench Dialog Box 4. Click OK. The dialog box closes. System Information To list system information: 1. Click Help on the Developer Workbench toolbar. 2.
xMAP Technology Help 3. Click System Info. The System Information dialog box appears. See Figure 62. Figure 62. System Information Dialog Box 4. Click on the “X” (upper right corner of the box) to close the System Information box. On-line Help On-line help is available at any time. 1. Click Help on the Developer Workbench Toolbar. 2. From the drop-down menu select Contents - Developer Workbench. See Figure 63. Figure 63. Select On-line Help 3.
xMAP Technology PN 89-00002-00-032 Rev.
A Compatibility with Luminex 100 Version 1.7 Certain settings in the Luminex 100 Version 1.7 software need to have particular values for your assay to be compatible with the Luminex 100 IS system. See Table 11. Table 11: Value Settings for the Luminex 100 Default bead map: 100 regions Sample size: between 20 and 200 µL Events per bead: recommend 100 Flow rate: Fast Note: You cannot have Luminex 100 Version 1.7 and Luminex 100 IS loaded on the same system.
Luminex100 IS Developer Guide to xMAP Technology Version 2.2 xMAP Technology Figure 64. Options Dialog Box 3. Click New Session on the main screen. From the New Session screen click Settings on the toolbar. On the General tab of the Settings dialog box, set Sample Size to a size between 20 and 200 µL. Set Flow Rate to Fast. Click OK. See Figure 65. Figure 65. Settings Dialog Box 74 PN 89-00002-00-032 Rev.
B xMAP Protocols Updates or additions to these protocols are posted on the Luminex website at http://www.luminexcorp.com/ats.
Luminex100 IS Developer Guide to xMAP Technology Version 2.2 xMAP Technology effective in resuspending the microspheres or preventing aggregation. Over time, it is normal to observe a presence of beads on the surface of the liquid in the stock vials. You may also notice a container wall residue and suspended macrobead aggregates. While these conditions are typical, the severity may increase with repeated opening and pipetting from the vials.
xMAP Technology It is not advisable to construct an assay without defining the concentration of the subject-coupled microsphere preparation. The total surface area (total number of microspheres) represented in an assay is a critical variable, so the optimization and control of this variable begins with manipulation of known microsphere numbers. Microspheres can be counted with a hemacytometer. Please follow counting and calculation methods outlined in the instructions for your hemacytometer.
Luminex100 IS Developer Guide to xMAP Technology Version 2.2 xMAP Technology Two-Step Carbodiimide Coupling of Protein to Luminex Carboxylated Microspheres Introduction Use the protocols included here as a general starting point for developing assays. All assays should be optimized for your reagents in your specific application. You will discover the methods that give you the best results by starting with these guidelines and modifying them for your specific needs.
xMAP Technology Preparation 1. Allow all reagents to warm to room temperature. 2. Dilute the protein stock with COUPLING BUFFER to a concentration of 25 - 250 µg/mL and a volume of at least 500 µL (See Technical note 2). 3. Using an analytical balance, weigh approximately 10 mg of Sulfo-NHS into a tube. Repeat for EDC (See Technical note 1). Procedure Microsphere activation. 1. Centrifuge the xMAP microsphere stock for 1 minute at 10,000 × g. 2.
Luminex100 IS Developer Guide to xMAP Technology Version 2.2 xMAP Technology 13. Add 500 µL of COUPLING BUFFER to the activated microspheres and vortex. Centrifuge the activated microspheres for 1 minute at 10,000 × g. Aspirate the supernatant. 14. Repeat the previous step and go immediately to the protein coupling steps. Coupling, blocking, and storage. 1. To initiate the coupling reaction, add 500 µL of the protein preparation (protein stock in COUPLING BUFFER) to the activated microspheres; vortex. 2.
xMAP Technology One-Step Carbodiimide Coupling of Oligonucleotides to Luminex Carboxylated Microspheres Introduction Use the protocols included here as a general starting point for developing assays. All assays should be optimized for your reagents in your specific application. You will discover the methods that give you the best results by starting with these guidelines and modifying them for your specific needs.
Luminex100 IS Developer Guide to xMAP Technology Version 2.2 xMAP Technology 4. Remove the supernatant, being careful not to disturb the pellet. 5. Add 50 µL of 0.1 M MES (pH 4.5). Vortex and sonicate. 6. Add 1 nmole of amino-substituted oligonucleotide (i.e., 1 µL of a 1 mM solution). Vortex briefly (See Technical note 3). 7. Immediately before use, add 1.0 mL of sterile water to 10 mg of EDC powder (See Technical note 4). Vortex until dissolved. 8. Add 2.
xMAP Technology 3. The optimal coupling concentration for a given oligonucleotide is determined by coupling at various concentrations within the recommended range of 1 to 50 µM. 4. Minimize the exposure of EDC to air; secure closures on stock and dry aliquot containers, store desiccated at -20°C. Use aliquots immediately and discard containers after use. Make a fresh 10 mg/mL EDC solution before each addition. PN 89-00002-00-032 Rev.
Luminex100 IS Developer Guide to xMAP Technology Version 2.2 xMAP Technology Binding Biotin-conjugated Molecules to LumAvidin-Modified Microspheres Introduction Use the protocols included here as a general starting point for developing assays. All assays should be optimized for your reagents in your specific application. You will discover the methods that give you the best results by starting with these guidelines and modifying them for your specific needs.
xMAP Technology 5. Add 250 µL of the REACTION BUFFER (See Technical note 2). Vortex. 6. Add 250 µL of the Biotin-conjugated molecule solution to the microsphere suspension. Vortex immediately. 7. Rotate the mixture for 30 minutes in the dark at room temperature. 8. Centrifuge the microspheres for 1 minute at 10,000 × g. Aspirate the supernatant. 9. Add 500 µL of BLOCKING/STORAGE BUFFER to the microspheres and vortex. Centrifuge the tube for 60 seconds. Aspirate the supernatant. 10. Repeat step 9. 11.
xMAP Technology PN 89-00002-00-032 Rev.
Index Symbols %CV 1-23 A About Developer Workbench 1-69, 1-70 about this guide 1-1 accuracy and precision specifications 1-2 Acquire 1-44 Acquire Background 1-44 Acquire Control 1-44 Acquire Standard 1-44 Acquire Test Specimen 1-44 Acquisition Detail New Advanced Batch 1-11 Acquisition Detail tab 1-9 main features 1-9 Acquisition Detail Toolbar 1-10 Advanced Batch, definition 1-16 Analyze Reprocessed Data with Replay Batch 1- 14 Apply Suffix button 1-33 Apply Unit button 1-33 Assay Controls 1-33 assay co
Luminex100 IS Developer Guide to xMAP Technology Version 2.
xMAP Technology New Product 1-12 nonheated assays, assays nonheated 1-8 numerical position of gate 1-24 O On-line Help 1-71 On-line help 1-71 optimal gate settings 1-25 Overview 1-1 P Pause 1-12 Peak 1-23 performance specifications 1-2 plates 1-8 Prime 1-44 Print Template Information 1-65 print template information 1-65 printing methods 1-65 printing template information 1-65 procedures 1-30 procedures, create products 1-30 procedures, create templates 1-30 procedures, template maintenance 1-30 Q Qualit
Luminex100 IS Developer Guide to xMAP Technology Version 2.