uBoard Hardware Installation Guide (V2.2) All contents of this publication are subject to change. 2011.
uBoard Hardware Installation Guide (V2.2) INDEX 1. Verify Components before Installation ---- 3 2. Station Installation ---- 3 2.1 Connecting USB cable properly ---- 4 2.2 Connection VGA cable properly ---- 4 3. Digital Pen ---- 5 3.1 Key features ---- 5 3.
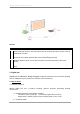
uBoard Hardware Installation Guide (V2.2) 1. Verify Components before Installation. Before hardware installation, firstly, please check if components listed below are included in the package. If you find missed one, please contact the store you purchased. . 1 2 3 4 5 6 7 Item Station Digital Pen Active Link USB Cable Recharging battery Cable Station Holder Pen tip Quantity 1 1 1 1 1 4 5 Remarks Including Calibration & Board SW 5M 1M 2. Station Installation. 2.1 Connecting USB Cables properly. 2.1.
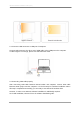
uBoard Hardware Installation Guide (V2.2) 2.1.2 Connect USB connector to USB port of Computer. Connect USB connector, the other end of USB cable, to the USB port on the computer. If cable length is not enough, please use USB extension cable. 2.2 Connecting VGA cable properly. After connecting USB cable between uBoard station and computer, connect VGA cable between Beam project and the computer. It is the last step for hardware installation.
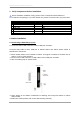
uBoard Hardware Installation Guide (V2.2) NOTICE: . Notice 1 Avoid using this device in the environment that air is blown directly to receiver from air conditioner or heater.
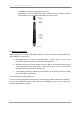
uBoard Hardware Installation Guide (V2.2) - Low button: executes the right button of mouse. Upper button: executes window Exit when to push it during a couple of seconds. (This function is only available during MINT control is active.) 3.2 Digital Pen operation uBoard digital pen is using rechargeable battery to avoid environment contamination with maximizing user convenience. a.
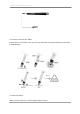
uBoard Hardware Installation Guide (V2.2) 3.2.2 How to check the pen status. Press pen tip or pen button, then you can hear low beep sound generated by the pen when it works properly. 10 sec . 3.2.3 Pen tip change When pen tip is worn-out, it can be replaced with new one.
uBoard Hardware Installation Guide (V2.2) [To remove] Turn pen-tip to right or left direction by 90 degrees and then pull it out carefully [To insert] Insert pen-tip into pen cage and turn it to right or left direction by 90 degrees to lock it. Notice: Possible to overheat, explode, fire or etc. Do not expose to heat(130°F), imapct, chops or etc Careful of inhaled or bited case by children or pets Prohivits to insert metals to charger connector or sink in water.