
User Manual


ASSIGNING AND REMOVING ACTIONS
Actions activate different tools and functions within
the editing software (e.g., activate a brush tool,
add a marker etc.). You can add and remove these
activations (actions) to and from the Loupedeck CT
device to best match your own workflow.
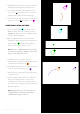
Assign an action to the device
• Select workspace or general element you want to
configure
• Click either the element on the Loupedeck CT
image or the element tab
• Drag and drop action from the left column
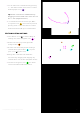
• Search for a desired action using search bar
on top of the action group list.
• Find the desired action manually by opening a
corresponding group:
• Workspaces, Actions, General Actions, Tools or
Pages
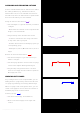
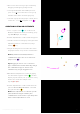
Remove an action from the device
• Select the workspace or general element you
want to configure
• Select the page (if there are more than one page,
see the next chapter: Working with Pages).
• Drag and drop assigned functions out of the
device to an empty area around the Loupedeck
CT image (red circle)
WORKING WITH PAGES
As you drag Actions to the Loupedeck CT, you are
adding them to a page. Every element has at least
one page (e.g. Dial Page, Touch Page, Wheel Page).
When one page is full of assigned actions, you can
create a new page for more actions. The number of
available pages has not been limited.
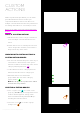
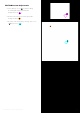
Selecting a page
• Select the element (e.g. Touch Buttons)
• Click on the desired page on the right-side
section
Copyright (c) 2017 Loupedeck Ltd. All rights reserved. 11