
User's Manual
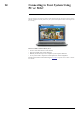
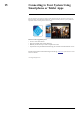
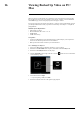
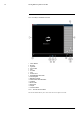


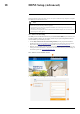
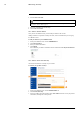

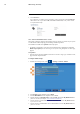
Table Of Contents
- 1 Important Safeguards
- 2 Package Contents
- 3 Recorder Overview
- 4 Basic Setup
- 5 Using the Mouse
- 6 Using the Recorder’s On-Screen Display
- 7 Recording
- 8 Playback
- 9 Search & Backup
- 10 Managing Users, Passwords and Permissions
- 11 Pairing Cameras
- 12 Storage
- 13 Using the Main Menu
- 13.1 Main Menu Overview
- 13.2 Settings Menu
- 13.2.1 Changing a Camera’s On-Screen Display (OSD)
- 13.2.2 Enabling / Disabling Cameras
- 13.2.3 Camera Firmware
- 13.2.4 Enabling Audio
- 13.2.5 Changing the Display Resolution
- 13.2.6 Menu Transparency
- 13.2.7 Configuring Basic Network Settings
- 13.2.8 Setting up Email Notifications
- 13.2.9 Setting an Email Schedule
- 13.2.10 Configuring Motion Detection Settings
- 13.3 System Menu
- 13.4 Advanced Menu
- 14 Connecting to Your System Using PC or MAC
- 15 Connecting to Your System Using Smartphone or Tablet Apps
- 16 Viewing Backed Up Video on PC/Mac
- 17 Smart Home & Voice Assistance
- 18 DDNS Setup (Advanced)
- 19 Troubleshooting
- 20 Technical Specifications

Smart Home & Voice Assistance17
This recorder is compatible with third-party smart home solutions such as Google Assistant®
and Amazon Alexa®. You can use these services to take your security experience to the next lev-
el, with smart home options that make accessing your system even easier.
For compatibility information, as well as full instructions on setup and use, visit
lorex.com/SmartHome.
To enable Smart Home services on the recorder:
1. From the live viewing screen, click
> Settings > Voice Assistance, then select
Google or Amazon.
2. Enter the email address you use to log into your Google Home/Amazon account, then click
Bind.
#LX400115; r. 3.0/57178/57178; en-US 70