
User's Manual
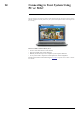
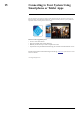
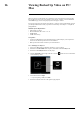
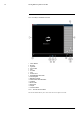


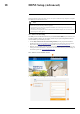

Table Of Contents
- 1 Important Safeguards
- 2 Package Contents
- 3 Recorder Overview
- 4 Basic Setup
- 5 Using the Mouse
- 6 Using the Recorder’s On-Screen Display
- 7 Recording
- 8 Playback
- 9 Search & Backup
- 10 Managing Users, Passwords and Permissions
- 11 Pairing Cameras
- 12 Storage
- 13 Using the Main Menu
- 13.1 Main Menu Overview
- 13.2 Settings Menu
- 13.2.1 Changing a Camera’s On-Screen Display (OSD)
- 13.2.2 Enabling / Disabling Cameras
- 13.2.3 Camera Firmware
- 13.2.4 Enabling Audio
- 13.2.5 Changing the Display Resolution
- 13.2.6 Menu Transparency
- 13.2.7 Configuring Basic Network Settings
- 13.2.8 Setting up Email Notifications
- 13.2.9 Setting an Email Schedule
- 13.2.10 Configuring Motion Detection Settings
- 13.3 System Menu
- 13.4 Advanced Menu
- 14 Connecting to Your System Using PC or MAC
- 15 Connecting to Your System Using Smartphone or Tablet Apps
- 16 Viewing Backed Up Video on PC/Mac
- 17 Smart Home & Voice Assistance
- 18 DDNS Setup (Advanced)
- 19 Troubleshooting
- 20 Technical Specifications

Connecting to Your System Using
PC or MAC
14
You can connect to you security system over the Internet using our free Lorex Client 13 for PC
and Mac computers. Securely connect to your system from anywhere with no recurring fees for
live viewing.
The Lorex Client 13 software allows you to:
• View live video from cameras over the Internet
• Play back recorded video from the hard drive
• Manually record video clips or save snapshots to your computer’s hard drive
• Access your recorder’s complete set of menu options for remote configuration
For full setup instructions and advanced support, click here to open the Lorex Client 13 instruc-
tion manual.
#LX400115; r. 3.0/57178/57178; en-US 65