
User's Manual


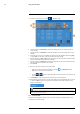
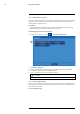
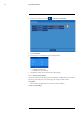


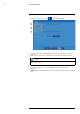
Table Of Contents
- 1 Important Safeguards
- 2 Package Contents
- 3 Recorder Overview
- 4 Basic Setup
- 5 Using the Mouse
- 6 Using the Recorder’s On-Screen Display
- 7 Recording
- 8 Playback
- 9 Search & Backup
- 10 Managing Users, Passwords and Permissions
- 11 Pairing Cameras
- 12 Storage
- 13 Using the Main Menu
- 13.1 Main Menu Overview
- 13.2 Settings Menu
- 13.2.1 Changing a Camera’s On-Screen Display (OSD)
- 13.2.2 Enabling / Disabling Cameras
- 13.2.3 Camera Firmware
- 13.2.4 Enabling Audio
- 13.2.5 Changing the Display Resolution
- 13.2.6 Menu Transparency
- 13.2.7 Configuring Basic Network Settings
- 13.2.8 Setting up Email Notifications
- 13.2.9 Setting an Email Schedule
- 13.2.10 Configuring Motion Detection Settings
- 13.3 System Menu
- 13.4 Advanced Menu
- 14 Connecting to Your System Using PC or MAC
- 15 Connecting to Your System Using Smartphone or Tablet Apps
- 16 Viewing Backed Up Video on PC/Mac
- 17 Smart Home & Voice Assistance
- 18 DDNS Setup (Advanced)
- 19 Troubleshooting
- 20 Technical Specifications

Using the Main Menu13
2. Select a time period from the dropdown next to Menu Timeouts.
• 30s–10min: Menus will disappear after the set time period if there is no activity on the
system.
• OFF: Menus will never time-out due to inactivity.
3. Click Save.
13.3.5 Configuring Daylight Savings Time (DST)
Customize settings for Daylight Savings Time (DST) based on your region or preference.
To configure Daylight Savings Time:
1. From the live viewing screen, click
> System > General > DST.
2. Select Enable from the dropdown next to DST.
3. Select the time difference to use for DST from the dropdown next to Time Offset.
4. Use the dropdown next to Daylight Saving Time to select a mode of entry for effective
dates:
• Select Week to choose DST time changes that are relative to the day of the week (for ex-
ample, on the second Sunday of March).
• Select Date to choose a specific date and time for each DST time change (for example,
on March 13th at 2:00AM).
5. Enter the desired Start Time and End Time for Daylight Savings Time. System time will
move forward an hour at the start time, and back an hour at the end time.
6. Click Save.
13.3.6 Configuring NTP
Network Time Protocol (NTP) allows the recorder to sync with an NTP time server to ensure
that system time is always accurate.
Prerequisites:
• The recorder must be connected to a router or switch on your network using the included
Ethernet cable. A constant connection to the Internet is required to use NTP.
To configure NTP:
#LX400115; r. 3.0/57178/57178; en-US 55