
User's Manual
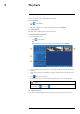
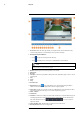

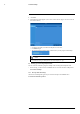


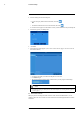

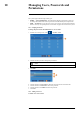
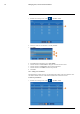
Table Of Contents
- 1 Important Safeguards
- 2 Package Contents
- 3 Recorder Overview
- 4 Basic Setup
- 5 Using the Mouse
- 6 Using the Recorder’s On-Screen Display
- 7 Recording
- 8 Playback
- 9 Search & Backup
- 10 Managing Users, Passwords and Permissions
- 11 Pairing Cameras
- 12 Storage
- 13 Using the Main Menu
- 13.1 Main Menu Overview
- 13.2 Settings Menu
- 13.2.1 Changing a Camera’s On-Screen Display (OSD)
- 13.2.2 Enabling / Disabling Cameras
- 13.2.3 Camera Firmware
- 13.2.4 Enabling Audio
- 13.2.5 Changing the Display Resolution
- 13.2.6 Menu Transparency
- 13.2.7 Configuring Basic Network Settings
- 13.2.8 Setting up Email Notifications
- 13.2.9 Setting an Email Schedule
- 13.2.10 Configuring Motion Detection Settings
- 13.3 System Menu
- 13.4 Advanced Menu
- 14 Connecting to Your System Using PC or MAC
- 15 Connecting to Your System Using Smartphone or Tablet Apps
- 16 Viewing Backed Up Video on PC/Mac
- 17 Smart Home & Voice Assistance
- 18 DDNS Setup (Advanced)
- 19 Troubleshooting
- 20 Technical Specifications

Managing Users, Passwords and Permissions10
1. From the live viewing screen, click
> System > Users.
2. Click one of the user accounts that is currently disabled.
3. Click Edit.
4. Select ON from the dropdown next to User Enable.
5. Click the field next to User Name to change the user name for the account.
6. Click the field next to Password to enter the desired password.
7. Click the field next to Confirm to reenter the password.
8. Click Save.
10.3 Setting User Permissions
The administrator account is the only account that has full control of all system functions. You
can enable or disable access to certain menus and functions of each user account.
To edit user permissions:
1. From the live viewing screen, click
> System > Users.
#LX400115; r. 3.0/57178/57178; en-US 34