
Owner's Manual


45
Using the Main Menu
For example, if you select a 3 minute
interval, the DVR will send out email
notifications every 3 minutes until the DVR
stops detecting motion / alarm. The DVR
will only send out notifications when it
detects motion/alarm triggers.
3 Click Apply to save your settings.
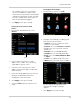
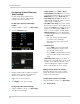
If you want to use Lorex’s email
server:
1 In the
Email drop-down menu, select
Default.
2 In
the Sender field, enter the email
address of the sender. This can be any
email address of your choice.
3 In the
Receiver field, enter the email
address you want the DVR to send alarm
notifications to.
4 In the
Interval drop-down menu, enter the
Duration the DVR must wait before
sending out a new notification.
5 Cl
ick Apply to save your settings.
6 Cl
ick the TEST button to send out a test
email.
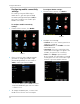
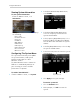
To configure PTZ settings:
1 F
rom the Device menu, click PTZ.
2 Configur
e the following according to your
PTZ camera’s specifications:
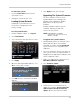
• Channel: Sel
ect the channel the PTZ
camera is connected to.
• Protocol: Select from Pelco-D or Pelco-P
• Bauder rate: Select the PTZ camera’s
baude rate
• Data Bits: Select from 5~8 data bits.
• Stop Bits: Select from 1 or 2 stop bits.
• Parity: Select from None, Odd, Even, Mark
or Space.
• Cruise: Select On to enable PTZ cruise.
• Address: Enter the PTZ camera’s address
Use the Copy To drop-down menu to
copy
the PTZ settings to multiple
channels.
3 Click Appl
y to save your settings.
Default
PTZ