
User's Manual


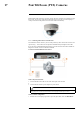
Table Of Contents
- 1 Important Safeguards
- 2 Package Contents
- 3 Recorder Overview
- 4 Basic System Setup
- 5 Camera Installation
- 6 Using the Mouse
- 7 Using the On–Screen Display
- 8 Recording
- 9 Playback
- 10 Backup
- 11 Motion Detection
- 12 Face Detection
- 13 Active Deterrence
- 14 Managing Passwords and User Accounts
- 15 Using the Main Menu
- 16 Smart Home & Voice Assistance
- 17 Pan/Tilt/Zoom (PTZ) Cameras
- 18 Connecting Audio Devices
- 19 Replacing the Hard Drive
- 20 DDNS Setup (Advanced)
- 21 Troubleshooting
- 22 Technical Specifications
- 23 Notices

Using the Main Menu15
2. Click INFORMATION, click the Update/Reset tab, then click Update on the top panel.
3. Click Browse.
4. Click on the .bin firmware file for your recorder.
5. Click Start.
15.11.11 Automatic Firmware Upgrades
Firmware upgrades provide enhanced functionality. The system will automatically check for
firmware upgrades if it is connected to the Internet.
To configure automatic firmware upgrade:
1. From the Live View display, right-click to open the Quick Menu, then click Main Menu.
2. Click INFORMATION, click the Update/Reset tab, then click Update on the top panel.
3. Ensure Automatically Check for Updates is enabled ( ). Click Check for Updates
to check if a newer version is available.
4. If a newer version is found, click Upgrade Now to upgrade the system.
15.11.12 Import System Settings from a USB Flash Drive
If you have backed up your system configuration, you can import it to apply all your saved menu
settings.
Prerequisite:
• Connect a USB flash drive (not included) to a free USB port on the unit with an exported sys-
tem configuration (see 15.8.6 Save System Settings to a USB Flash Drive, page 69 for full
details).
To import system settings:
1. From the Live View display, right-click to open the Quick Menu, then click Main Menu.
#LX400111; r. 5.0/56648/56651; en-US 79