
User's Manual
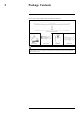


Table Of Contents
- 1 Important Safeguards
- 2 Package Contents
- 3 Recorder Overview
- 4 Basic System Setup
- 5 Camera Installation
- 6 Using the Mouse
- 7 Using the On–Screen Display
- 8 Recording
- 9 Playback
- 10 Backup
- 11 Motion Detection
- 12 Face Detection
- 13 Active Deterrence
- 14 Managing Passwords and User Accounts
- 15 Using the Main Menu
- 16 Smart Home & Voice Assistance
- 17 Pan/Tilt/Zoom (PTZ) Cameras
- 18 Connecting Audio Devices
- 19 Replacing the Hard Drive
- 20 DDNS Setup (Advanced)
- 21 Troubleshooting
- 22 Technical Specifications
- 23 Notices

Basic System Setup4
CAUTION
The system will automatically match the resolution of the connected monitor the first time you use the recorder.
If you need to switch monitors, make sure you set the recorder to an output resolution supported by the new
monitor BEFORE switching. See 15.5.1 Setting the Recorder’s Output Resolution, page 51 for details.
4.5 STEP 5: Connect power
Use the included power adapter to connect the recorder to a nearby outlet. Turn the recorder on
using the power switch on the back panel.
4.6 STEP 6: Lorex Setup Wizard
When you first power up your recorder, the Lorex Setup Wizard will begin. The Wizard will
help you configure core system settings and set up your cameras. It is recommended to review ,
page before choosing a permanent mounting position for your cameras.
NOTE
For detailed mounting instructions for your particular camera model, refer to your camera’s documentation on
lorex.com.
You will also create a password that will be used to access the unit from now on. For future refer-
ence, it is recommended that you record your password in a secure location.
4.7 STEP 7: Upgrade Firmware to Latest Version (If Available)
If a firmware upgrade is available, you will be asked to install it once the system starts up. It is
required to upgrade your system firmware and client software or mobile apps to the latest ver-
sion to enable remote connection to the system.
#LX400111; r. 5.0/56648/56651; en-US 7