
Owner's Manual


29
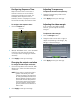
Using the Main Menu
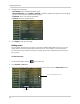
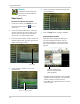
Display
The display menu allows you
to configure DVR image
settings, and general
settings on how your DVR
displays names and titles on
screen.
Tip: When you want
to apply th
e setting
to multiple channels, click the "Copy
To" drop-down menu, and select All.
Click the Copy button to copy the setting
across all channels.
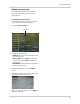
Changing the channel name
1 In the Channel drop-down menu, select
the channel that you wish to re-name.
2 Double-click the "Name"
field. Use the
mouse to enter in the new channel name.
3 Click Apply
to save your settings.
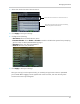
Changing the position of the
channel name
1 In the Position drop-down menu, select
one of the following:
• U-L : Upper left hand corner
• D-L: Lo
wer left hand corner
• U-R: Upper right hand corner
• D-R: Lower right hand corner
2 Click Apply
to save your settings.
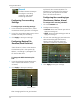
Adjusting the image color
1 In the Channel drop-down menu, select
the channel that you wish to configure.
2 Click the Setup butt
on. The Color Setup
window opens.
3 Drag the slider to adjust the color values
fo
r the following: Hue, Brightness,
Contrast, Saturation.
4 Cl
ick A
pply to save your settings.
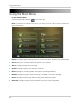
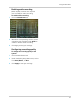
Enabling Covert Recording
Covert Recording blanks out the screen
so that it seems as if the system is not
recording.
To enable covert recording:
1 In the Channel drop-down menu, select
th
e channel you wish to apply covert
recording to.
2 In the Covert drop-down menu, select
En
able.
3 Cl
ick A
pply to save your settings.
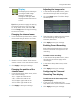
Configuring the Time and
Recording Time display
To add/remove the time stamp in the
system display:
1 In the Live Time and Record Time
dr
op-down menu, select enable or disable.
2 Click A
pply to save your settings.
Channel drop-down menu