
- Lorex Technology LCD Monitor Instruction Manual


53
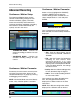
Advanced Recording
Continuous / Motion Schedule
Sets the Time or Motion recording for each
channel (by hour). Select single or multiple
time blocks:
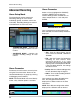
• Mouse Control: Click a single block to
open the Recording Type Menu. Click
and Drag a block of times to configure
multiple channels and times at once.
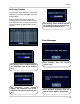
• Remote Control & Front Panel:
Navigate to the Channel Block section,
and the entire block will be highlighted
with a White outline:
z Press the ENTER button to access the
Time Blocks - the first hour on Channel 1
will be highlighted in Yellow.
z Navigate to the desired time block, and
press the ENTER button to activate the
block - if a single block is desired, press
ENTER a second time.
z To select multiple blocks, use the arrows
to drag the cursor until the desired time
blocks are selected and press the
ENTER key.
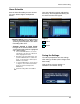
Once the desired time(s) have been
selected, the Recording Setting menu is
displayed.
Select from:
• NONE: Recording is turned OFF.
• CONTINUOUS: Recording is always
ON.
• MOTION: Only starts the recording if
motion is detected in the selected time
interval.
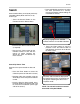
NOTE: This system has an Advanced
Recording Feature where BOTH Continuous
and Motion can be set to ON at the same
time:
z The system will record continuously, but
when motion is detected the system will
display a M recording type on the
relevant channel.
z The event will be logged as Motion in the
system archive.
z This is useful in situations where you
want to have continuous recording, but
wish to have Motion detected for easier
event searching.
z In addition, an e-mail notification can be
sent when Motion has been detected.
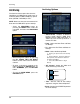
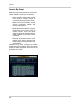
Select the RETURN button to apply the
changes. Once the settings have been
adjusted for the hour(s), the changed time
block(s) will be shown based on the legend:
Legend:
• None
• Continuous
• Motion
• Continuous & Motion