
User's Manual


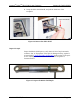
Table Of Contents
- Table of Contents
- Chapter 1: Introduction
- Chapter 2: Theory of Operation
- Chapter 3: Safety
- Chapter 4: Clinical Guide
- Chapter 5: Preparing the System for Use
- Chapter 6: Operating Instructions
- Chapter 7 - Troubleshooting and Maintenance
- Handling Error Messages and Notifications
- Troubleshooting
- Initialization Error Message Appears
- System Does Not Turn On
- Inadequate or No Aiming Beam
- No Laser Energy Emission
- “Popping” or “Tapping” Coming Sound from the Fiber Port
- Fiber Burn Back
- Unrecognized Fiber
- A Notification or Error Message Appears on the Control Panel
- System Overheats
- Message Appears: Attach an Authorized Fiber
- Message Appears: Attach fiber
- Message Appears: Attach footswitch
- Message Appears: Check footswitch
- Message Appears: Check interlock
- Message Appears: Insert debris shield
- Message Appears: No lasers
- Message Appears: Energy high
- Message Appears: Energy low
- Message Appears: Rate high
- Message Appears: Rate low
- Routine Periodic Maintenance
- Hospital/Clinic Staff Maintenance
- Professional Maintenance
- Chapter 8: System Requirements and General Information
- Appendix A: EMC Guidance and Manufacturer's Declaration

Lumenis
®
Pulse
TM
50H / 100H Laser Systems Hospital/Clinic Staff Maintenance
UM-20006520DE, Rev. A Page 58
Hospital/Clinic Staff Maintenance
Visual Inspection
The exterior of the system should be inspected once a week to ensure that
there are no loose cable connections and that there is no damage to the
system.
Routine Exterior Cleaning
The external surfaces of the system (console, LCD panel) and the
footswitch should be cleaned when the system is received, and thereafter
as required by clinic protocol.
The outer surfaces of the system may be wiped clean with a soft, lint-free
cloth dipped in 70% isopropyl alcohol, or a hospital-grade disinfectant
solution.
CAUTION:
Do not spray or pour cleaning agents directly on the laser console or
control screen. You may damage the console, screen and laser system
electronics.
Remote Interlock Check
Laser beam emission is disabled when the remote interlock plug is not
connected or the connected door is not closed. To check this:
1. Set the system to Ready mode.
2. Unplug the remote interlock connector plug; the system should display
the following message in the notification bar: Check Interlock. re-
insert the interlock connector plug.
3. Open the connected door; the system should display the following
message in the notification bar: Check Interlock.
4. If the system does not display the message and remains in Ready
mode, discontinue use and contact Lumenis Service.