You can download these instructions in pdf format at: www.logicom-europe.
We, LOGICOM 55, rue de Lisbonne 75008 Paris France Declare that the LOGICOM MANTA 155T, MANTA 255T and MANTA 355T DECT telephone products with answering machine and hands-free are in compliance with the essential requirements applicable and in particular the requirements of guideline 1999/5/EC, which are as follows: Article 3.1a - (protection of the user's health and security): - EN 60950-1/ A12:2011 Article 3.1b - (protection requirements concerning electromagnetic compatibility): - EN 301 489-6 V1.3.
The device presentation .................................................................................................. 5 1 – General characteristics .......................................................................................... 5 2 – Precautions for use ................................................................................................ 6 3 – Included in box .......................................................................................................
5 – Transferring an external call to another handset .................................................. 29 6 – 3-way conference calling...................................................................................... 30 Redial list ....................................................................................................................... 30 1 – Viewing the REDIAL list .......................................................................................
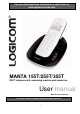
The device presentation 1 – General characteristics The general characteristics of your MANTA phone are: Handset • 3 line LCD screen (1 alphanumeric line + 2 icon lines) • GAP compatible. • Possibility of associating up to 5 handsets on 1 base. • Automatic registration with additional MANTA handsets. • Range: 50 metres inside and 300 metres in open field. • Battery Life: 100 hours in standby mode. 10 hours of communication.
• Customised remote consultation code • Personal message recording (memo) • Messages available via the base or handset • Remote activation/deactivation • Memory full indicator • Memory backed up in case of power cuts 2 – Precautions for use •Carefully read through the instructions provided. •Only use the power adaptor provided. •Do not install in a dusty area or prone to vibrations or shocks. •Do not place your device close to a magnetic source (television, speakers, etc.) as this may cause interference.
Battery performance In ideal conditions, a fully charged battery allows for 10 hours of communication or 100 hours in standby mode. New batteries perform best after several days of use. To optimise battery performance, do not leave the handset on the base all day. The battery's life span will be prolonged by allowing it to fully deplete once per week. The charge limit for rechargeable batteries decreases over time due to use, also reducing the handset's communication and standby time.
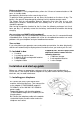
2 – Installing and charging rechargeable batteries Installation: - Insert the 2 batteries (Type AAA Ni-MH/400mAh) into the compartment. Respect the polarity indication. - Close the battery compartment using the flap provided with the batteries in the packaging Charging the batteries: Before use, batteries must be charged (for the first time) for at least 24 hours. - Place the handset on the charging base, a confirmation signal will be heard.
Using the DOWN key, select "RING SETUP" Select "EXT RING" to choose the external ringtone or "INT RING" for the internal ringtone Select a new ringtone Return to the home screen 3-3 Modifying the ringtone volume Enter the menu and select the "HS SETTINGS" menu using the DOWN key Using the DOWN key, select "RING SETUP" Select "RING VOLUME" Configure the ringtone volume (from 1 to 5) or select "VOLUME OFF" to mute ringtone Return to the home screen Note: during a call, use keys volume to increase or decrease
4 – Basic use of your telephone 4-1- Calling 123 123 Normal dialling: Pick up the handset, then compose your correspondent's number Pre-dialling: Compose your correspondent's number, then pick up the handset Calling a contact via the directory: Enter the directory, then select a contact from the list Pick up your handset Once the call is finished, hang up your handset 4-2- Answering a call When the telephone rings, pick up your handset Once the call is finished, hang up your handset You can also hang up t
Diagrams and functions of the telephone 1 – Description of the keypad - Allows you to directly access the call log - Allows you to increase the volume during communication - Allows you to navigate through the menu - Allows you to return to the previous menu - Allows you to erase a figure or character - Allows inter-phone calling - During communication, allows you to activate (stop the microphone) or deactivate the secret function - Allows you to pick - Allows you to directly up the line or answer access
2 – Description of the base Registration key: - Allows you to set the base to handset registration mode (press and hold down for 10 seconds) - Allows you to call all the handsets configured to the base (press down quickly) Base speaker Delete key: - Pressing down quickly: Deletes the message displayed - Pressing and holding down: Deletes all messages Play/Pause keys: - Allows you to start or stop reading messages Flashing light: Flashes when there are new messages on the answering machine 3 – Descripti
Indicates that a function is accessible via the navigational keys Flashes when the handset is out of range or not associated to the base Flashes for incoming internal calls, and remains lit Indicates an ongoing internal call Indicates that hands-free is activated Indicates that there are messages on the answering machine Indicates that the ringtone has been muted Is displayed when the alarm is activated Indicates that the keypad is locked Indicates the reception of a new message on your operator's voicemail
Keys 1 2 3 4 5 6 7 8 9 0 1st Press SPACE A D G J M P T W 0 2nd Press B E H K N Q U X 3rd Press 1 C F I L O R V Y 4th Press 5th Press 2 3 4 5 6 S 8 Z 7 9 Note: Other characters are available using keys * and #.
x2 TONE SETUP KEY TONE Activate/deactivate the low battery sound alert. Activate/deactivate the x2 OUT OF RANGE sound when the handset is too far from the base. Modify the telephone language. x1 x4 REGISTRATION x5 DEFAULT x6 ANS MACHINE x3 LANGUAGE x4 RENAME HS x5 HS DISPLAY x6 AUTO ANSWER x7 DATE & TIME Activate/deactivate the key tones. BATTERY TONE Modify the name of the handset displayed during internal calls.
Handset functions 1 – Hands-free and listening volume of the handset During a telephone conversation, this function allows you to activate the handset speaker so as to listen and speak to your correspondent without having to hold the handset. CAUTION: Prolonged use of the hands-free function leads to important battery consumption, therefore considerably reducing the device's battery life. Adjust the listening volume of the handset or hands-free speaker.
3 – Secret function This function allows you, during communication, to talk to a third person without being heard by your correspondent. The message "VOLUME OFF" appears on screen and indicates that you are in secret mode When the secret function is activated, when you deactivate the function, the message "VOLUME OFF" disappears from the screen 4 – Deactivating/reactivating the handset ringtone If you desire, you can temporarily deactivate (stop) the handset ringtone.
6 – Handset calling This function allows you to call all handsets associated to a base. This is useful if you have misplaced a handset. • All handsets must be idle (no tone). • Quickly press the REGISTRATION key located on the base (Refer to chapter "Description de la base"). • All handsets associated to the base emit a beep and "PAGING" appears on the screens of all the handsets. • To stop the beep, press any key on the handsets or press the registration key located on the base.
Access via the menu Enter the PHONEBOOK" menu Navigate through the contacts ABC You can enter the first letter of the name desired; the telephone will take you directly to the first name in the list which starts by that letter.
4 – Deleting one or all contacts Deleting a contact Enter the PHONEBOOK" menu Select "DELETE" Select the contact that you would like to delete. Validate the deletion of the contact; a beep confirms the deletion of the contact Deleting all contacts Enter the "PHONEBOOK" menu Select "DELETE ALL" If there are no saved numbers in the directory, "EMPTY" appears on screen "CONFIRM?" appears on screen to confirm the deletion of all contacts Validate the deletion of all contacts, a beep confirms the deletion.
2 – Screen display You can choose the information displayed on screen when your handset is idle. There are two possibilities: the handset's name or the time. Enter the menu and, using the DOWN key, select the menu "HS SETTINGS" Select "HS DISPLAY" Select "TIME" or "HANDSET NAME" to choose the display you desire for idle mode 3 – Key tones You can activate and deactivate the key tones.
Enter the menu and, using the DOWN key, select the menu "HS SETTINGS" Select "TONE SETUP" Select "BATTERY TONE" Activate or deactivate the handset's key tones. 6 – Activate/Deactivate the out of range alert When activated, this function allows you to hear a beep, indicating that the handset is out of range. Enter the menu and, using the DOWN key, select the menu "HS SETTINGS" Select "TONE SETUP" Select "OUT OF RANGE" Activate or deactivate the handset's key tones.
Select "DATE & TIME" Select "DATE FORMAT" Select a format. A beep confirms the validation of the format. Select the time display format You can choose 24 hour clock format (e.g.
x2 123 Select the first figure from the hour section, "10H00" Modify this figure using the alphanumeric keypad from "1" to "2". "20H00" is displayed on the screen, Validate the modification. This process must be used to set a time between "20H00" and "23H00" when the telephone displays a time between "14H00" and "19H00". 9 – Alarm If the alarm is activated, it will be triggered every day at the set alarm time.
Select "CHANGE PIN" 123 "PIN? -----" appears on screen, enter the PIN code using the alphanumeric keys (the default PIN code is 0000) 123 "NEW PIN? -----" is displayed on the screen, type in the new PIN code. 123 "CONFIRM? ----- " is displayed on the screen, type in the new PIN code a second time, a beep confirms the PIN code change. Note: When restoring the factory settings, the default PIN code (0000) is automatically reactivated.
3 – Manual registration of a handset with the base You can associate up to 5 handsets with the base. • Press down the registration key located on the base for 10 seconds (Refer to chapter "Description de la base"). Your base is now in registration mode. Follow the registration procedure for the handset to be associated.
5 – Setting the flashing period (R) The R key allows you to access certain services provided by your operator. Contact your operator for more information concerning these services. WARNING: Default settings depend on your country of residence. In England, the flashing period is set to "SHORT" (100ms). Certain services may not operate for a short or long period, such as your operator's call signal management, for example.
The telephone's default settings are: Language: English External ringtone: 1 Internal ringtone: 2 Ringtone volume: 3 Key tones: Activated (ON) Low battery alert: Activated (ON) Out of range alert: Deactivated (OFF) Alarm deactivated (OFF) Time: 00:00 PIN code: 0000 Dialling mode: Tone dialling R key: SHORT (100ms) Time format: 24 Hour Handset name: HANDSET Automatic answer: Activated (ON) Enter the menu and use the DOWN key to select the "DEFAULT" menu "PIN?-----" appears on
2 – Calling all other handsets "HS23 9" is displayed on the screen (2 corresponds to the second handset registered with the base 3 corresponds the third registered handset) 123 Press the 9 button on the alphanumeric keypad to call all other handsets "CALL ALL HS" is displayed on the handset screen "CALL FR HS CBX" is displayed on the screen of each handset receiving the call (X corresponds to the number of the handset making the call.
"CALLING HS X" is displayed on the handset screen (X corresponds to the number of the handset you would like to call). For example: "CALLING HS 3") "CALL FR HS CBX" is displayed on the handset receiving the call (X corresponds to the number of the handset making the call. For example: "CALL FR HS 23" . When the internal correspondent picks up the handset receiving the call, hang up your handset and the internal correspondent will be in communication with the external correspondent.
Find the desired number amongst the last entered numbers in the REDIAL list Call the selected number 2 – Saving a number from the REDIAL list to the directory Access the REDIAL list The last number entered is displayed on the screen Select the number that you would like to save in the directory.
Call log The call log allows you to memorise the last 10 calls received. To have full access to or to modify the Call log on the handset, the handset must be in idle mode (no tones) CAUTION: To benefit from all of the following functions, you need to have a subscription to your phone operator name or number identification service subject to technical availability from your operator.
Access the call log The most recent name or number save in the log is displayed on the screen Navigate to view other names or numbers in the log View the number if the name is displayed in the log Enter the log menu and select "DETAIL" to view the time and date of the call. Call back the selected number 3 – Saving a number from the call log to the directory Access the call log The last number entered is displayed on the screen Select the number that you would like to save in the directory.
5 – Deleting the entire call log Access the call log The last number entered is displayed on the screen Enter the call log and select "DELETE ALL" "CONFIRM?" is displayed on the screen. A beep confirms that the content has been deleted from the call log Using the answering machine This device incorporates a numeric answering machine capable of saving entire messages up to a limit of around 15 minutes combined. You can access the answering machine from the base or the handset.
Recording a memo: Enter the menu and use the DOWN key to select the "ANS MACHINE" menu Select "MEMO" "RECORDING" is displayed on the screen whilst recording. End the recording. Note: The recording ends automatically after 1 minute Note: Memos are saved on the answering machine after received messages according to the time and date of the recording in the same way as externally received voice messages. To listen to a recorded memo, see the following chapter on listening to messages.
Enter the menu and use the DOWN key to select the "ANS MACHINE" menu Select "MSG PLAYBACK" New messages are then played back.
If the telephone line is using pulse dialling, a beeper must be used (not included).
Remote deactivation The answering machine is activated.
2 – Default recorded messages There are 2 default recorded messages (pre-recorded) in French and English, one for the recorder and the other for the answering machine only. These recorded messages are automatically activated if you do not record a personal message for the selected mode.
3 – Recording a personal message If you do not wish to use the default messages, you can record your own for both answering machine modes (Recorder/Answering machine only). Recording a personal message automatically deletes and replaces the default or previously recorded message. Note: A recorded message cannot be any longer than 60 seconds. When recording, speak 5 cm away from the microphone in a clear and steady voice.
Select "PLAYBACK" The recording is selected and played "PLAYING OGM" is displayed on the screen Stops the recording and is used to return to the main menu 5 – Setting the answering machine delay. When activated, the answering machine is prompted after 2, 4, 6 or 8 rings, depending on the setting. The answering machine can also be prompted when in the Call saver mode ("TIME SAVER").
7 – Activate/Deactivate remote consultation Enter the menu and use the DOWN key to select the "ANS MACHINE" menu Select "TAM SETTINGS" Select "REMOTE ACC" Choose either: "ON": to activate remote consultation "OFF": to deactivate remote consultation A beep will confirm your choice 8 – Modifying the remote consultation code The default remote consultation code is 0000. (Not to be mixed up with the base's PIN code) CAUTION: If you modify the remote consultation code, be sure to keep it written down.
Voicemail Voicemail is a service available on request from your operator. This service becomes the answering machine for your phone line. The icon is displayed on the screen to let you know one or several messages have been left on your operator's voicemail. To listen to you new messages, you must call the voicemail number given to you by your operator. 1 – Changing the voicemail access number By default, no number is registered.
CAUTION: In certain cases, after having listened to all your operator's voicemail messages, the icon remains displayed on the screen. To make it disappear, simply follow the instructions described in chapter "Deleting the entire call log" and this procedure will also allow you to erase the call log and erase the icon . A beep will be heard during or after the call: Recharge the handset batteries. Stand closer to the base.
The answering machine's memory is full; you must listen to all the messages then delete them to be able to record new massages. General information IMPORTANT This telephone was not made to place emergency calls during a power cut. Please ensure you make alternative arrangements. 1 – Replacing the handset batteries After a certain amount of time, the handset batteries may discharge faster. This is due to normal use. The batteries must be replaced. 1. Open the battery cover. 2.
interference with hearing aids. • It is wise to ask for professional advice before using this device in proximity to intensive care or emergency medical equipment. • If you have a pacemaker, we recommend asking your doctor for advice before using this device. • Your telephone may interfere with other electrical equipment, e.g. televisions and radio sets, clock/alarms and computers if placed too close.
Product disposal instructions for residential users If you no longer use the device, remove and dispose of the batteries, as well as the device, in compliance with the local recycling procedures. For more information please contact your local authority or the retailer where the product was purchased.