
User's Manual


User Manual Rev 1.11
Basic/Smart/Smart Plus/Intelligent Charger-32A
27
3. Electrical wiring to the charge point.
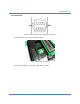
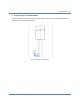
3-1. Disassemble top cover.
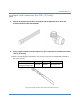
3-2. Use Philips screwdriver to release terminal screws.
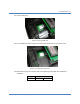
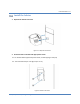
3-3. Fold the wire end to pass through the conduit and insert them into the input hole.
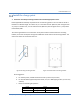
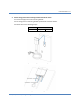
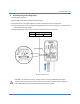
3-4. Fix the copper wire on the corresponding terminal block. The wiring instruction is printed in front
of the terminal block (L1/L2/G).
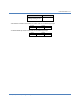
3-5. Use the following torque to connect the wire terminal to the terminal block.
Screw
Torque
M4
16 kgf.cm
13.88 lb-in
Figure 3-16 Input wiring
CAUTION: To reduce the risk of fire, connect only to a circuit provided with 40 amperes
maximum branch circuit overcurrent protection in accordance with the National Electrical
Code, ANSI/NFPA 70, and the Canadian Electrical Code, Part I, C22.1.