
Operators

22
OPERATION
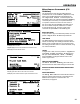
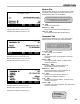
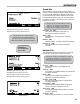
Setup New Vehicle
The Setup New Vehicle screen allows fuelers to add
new vehicles to the FleetConnect database, so that
when fuelers encounter a vehicle that doesn’t exist in
the FleetConnect database, they can enter it into the
FleetConnect database and fuel the vehicle on-the-spot
in the eld.
The fueler will need a RFID button to map in the DMS
i1000 and then attach to the new vehicle. It’s a good
practice to carry a bag of RFID buttons in the delivery
truck so they are on hand. To attach a RFID button to a
vehicle, nd a convenient spot near the fueling point on
the vehicle, clean it thoroughly, and stick the RFID button
onto the vehicle using double-sided tape.
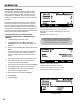
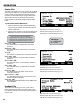
To map a button using a customer account
and vehicle le that exists in the FleetConnect
database:
1. Press Misc (F4) in Fill Vehicles screen.
2. Press PgDn (F4) to scroll the Miscellaneous
Commands
list down to the Setup New Vehicles
Command.
3. Move the pointer to Setup New Vehicles and press
Enter.
4. Attach the EZConnect button reader to the RFID button
and press the power button. The RFID number will
appear in the iButton eld of the Setup New Vehicles
screen.
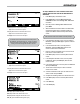
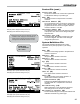
5. Select Account # to open the Customer File screen.
6. Select Account # to open a list box of customer
accounts in the FleetConnect database.
7. Move the pointer to a customer account and press Enter.
8. Select Vehicle # to open the Vehicle File screen.
9. Select Vehicle # to open a list box of vehicles
programmed to the selected customer.
10. Move the pointer to a vehicle and press Enter.
11. Press Add (F1).
12. Press Done (F5).
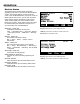
Add (F1) creates a Button File record of the displayed data
All (F2) opens each eld on the screen in succession
New (F3) opens Customer File (Account #:) or Vehicle File
(Vehicle #:)
Done (F5) opens Fill Vehicle screen
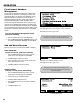
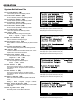
DO NOT CREATE BUTTON RECORDS IN THE BUTTON
FILE. Liquid Controls does not recommend creating or
editing les in the Button File. It is for viewing only.
Next (F1) opens Customer File (2/2)
New (F3) creates new Customer File record
Del (F4) deletes displayed Customer File record
Exit (F5) opens Database Management (1/2)
Selecting a Vehicle