
Instruction Manual

10
LECTROCOUNT SHUTDOWN VALUE SETTING
The unit is factory set with the default value of 25.0 PSID.
The maximum value that can be set is “59.9”.
∆P Default & Maximum Setting
To monitor the differential pressure without shutting down
a delivery, set the differential pressure shutdown value to
“00.0”. The LectroCount LectroCount register will continue
to monitor the differential pressure and print the maximum
differential pressure and owrate values on the delivery ticket.
Disabling the Shutdown Setting
To view the differential pressure reading during a delivery,
simply press the SELECT button three times with the
selector switch in the RUN position. This will scroll though
owrate, temperature and then differential pressure. After ve
seconds, the display will return to the current delivery total.
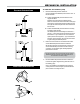
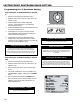
Viewing the ΔP Reading - LCR-II
The ∆P reading is displayed on the aviation
delivery screen during deliveries.
Viewing the ΔP Reading - LCR 600
Regardless of the differential pressure shutdown value
programmed , the system will force a shutdown should the
differential pressure exceed 60 PSID. This feature cannot
be disabled.
Global Shutdown Value
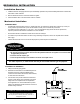
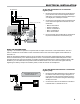
Selector Switch Six O’clock Position
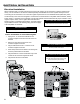
LCR-II ΔP Shutdown Setting Screen
LCR 600 System Setup Screen
II:
1. Remove the switch plate from the selector switch.
2. Rotate the selector switch to the six o’clock position, the
calibration mode.
3. Press the SELECT button until the display reads
“dP XX.X”. XX.X represents the current differential
pressure shutdown setting.
4. Press the INCREASE button to set the rst (leftmost) digit
to a number no greater than “5”.
5. Press SELECT to move to the next digit to the right.
Press INCREASE to set this digit to the desired value.
Continue until all three digits are set.
6. Press SELECT to set the new differential pressure
shutdown value. When the selector switch is rotated
clockwise out of the calibration mode, this new setting will
appear on the printed calibration ticket.
1. Remove the switch plate from the selector switch.
2. Rotate the selector switch to the six o’clock position, the
calibration mode.
3. From the Conguration Menu open the System Setup
screen.
4. Using the and buttons, move the pointer to the
∆P Shutdown Value:
eld and press the EntEr
button.
5. Enter the desired value and press the EntEr button.
When the selector switch is rotated clockwise out of the
calibration mode, this new setting will appear on the
printed calibration ticket.