
- LinkSys Wireless-G Broadband Router User Guide
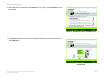
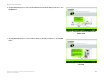


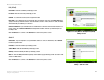

Table Of Contents
- Chapter 1: Introduction
- Chapter 2: Planning Your Wireless Network
- Chapter 3: Getting to Know the Wireless-G Broadband Router
- Chapter 4: Connecting the Wireless-G Broadband Router
- Chapter 5: Setting up the Wireless-G Broadband Router
- Chapter 6: Configuring the Wireless-G Broadband Router
- Appendix A: Troubleshooting
- Appendix B: Wireless Security
- Appendix C: Upgrading Firmware
- Appendix D: Windows Help
- Appendix E: Finding the MAC Address and IP Address for Your Ethernet Adapter
- Appendix F: Glossary
- Appendix G: Specifications
- Appendix H: Warranty Information
- Appendix I: Regulatory Information
- Appendix J: Contact Information
16
Chapter 5: Setting up the Wireless-G Broadband Router
Using the Setup Wizard
Wireless-G Broadband Router
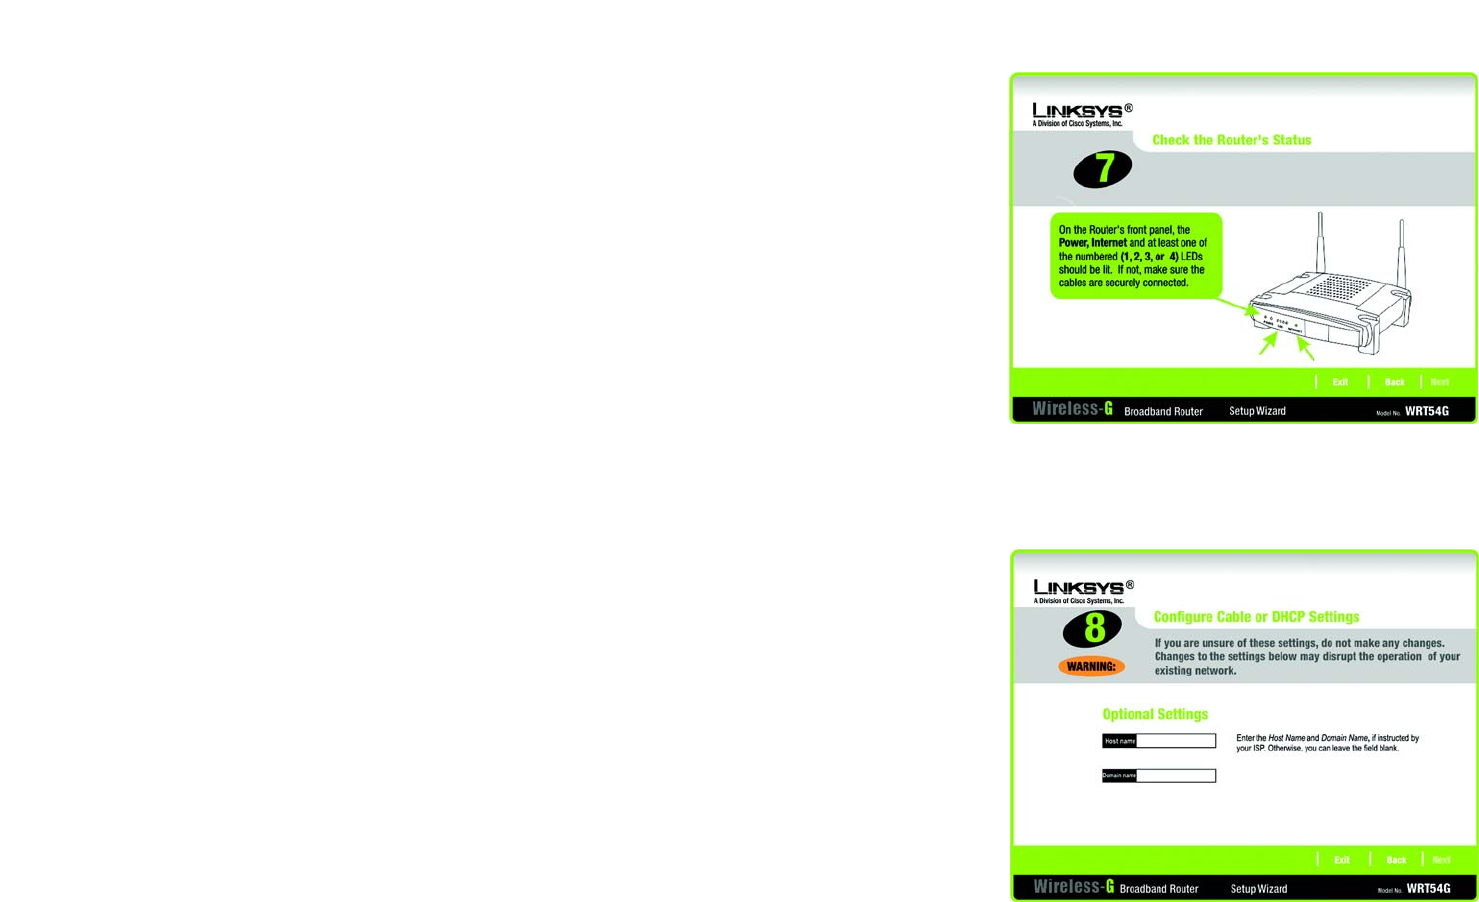
10. Make sure the Router’s Power, Internet, and numbered LEDs (depending on the number of PCs connected) are
lit on its front panel. After you have done so, click the Next button.
11. The Setup Wizard will automatically detect the Internet connection type you use: Cable or DHCP or DSL
(PPPoE). If the Setup Wizard cannot detect your Internet connection type, you will see the Advanced Internet
Settings screen, and you will be asked to select your Internet connection type: Static IP, PPTP, L2TP, or
Telstra. Proceed to the appropriate section for your Internet connection type.
Cable or DHCP
Host Name - Enter the Host Name if required by your ISP; otherwise, leave this field blank.
Domain Name - Enter the Domain Name if required by your ISP; otherwise, leave this field blank.
Click the Next button to continue or the Back button to return to the previous screen.
Figure 5-9: Setup Wizard’s Check the Router’s
Status Screen
Figure 5-10: Setup Wizard’s Configure Cable or DHCP
Settings Screen