USER GUIDE Wireless-N ADSL2+ Gateway Model No: WAG325N
About This Guide About This Guide Icon Descriptions While reading through the User Guide you may see various icons that call attention to specific items. Below is a description of these icons: NOTE: This check mark indicates that there is a note of interest and is something that you should pay special attention to while using the product. WARNING: This exclamation point indicates that there is a caution or warning and it is something that could damage your property or product.
Table of Contents Chapter 1: Product Overview 4 LEDs . . . . . . . . . . . . . . . . . . . . . . . . . . . . . . . . . . . . . . . . . . . . . . . . . . . . . . 4 Back Panel . . . . . . . . . . . . . . . . . . . . . . . . . . . . . . . . . . . . . . . . . . . . . . . . . . . 4 Chapter 2: Wireless Security Checklist 5 General Network Security Guidelines . . . . . . . . . . . . . . .
Table of Contents FCC Statement . . . . . . . . . . . . . . . . . . . . . . . . . . . . . . . . . . . . . . . . . . . . . . . 35 Safety Notices . . . . . . . . . . . . . . . . . . . . . . . . . . . . . . . . . . . . . . . . . . . . . . . 35 Industry Canada Statement . . . . . . . . . . . . . . . . . . . . . . . . . . . . . . . . . . . . . . . 35 Avis d’Industrie Canada . . .
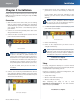
Product Overview Chapter 1 Chapter 1: Product Overview Thank you for choosing the Linksys Wireless-N ADSL2+ Gateway. The Gateway lets you access the Internet via a wireless connection or through one of its four switched ports. You can also use the Gateway to share resources such as computers, printers and files. A variety of security features help to protect your data and your privacy while online. Security features include WPA2 security, a Stateful Packet Inspection (SPI) firewall and NAT technology.
Wireless Security Checklist Chapter 2 Chapter 2: Wireless Security Checklist Wireless networks are convenient and easy to install, so homes with high-speed Internet access are adopting them at a rapid pace. Because wireless networking operates by sending information over radio waves, it can be more vulnerable to intruders than a traditional wired network. Like signals from your cellular or cordless phones, signals from your wireless network can also be intercepted.
Installation Chapter 3 Chapter 3: Installation 5. Repeat steps 1-4 for every computer or device that you want to connect to the Gateway via Ethernet. Linksys strongly recommends that you run the Setup CDROM. If you have problems running the Setup CD-ROM, use this chapter. If you connect more than four computers to the Gateway, you also need to connect a switch to the Gateway. Connection 1.
Advanced Configuration Chapter 3 Chapter 4: Advanced Configuration After setting up the Gateway with the Setup Wizard (located on the CD-ROM), the Gateway will be ready for use. However, if you’d like to change its advanced settings, use the Gateway’s web-based utility. This chapter describes each web page of the utility and each page’s key functions. You can access the utility via a web browser on a computer connected to the Gateway.
Advanced Configuration Chapter 3 VC Settings PPPoA Settings Configure your Virtual Circuit (VC) settings in this section. User Name and Password Enter the User Name and Password provided by your ISP. Multiplexing Select LLC or VC, depending on your ISP.
Advanced Configuration Chapter 3 IP Settings Your ISP provides these settings. Internet IP Address Enter the Gateway’s IP address, as seen from the Internet. Subnet Mask Enter the Gateway’s Subnet Mask, as seen from the Internet (including your ISP). Default Gateway Enter the IP address of the ISP server. Internet Connection Type > RFC 2516 PPPoE PPPoE Settings User Name and Password Enter the User Name and Password provided by your ISP.
Advanced Configuration Chapter 3 Optional Settings Host Name and Domain Name These fields allow you to supply a host and domain name for the Gateway. Some ISPs, usually cable ISPs, require these names as identification. You may have to check with your ISP to see if your broadband Internet service has been configured with a host and domain name. In most cases, leaving these fields blank will work.
Advanced Configuration Chapter 3 Automatically adjust clock for daylight saving changes Select this option if you want the Gateway to automatically adjust for daylight saving time. Time Settings and Language Network Address Server Settings (DHCP) Language DHCP Server A Dynamic Host Configuration Protocol (DHCP) server automatically assigns an IP address to each computer on your network for you. Unless you already have one, Linksys recommends that you keep the default, Enable.
Advanced Configuration Chapter 3 Password Enter the Password for your account. Host Name Enter the DDNS URL assigned by the service. Status The status of the DDNS service connection is displayed. Connect To manually trigger an update, click this button. Click Save Settings to apply your changes, or click Cancel Changes to cancel your changes. TZO.com Setup > MAC Address Clone Enable/Disable To have the MAC Address cloned, click the radio button beside Enable. MAC Address.
Advanced Configuration Chapter 3 Advanced Routing NAT Enabled/Disabled If this Gateway is hosting your network’s connection to the Internet, keep the default, Enabled. If another gateway or router exists on your network, select Disabled. Dynamic Routing RIP This feature enables the Gateway to automatically adjust to physical changes in the network’s layout and exchange routing tables with the other router(s).
Advanced Configuration Chapter 3 Wireless-B networking only, select Standard - 20MHz Channel. WPA2-Personal (Recommended) NOTE: If you select Wide - 40MHz Channel for the Radio Band setting, then Wirelss-N can use two channels: a primary one (Wide Channel) and a secondary on (Standard Channel). This will enhance Wireless-N performance.. Wide Channel If you selected Wide - 40MHz Channel for the Radio Band setting, then this setting will be available for your primary Wireless-N channel.
Advanced Configuration Chapter 3 Key Renewal Enter the Key Renewal period, which tells the device how often it should change the dynamic encryption keys. Click Save Settings to apply your changes, or click Cancel Changes to cancel your changes.v RADIUS (May affect wireless performance. WPA2 recommended) Security Mode > WPA2-Enterprise This option features WEP used in coordination with a RADIUS server. (This should only be used when a RADIUS server is connected to the device.
Advanced Configuration Chapter 3 26 hexadecimal characters in length. Valid hexadecimal characters are “0”-“9” and “A”-“F”. TX Key. To indicate which WEP key to use, select a default Transmit (TX) Key number. Click Save Settings to apply your changes, or click Cancel Changes to cancel your changes. WEP (May affect wireless performance. WPA2 recommended) Security Mode > WEP Encryption Select a level of WEP encryption, 64-bit or 128-bit. Passphrase Enter a Passphrase to automatically generate WEP keys.
Advanced Configuration Chapter 3 can transmit. The device will advertise its Basic Rate to the other wireless devices in your network, so they know which rates will be used. The device will also advertise that it will automatically select the best rate for transmission. The default setting is Default, when the device can transmit at all standard wireless rates (1-2Mbps, 5.5Mbps, 11Mbps, 18Mbps, and 24Mbps).
Advanced Configuration Chapter 3 reduction of the default value is recommended. In most cases, it should remain at its default value of 2346. RTS Threshold Should you encounter inconsistent data flow, only minor reduction of the default, 2346, is recommended. If a network packet is smaller than the preset RTS threshold size, the RTS/CTS mechanism will not be enabled. The Gateway sends Request to Send (RTS) frames to a particular receiving station and negotiates the sending of a data frame.
Advanced Configuration Chapter 3 Security > VPN access the tunnel. Under Local Secure Group, you may choose from Subnet and IP address. Under Remote Secure Group, you may choose from IP address, Subnet, and Any. Subnet If you select Subnet (which is also the default), this will allow all computers on the local subnet to access the tunnel. When using the Subnet setting, the default values of 0 should remain in the last fields of the IP and Mask settings.
Chapter 3 Advanced Configuration Authentication Authentication acts as another level of security. There are two types of authentication: MD5 and SHA (SHA is recommended because it is more secure). As with encryption, either of these may be selected, provided that the VPN device at the other end of the tunnel is using the same type of authentication. Or, both ends of the tunnel may choose to Disable authentication. packets. Select MD5 or SHA.
Advanced Configuration Chapter 3 From the Advanced Settings screen you can adjust the settings for specific VPN tunnels. Phase 1 Phase 1 is used to create a security association (SA), often called the IKE SA. After Phase 1 is completed, Phase 2 is used to create one or more IPSec SAs, which are then used to key IPSec sessions. Operation Mode There are two modes: Main and Aggressive, and they exchange the same IKE payloads in different sequences.
Advanced Configuration Chapter 3 To create a policy, follow steps 1-11. Repeat these steps to create additional policies, one at a time. 1. Select a number from the Internet Access Policy dropdown menu. 2. To enable this policy, select Enable. 3. Enter a Policy Name in the field provided. 4. Click Edit List of PCs to select which computers will be affected by the policy. The Internet Access PC List screen appears. You can select a computer by MAC address or IP address.
Chapter 3 Advanced Configuration IP Address For each application, enter the IP address of the computer that should receive the requests. IP Address For each application, enter the IP address of the computer running the specific application. Enabled For each application, select Enabled to enable port forwarding. Enable Select Enable to enable port forwarding for the applications you have defined. Click Save Settings to apply your changes, or click Cancel Changes to cancel your changes.
Advanced Configuration Chapter 3 Applications and Gaming > DMZ The DMZ feature allows one network computer to be exposed to the Internet for use of a special-purpose service such as Internet gaming or videoconferencing. DMZ hosting forwards all the ports at the same time to one PC. The Port Range Forwarding feature is more secure because it only opens the ports you want to have opened, while DMZ hosting opens all the ports of one computer, exposing the computer to the Internet.
Advanced Configuration Chapter 3 Applications Applications Select the appropriate application. If you select Add a New Application, follow the Add a New Application instructions. Priority Select the appropriate priority: High, Medium, Normal, or Low. Click the Add button to save your changes. Your new entry will appear in the Summary list. Add a New Application Online Game Add a New Application (MAC Address) Enter a Name Enter any name to indicate the name of the entry.
Advanced Configuration Chapter 3 Priority Select the appropriate priority: High, Medium, Normal, or Low. Gateway Access Click the Add button to save your changes. Your new entry will appear in the Summary list. Local Gateway Access Summary This lists the QoS entries you have created for your applications and devices. Priority This displays the bandwidth priority of High, Medium, Normal, or Low. Name This displays the application, device, or port name.
Advanced Configuration Chapter 3 UPnP Universal Plug and Play (UPnP) allows Windows XP and Vista to automatically configure the Gateway for various Internet applications, such as gaming and videoconferencing. UPnP If you want to use UPnP, keep the default, Enable. Otherwise, select Disable. WLAN Denial of Service Thresholds Enter the number of Denial of Service attacks that will trigger an e-mail alert. SMTP Mail Server Enter the IP address of the SMTP server.
Advanced Configuration Chapter 3 Ping Test Ping Test Parameters The ping test checks the status of a connection. Ping Target IP Enter the IP address that you want to ping. This can be either a local (LAN) or Internet (WAN) IP address. Ping Size Enter the packet size you want to use. The default is 60 bytes. Number of Pings Enter how many times you want to ping. The default is 1. Ping Interval Enter the number of milliseconds between pings. The default is 1000 milliseconds.
Advanced Configuration Chapter 3 instructions. Any custom Gateway settings you have saved will be lost when the default settings are restored. Administration > Firmware Upgrade The Firmware Upgrade screen allows you to upgrade the Gateway’s firmware. Do not upgrade the firmware unless you are experiencing problems with the Gateway or the new firmware has a feature you want to use. Status > Gateway Gateway Information Firmware Version The version number of the Gateway’s current firmware is displayed.
Advanced Configuration Chapter 3 Subnet Mask The Subnet Mask of the Gateway is displayed. DHCP Server DHCP Server The status of the Gateway’s DHCP server function is displayed. Start IP Address For the range of IP addresses used by devices on your local network, the starting IP address is displayed. End IP Address For the range of IP addresses used by devices on your local network, the ending IP address is displayed.
Advanced Configuration Chapter 3 Status > DSL Connection DSL Connection Status The status of the DSL connection is displayed. Downstream Rate The download speed of traffic from the Internet to the Gateway is displayed. Upstream Rate The upload speed of traffic from the Gateway to the Internet is displayed. For ADSL connection, the Upstream Rate is typically 25% of the Downstream Rate. NOTE: The Downstream and Upstream Rates are affected by distance from and configuration of the DSL central office.
Appendix A Appendix A: Troubleshooting Your computer cannot connect to the Internet. Follow the instructions until your computer can connect to the Internet: • Make sure that the Gateway is powered on. The Power LED should be green and not flashing. • If the Power LED is flashing, then power off all of your network devices, including the Gateway and computers. Then power on each device in the following order: • 1. Gateway 2.
Specifications Appendix B Appendix B: Specifications Model Number WAG325N Standards Draft 802.11n, IEEE 802.11g, IEEE 802.11b, IEEE 802.3u, IEEE 802.3, g.992.1 (g.dmt), g.992.2 (g.lite), g.992.3, g.992.5, T1.
Appendix C Appendix C: Warranty Information Linksys warrants to You that, for a period of three years (the “Warranty Period”), your Linksys Product will be substantially free of defects in materials and workmanship under normal use. Your exclusive remedy and Linksys’ entire liability under this warranty will be for Linksys at its option to repair or replace the Product or refund Your purchase price less any rebates. This limited warranty extends only to the original purchaser.
Appendix D Appendix D: Regulatory Information FCC Statement This product has been tested and complies with the specifications for a Class B digital device, pursuant to Part 15 of the FCC Rules. These limits are designed to provide reasonable protection against harmful interference in a residential installation. This equipment generates, uses, and can radiate radio frequency energy and, if not installed and used according to the instructions, may cause harmful interference to radio communications.
Regulatory Information Appendix D Declaration of Conformity with Regard to EU Directive 1999/5/EC (R&TTE Directive) Nederlands [Dutch]: Dit apparaat voldoet aan de essentiele eisen en andere van toepassing zijnde bepalingen van de Richtlijn 1999/5/EC.
Regulatory Information Appendix D The following standards were applied during the assessment of the product against the requirements of the Directive 1999/5/EC: • Radio: EN 300 328 and/or EN 301 893 as applicable • EMC: EN 301 489-1, EN 301 489-17 • Safety: EN 60950 and either EN 50385 or EN 50371 Dynamic Frequency Selection (DFS) and Transmit Power Control (TPC) are required for operation in the 5 GHz band. DFS: The equipment meets the DFS requirements as defined in ETSI EN 301 893.
Regulatory Information Appendix D France Product Usage Restrictions For 2,4 GHz, the product should not be used outdoors in the band 2454 - 2483,5 MHz. There are no restrictions when used in other parts of the 2,4 GHz band when used indoors. Check http://www.arcep.fr/ for more details. This product is designed for indoor usage only. Outdoor usage is not recommended, unless otherwise noted. Pour la bande 2,4 GHz, l’ équipement ne doit pas être utilisé en extérieur dans la bande 2454 - 2483,5 MHz.
Appendix D User Information for Consumer Products Covered by EU Directive 2002/96/EC on Waste Electric and Electronic Equipment (WEEE) This document contains important information for users with regards to the proper disposal and recycling of Linksys products.
Appendix D Regulatory Information Eesti (Estonian) - Keskkonnaalane informatsioon Euroopa Liidus asuvatele klientidele Français (French) - Informations environnementales pour les clients de l’Union européenne Euroopa Liidu direktiivi 2002/96/EÜ nõuete kohaselt on seadmeid, millel on tootel või pakendil käesolev sümbol , keelatud kõrvaldada koos sorteerimata olmejäätmetega. See sümbol näitab, et toode tuleks kõrvaldada eraldi tavalistest olmejäätmevoogudest.
Appendix D Regulatory Information Lietuvškai (Lithuanian) - Aplinkosaugos informacija, skirta Europos Sąjungos vartotojams Nederlands (Dutch) - Milieu-informatie voor klanten in de Europese Unie Europos direktyva 2002/96/EC numato, kad įrangos, kuri ir kurios pakuotė yra pažymėta šiuo simboliu (įveskite simbolį), negalima šalinti kartu su nerūšiuotomis komunalinėmis atliekomis. Šis simbolis rodo, kad gaminį reikia šalinti atskirai nuo bendro buitinių atliekų srauto.
Appendix D Regulatory Information Português (Portuguese) - Informação ambiental para clientes da União Europeia Slovenčina (Slovene) - Okoljske informacije za stranke v Evropski uniji A Directiva Europeia 2002/96/CE exige que o equipamento que exibe este símbolo no produto e/ou na sua embalagem não seja eliminado junto com os resíduos municipais não separados. O símbolo indica que este produto deve ser eliminado separadamente dos resíduos domésticos regulares.