
User Guide

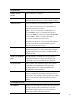
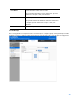
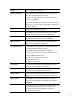

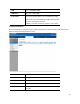
Table Of Contents
- Package Contents
- Access Point Setup Guide
- Setup to manage your access point with Linksys cloud server
- Step 1
- Make sure the access point is powered on and connected with an ethernet cable to your network with internet access. By factory default, the IP address is assigned by a DHCP server. If there is no DHCP server in your network, the default IP address is ...
- Log in to the access point’s browser-based admin tool locally and click the Configure LAN Settings link. Change the IP address or VLAN so the access point can access the internet.
- If the indicator light is off, check that the AC power adapter, or PoE cable, is properly connected on both ends.
- Step 2
- Setup to manage your access point locally with browser-based admin tool
- Setup to manage your access point with Linksys cloud server
- Cloud Management Interface
- Local Management Interface
- Appendix A - Troubleshooting
- Appendix B - About Wireless LANs
- Appendix C - PC and Server Configuration

81
HTTP Port
Once Additional HTTP Port is enabled, define an
additional port for HTTP protocol. The value can be
80 or 1024 to 65535 and is 80 by default. The HTTP
Port must be different from the HTTP port in
Administration > Management Access
page.
Additional HTTPS
Port
HTTPS portal authentication uses the HTTPS
management port by default. You can configure an
additional port for that process.
HTTPS Port
Once Additional HTTPS Port is enabled, define an
additional port for HTTPS protocol. The value can be
443 or 1024 to 65535 and is 443 by default. The
additional HTTPS Port must be different from the
HTTPS port in
Administration > Management Access
page.
Portal Profiles
Go to Configuration > Captive Portal > Portal Profiles to define detailed settings for Captive
Portal profile. Create up to two profiles.