
User Guide
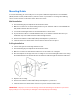

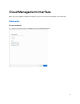
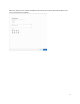
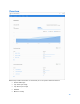
Table Of Contents
- Package Contents
- Access Point Setup Guide
- Setup to manage your access point with Linksys cloud server
- Step 1
- Make sure the access point is powered on and connected with an ethernet cable to your network with internet access. By factory default, the IP address is assigned by a DHCP server. If there is no DHCP server in your network, the default IP address is ...
- Log in to the access point’s browser-based admin tool locally and click the Configure LAN Settings link. Change the IP address or VLAN so the access point can access the internet.
- If the indicator light is off, check that the AC power adapter, or PoE cable, is properly connected on both ends.
- Step 2
- Setup to manage your access point locally with browser-based admin tool
- Setup to manage your access point with Linksys cloud server
- Cloud Management Interface
- Local Management Interface
- Appendix A - Troubleshooting
- Appendix B - About Wireless LANs
- Appendix C - PC and Server Configuration

5
Mounting Guide
To avoid overheating, do not install your access point if ambient temperatures exceed 104°F
(40°C). Install on a flat, stable surface, near the center of your wireless coverage area making
sure not to block vents on the sides of the device enclosure.
Wall Installation
1.
Position drilling layout template at the desired location.
2.
Drill four screw holes on the mounting surface. If your ethernet cable is routed behind the
wall, mark ethernet cable hole as well.
3.
Secure the mounting bracket on the wall with anchors and screws.
4.
If your ethernet cable is routed behind the wall, cut or drill the ethernet cable hole you
marked in Step 2. Feed the ethernet cable through the hole.
5.
Connect the ethernet cable and/or AC power adapter to your device.
6.
Slide the device into the bracket. Turn clockwise until it locks into place.
Ceiling Installation
1.
Select ceiling tile for mounting and remove tile.
2.
Position drilling layout template at the desired location.
3.
Drill four screw holes and ethernet cable hole on the surface of ceiling tile.
4.
Place back plate on the opposite side of ceiling tile. Secure mounting bracket to the ceiling
tile with flathead screw and nut. Route the ethernet cable through the ethernet cable hole.
5.
Replace tile in ceiling.
6.
Connect the ethernet cable and/or AC power adapter to your device
7.
Slide the device into the bracket. Turn access point clockwise until it locks.
IMPORTANT—Improper or insecure mounting could result in damage to the device or personal
injury. Linksys is not responsible for damages caused by improper mounting.