
User Guide
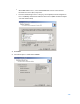
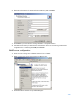
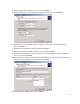
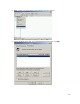

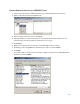
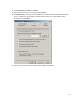
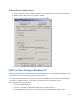
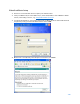
Table Of Contents
- Package Contents
- Access Point Setup Guide
- Setup to manage your access point with Linksys cloud server
- Step 1
- Make sure the access point is powered on and connected with an ethernet cable to your network with internet access. By factory default, the IP address is assigned by a DHCP server. If there is no DHCP server in your network, the default IP address is ...
- Log in to the access point’s browser-based admin tool locally and click the Configure LAN Settings link. Change the IP address or VLAN so the access point can access the internet.
- If the indicator light is off, check that the AC power adapter, or PoE cable, is properly connected on both ends.
- Step 2
- Setup to manage your access point locally with browser-based admin tool
- Setup to manage your access point with Linksys cloud server
- Cloud Management Interface
- Local Management Interface
- Appendix A - Troubleshooting
- Appendix B - About Wireless LANs
- Appendix C - PC and Server Configuration

129
Remote Access Login for Users
1.
Select Start > Programs > Administrative Tools > Active Directory Users and Computers.
2.
Double-click on the user who you want to enable.
3.
Select the Dial-in tab and enable Allow access. Click OK.
802.1x Client Setup on Windows XP
Windows XP ships with a complete 802.1x client implementation. If using Windows 2000, you can
install SP3 (Service Pack 3) to gain the same functionality.
If you don't have either of these systems, you must use the 802.1x client software provided with
your wireless adapter. Refer to your vendor's documentation for setup instructions.
The following instructions assume:
•
You are using Windows XP.
•
You are connecting to a Windows 2000 server for authentication.
•
You already have a login (User name and password) on the Windows 2000 server.