
Setup Guide


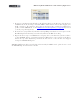
Table Of Contents

MIDI Setup Guide: MIDI Control with 3rd Party Applications
4•17
Here is an example of how to map the Expression Pedal controller to the Wah Position parameter of
the GearBox Plug-In, allowing you to remotely control the GearBox Wah in real-time as you hear
the input monitor recording signal or playback of your audio track. These mapping steps are the same
to map any knob, button, footswitch controller to any other available parameter in the ACT MIDI
Controller dialog as well...
• Open the SONAR ACT MIDI Controller dialog, and if you have not already done so, select the
Default preset. Leave this dialog open and where you can see it.
• Create an audio track in your SONAR project, and record or insert an audio file so you’ll have
something to hear your Plug-In effect applied to. A nice clean guitar recording wold work nicely
here.
• Click on an FX Bin Insert slot for this audio track and insert the GearBox Plug-In.
• In the GearBox Plug-In window, load a Tone preset, and click on the Wah pedal effect to make
sure it is “on” and to show the Wah effect’s edit settings in the edit panel.
The GearBox Plug-In Edit Panel, Wah effect
• With your “focus” still on the GearBox Plug-In window, you should now see the many GearBox
Plug-In parameters shown in the cells of the ACT dialog. We specifically want to access the Wah
- Position parameter. To see this you’ll need to select Bank 4 of the top row of “Rotary” cells, and
the Wah - Position parameter should appear in the Rotary 1 controller slot.
The Default preset is selected...
In the Controllers tab, select Bank 4 in the
top row of cells.
The GearBox Plug-In’s Wah-Position
parameter appears in the Rotary 1 slot.
• Click on the lower cell of the Rotary 1 controller slot and this places it in “MIDI Learn” mode,
where it then waits to receive a MIDI command from the assigned MIDI surface control device
(your KB37/UX2/UX8)...