
Setup Guide


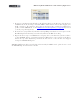
Table Of Contents

MIDI Setup Guide: MIDI Control with 3rd Party Applications
4•15
• In the ACT Controllers toolbar options, click the Controllers/Surfaces Properties button that
is at the right end of the Control Surfaces toolbar.
For UX2 and UX8, you can skip ahead to the following “SONAR ACT and MIDI Learn” on page 4•16
section since you’ll need to use the MIDI Learn function to map your Footswitch/Pedal controllers, but
reading the rest of the points in this section is likely helpful to see a bit about how ACT works!
• In the Properties dialog, select the Line 6 KB37 preset from the menu. You’ll see that this loads
a number of “pre-mapped” settings for your device. Note that these mappings are designed to
work with the MIDI commands that we configured in the earlier step when we created the Line
6 MIDI Controller Settings - SONAR preset for your device.
• Click on the Rotaries Mode - Multi Channel and Control Group - Track options to select them,
then click your mouse within Sonar’s main track area so that your “focus” is placed on this main
area of SONAR* - your ACT MIDI Controller dialog appears like the following screenshot.
*Note that the preset’s Controller assignments within the ACT MIDI Controller dialog will change if you
click and place focus on different SONAR windows, such as if you click in the properties window of a
loaded Plug-In. More on this later!