Smart Socket (L41TF / L41TFWH) Intelligente Steckdose / Zocalo Inteligente / Prise Intelligente Presa Smart / Tomada Inteligente / Smart Uttag / Akilli Priz
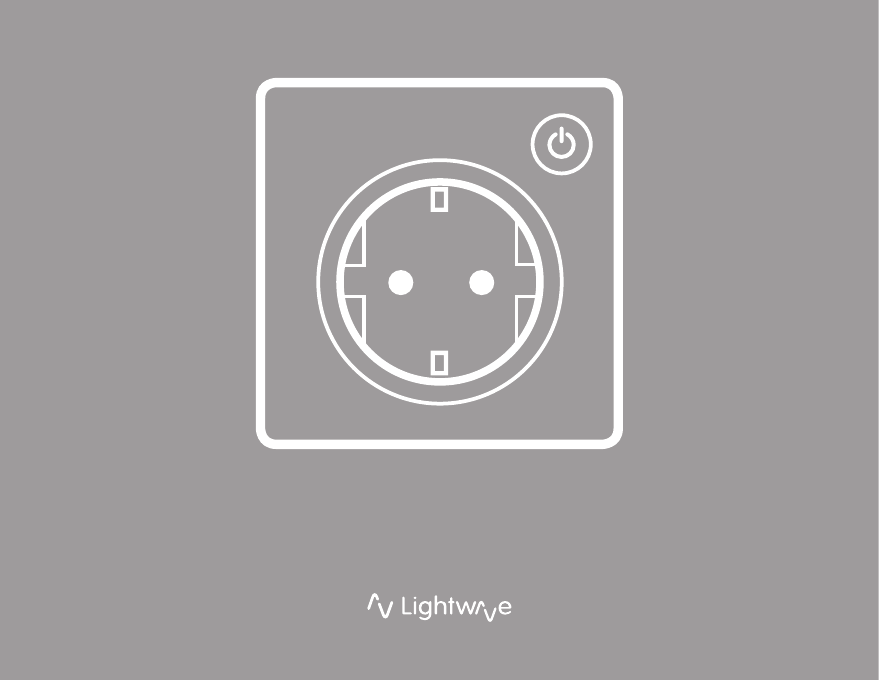
1 Preparation UK On/off button Indicator light changes colour to show the status of the socket Installation Back box Help video & further guidance EU Declaration of Conformity This product is required to be installed by a qualified electrician. This Lightwave Smart Socket requires a 50mm deep back box in which to mount it. For additional guidance, and to watch a video that will help guide you through the installation process, please visit the support section on www.lightwaverf.com.
2 Installing the Socket Carefully follow the instructions in this section in order to install the Socket. Please remember that live electricity is dangerous. Do not take any risks. For other advice, please contact our dedicated technical support team at www.lightwaverf.com. The easiest way to learn how to install the Lightwave Socket is to watch our short installation video which is accessible at www.lightwaverf.com/product-manuals 2.
1 DE Ein-/Ausschaltknopf Vorbereitung Kontrollleuchte ändert Farbe, um den Sockelstatus anzuzeigen Installation Unterputzdose Hilfe-Video & weitere Anleitung EU-Konformitätserklärung Dieses Produkt muss von einem qualifizierten Elektriker installiert werden. Diese Lightwave Smart Steckdose benötigt für den Einbau eine 50 mm tiefe Unterputzdose. Weitere Hilfen und Videos, die Sie durch die Installation führen, finden Sie im Support-Abschnitt unter www. lightwaverf.com.
2 Installieren der Steckdose Befolgen Sie sorgfältig die Anweisungen in diesem Abschnitt, um den Steckdose zu installieren. Bitte denken Sie daran, dass spannungserzeugende, elektrische Anlagen gefährlich sind. Setzen Sie sich keiner Gefahr aus. Für weitere Informationen wenden Sie sich bitte an unseren engagierten technischen Support unter www.lightwaverf.com Erfahren Sie alles über die Installation der Lightwave Steckdose, indem Sie sich einfach unser kurzes Anleitungsvideo www.lightwaverf.
1 ES Botón de encendido/apagado Preparación La luz indicadora cambia de color para mostrar el estado de la toma Instalación Caja posterior Vídeo de ayuda y guía adicional Dichiarazione di conformità UE Este producto lo debe instalar un electricista calificado. Es importante instalar este producto siguiendo estas instrucciones. De lo contrario, podría poner en peligro su seguridad personal, producirse un incendio, infringir la ley e incluso perder la garantía.
2 Instale el enchufe Vincular la toma y otras funciones Cable de circuito principal Entrar y dejar la caja posterior 3 Instale el enchufe 2.3 Quite la placa frontal Enlace el enchufe Bloqueo del enchufe Siga detenidamente las instrucciones de este apartado para instalar el enchufe. Recuerde que la electricidad activa es peligrosa. Debe tener cuidado. Para obtener más asesoramiento, póngase en contacto con nuestro de asistencia técnica especializado en www. lightwaverf.com.
1 Préparation FR On/off button Le voyant change de couleur pour indiquer l’état de la prise Installation Boîte arrière Vidéo d’aide et conseils supplémentaires Ce produit doit être installé par un électricien qualifié. Il est important d’installer ce produit en respectant les instructions. Le non-respect de cette consigne peut mettre en danger votre propre sécurité, créer un risque d’incendie, enfreindre la loi et annuler votre garantie.
2 Installez la prise de courant Veuillez suivre attentivement les instructions de cette section pour installer la prise de courant. Souvenezvous que l’électricité sous tension est dangereuse. Ne prenez aucun risque. Pour d’autres conseils, veuillez contacter notre équipe du support technique dédié en accédant au site: www.lightwaverf.com.
1 IT Pulsante On/Off Preparazione La luce dell’indicatore cambia colore per mostrare lo stato della presa Installazione Scatola elettrica Video guida e ulteriori indicazioni Dichiarazione di conformità UE Questo prodotto deve essere installato da un elettricista qualificato. Questa Presa Smart Lightwave richiede una scatola elettrica profonda 50mm per il montaggio. Per ulteriori informazioni utili durante il processo di installazione, invitiamo a visitare la sezione assistenza all’indirizzo www.
2 Installazione della Presa Ti invitiamo ad attenerti con attenzione alle istruzioni di questa sezione per installare il presa. Ti preghiamo di ricordare che la tensione elettrica è pericolosa. Non correre rischi. Per altri consigli, ti invitiamo a contattare il nostro team di supporto tecnico dedicato al seguente link www.lightwaverf.com. Il modo più semplice per imparare a installare la Presa Lightwave è guardare il nostro breve video di installazione accessibile all’indirizzo www.lightwaverf.
1 PT Botão de ligar/desligar Preparação A luz indicadora alterna a cor para mostrar o estado da tomada Instalação Caixa de instalação Vídeo de ajuda e orientação adicional Declaração de Conformidade UE Este produto deve ser instalado por um eletricista qualificado. Esta tomada inteligente Lightwave exige uma caixa de instalação com profundidade de 50 mm para montagem.
2 Instalar a tomada Siga atentamente as instruções nesta seção para instalar a tomada. Lembre-se que a corrente elétrica é perigosa. Não corra riscos. Para outros conselhos, contacte a nossa equipa de apoio técnico dedicada através do website www.lightwaverf.com. A forma mais fácil de saber como instalar a tomada Lightwave é assistindo ao nosso pequeno vídeo de instalação que pode ser acedido em www.lightwaverf.com/product-manuals 2.
1 Förberedelser SE På-/av-knapp Indikatorlampan ändrar färg för att visa uttagets status Installation Back-box Hjälpvideo och ytterligare handledning EU-försäkran om överensstämmelse Denna produkt får bara installeras av en kvalificerad elektriker. Detta smarta uttag från Lightwave kräver en back-box som är 50 mm djup för montering. För ytterligare handledning och för att se en video som guidar dig genom installationsprocessen kan du besöka supportdelen på www.lightwaverf.
2 Installera uttaget Följ noggrant instruktionerna i detta avsnitt för att installera uttaget. Kom ihåg att elektricitet är farligt Ta inga risker. Ytterligare råd får du om du kontaktar vår tekniska support på www.lightwaverf.com. Det enklaste sättet att lära sig att installera Lightwaveuttaget är att titta på vår korta installationsvideo som finns tillgänglig på www.lightwaverf.com/product-manuals går in i och ut ur back-box. 2.
1 Hazırlık TR Açma / Kapama düğmesi Gösterge ışığı, soketin durumunu göstermek için renk değiştirir Kurulum Arka kutu Yardım videosu ve ek rehber AB Uygunluk Beyanı Bu ürünün kurulumu yetkin bir elektrikçi tarafından yapılmalıdır. Bu Lightwave Akıllı Priz, monte edileceği 50 mm’lik bir derin arka kutu gerektirir. Ek yönlendirme ve montaj sürecinde size yardımcı olacak bir videoyu izlemek için lütfen www.lightwaverf. com adresindeki destek bölümünü ziyaret edin.
2 Prizin Takılması Prizin monte etmek için bu bölümdeki talimatları dikkatli bir şekilde uygulayın. Lütfen canlı elektriğin tehlikeli olduğunu unutmayın. Risk almayın. Diğer öneriler için www.lightwaverf.com adresinden özel teknik destek ekibimiz ile iletişime geçin. Lightwave Prizin nasıl monte edileceğini öğrenmenin en kolay yolu, şu adreste bulunan kısa montaj videomuzu izlemektir www.lightwaverf.com/product-manuals 2.
EU Declaration of Conformity CZ DK FL HU NL NO PL Produkt: Síťová zásuvka (typ F) Model/typ: L41TF / L41TFWH Výrobce: LightwaveRF Produkt: Stikkontakt (type F) Model/Type: L41TF / L41TFWH Fabrikant: LightwaveRF Tuote: Pistorasia (tyyppi F) Malli/Tyyppi: L41TF / L41TFWH Valmistaja: LightwaveRF Termék: Aljzat (F típus) Modell/típus: L41TF / L41TFWH Gyártó: LightwaveRF Product: Stopcontact (type F) Model/Type: L41TF / L41TFWH Fabrikant: LightwaveRF Produkt: Stikkontakt (Type F) Modell/Type: L41TF /
support@lightwaverf.com www.lightwaverf.