
User Manual
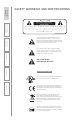
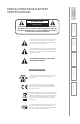
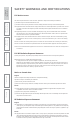

Table Of Contents
- U s e r M a n u a l
- SYSTEM COMPONENTS AND UNPACKING
- OPTIONAL COMPONENTS
- POD CONTROLS AND CONNECTIONS
- ACTIVATE STATION: CONTROLS, CONNECTIONS AND INDICATORS
- ACTIVATE STATION: CONTROLS, CONNECTIONS AND INDICATORS
- 2. PLUG IN THE ACTIVATE STATION
- 3. PLACE THE COMPONENTS IN THE ACTIVATE STATION
- 5. REGISTER ANY NEW ACTIVATE SYSTEM COMPONENTS
- 6. DOWNLOAD THE MOBILE APP
- 7. PAIR YOUR MOBILE DEVICE TO ACTIVATE STATION
- 8. SET UP THE FLEXMIKE + EARBUD
- 9. SET THE PODS OUT IN THE CLASSROOM
- 10. TEST GENERAL SYSTEM OPERATION
- 9. SETTING SYSTEM VOLUME LEVELS
- DAILY OPERATION INSTRUCTIONS
- ADDITIONAL OPERATION INFORMATION
- MAINTENANCE & TROUBLESHOOTING
- WARRANTY, SAFETY & SPECIFICATIONS

TROUBLESHOOTING
Note: Many problems are directly related to low battery power. Please run
through the “Battery Check” items first. For remaining troubleshooting, use
known good, fully-charged batteries.
PROBLEM: low battery condition.
SOLUTION: check the batteries and ensure proper charging.
•
Confirm batteries are properly charged each night. Full charging can take up
to 10
hours.
•
When placing a component in a charger, ensure the red charging light turns
on. The gr
een charging light will turn on when a full charge is reached.
•
Regardless of battery life, the red light will turn on for 20-30 minutes to check
status. When bat
tery is full, the light will turn green at some time after that.
•
Fully charged batteries will operate properly throughout a full school day for
a per
iod of at least 1-2 years. If the batteries are older, they may need to be
replaced.
PROBLEM: No audio from a speaker pod when selected.
SOLUTION: follow these steps to isolate and eliminate the problem.
•
When the pod # button is selected on remote, ensure it turns green.
-
If it does not turn green, this indicates the pod or other component is
either not on or not proper
ly registered.
- If t
he button turns red, this indicates the microphone is muted. Press the
mute button on the remote.
•
Ensure speaker pod is on and ready for use as indicated by a solid blue power
light.
-
Power the unit on by sliding the switch on the bottom of the pod.
-
Try turning the speaker off, then on again and wait up to 30 seconds for it
to properly link.
•
Ensure the speaker pod volume is set to a nominal level. If it is turned all the
way down, there will be no audio.
•
Ensure the Flexmike is on and ready for use as indicated by a steady blue
status light (#1 or #2).
- If the microphone status light is blinking, that indicates the Flexmike is
not linked up to the Access amplifier. Ensure the amplifier is plugged in to
power.
- Ensure there is a corresponding green 1 or 2 ready light on the Access
amplifier
- If the microphone status light is red, that indicates the Flexmike is muted.
Press the mute button on the remote or Flexmike to unmute.
•
Ensure the proper teacher remote is being used.
- If there are 2 microphones with the Flexcat system, each Flexmike must be
paired t
ogether with a specific remote, marked Teacher 1 or Teacher 2.
- C
heck microphone status indicator light (1 or 2) is on. Ensure you are using
the c
orresponding remote, marked Teacher 1 or Teacher 2 on the serial
number label on the back.
6.
Safety
&
Specifications
4.
Additional
Information
3.
DaiIy
Operation
2.
Initial
Set-up
1.
Overview
5.
Maintenance
&
T
r
oubleshooting