
User Manual
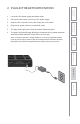
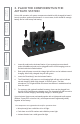
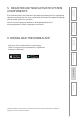
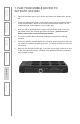
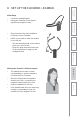
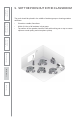

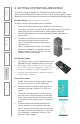
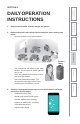
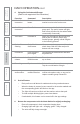
Table Of Contents
- U s e r M a n u a l
- SYSTEM COMPONENTS AND UNPACKING
- OPTIONAL COMPONENTS
- POD CONTROLS AND CONNECTIONS
- ACTIVATE STATION: CONTROLS, CONNECTIONS AND INDICATORS
- ACTIVATE STATION: CONTROLS, CONNECTIONS AND INDICATORS
- 2. PLUG IN THE ACTIVATE STATION
- 3. PLACE THE COMPONENTS IN THE ACTIVATE STATION
- 5. REGISTER ANY NEW ACTIVATE SYSTEM COMPONENTS
- 6. DOWNLOAD THE MOBILE APP
- 7. PAIR YOUR MOBILE DEVICE TO ACTIVATE STATION
- 8. SET UP THE FLEXMIKE + EARBUD
- 9. SET THE PODS OUT IN THE CLASSROOM
- 10. TEST GENERAL SYSTEM OPERATION
- 9. SETTING SYSTEM VOLUME LEVELS
- DAILY OPERATION INSTRUCTIONS
- ADDITIONAL OPERATION INFORMATION
- MAINTENANCE & TROUBLESHOOTING
- WARRANTY, SAFETY & SPECIFICATIONS

2.
PLUG IN THE ACTIVATE STATION
1.
Locate the 24V power supply and power cable.
2.
Connect the AC power cord into the DC power supply.
3.
Insert the DC connector into the DC Power jack on the back.
4.
Plug the AC power cord into an electrical outlet.
5.
The blue power light on the front of Activate Station will glow.
6.
The green link light will begin blinking as it searches for its paired classroom
audio bas
e station (Redcat, Topcat, 955 or Access Link).
Note: If Activate System is being added to an existing Lightspeed audio
system, please refer to please refer to the Registration Procedure at www.
lightspeed-tek.com/accessregistration for proper pairing instructions.
6.
Safety
&
Specifications
5.
Maintenance
&
T
r
oubleshooting
4.
Additional
Information
3.
DaiIy
Operation
1.
Overview
2.
Initial
Set-up