
User's Manual

22
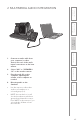
1. Overview 2. Initial Set-up 3. DaiIy Operation
4. Additional
Information
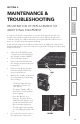
5. Maintenance &
Troubleshooting
6. Safety &
Specifications
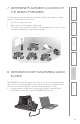
1. Remove the desktop speakers
from the charger and place
them on the group tables.
• The speakers will automatically
power on when the switch is left
in the on position.
• Note the location of the speaker
numbers.
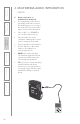
2. Remove the belt-pack and
headset and put them on.
• The belt-pack will automatically
power on when the switch is left
in the on position.
• The blue LED will turn on after a
few seconds to indicate the unit
is powered on and linked with
the base station
• The belt-pack can be worn
anywhere that is comfortable for
the teacher. It can be:
– Clipped to a belt around
– Clipped to the outside of a
pocket
– Placed inside a pocket
• Place the headset on. It is
designed to be worn over the
ear as shown below:
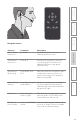
3. Remove the remote and begin
instruction. Use the remote to:
• Address the whole class
• Address small groups
• Monitor (listen only) small
groups
• Activate student group sharing
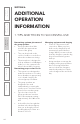
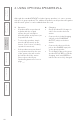
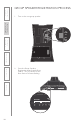
4. Return the components to
the base station for nightly
recharging:
• Place all components in their
respective charging slots
– Desktop Speaker: insert with
battery contact facing down.
– Remote(s) and Belt-pack(s):
the four small slots are
interchangeable
• The charging LED’s will turn RED
to indicate charging.
• The units will fully charge
overnight.
• The LED’s will turn GREEN to
indicate charging is complete.
SECTION 3:
DAILY OPERATING
INSTRUCTIONS
1. OPERATING THE FLEXCAT