
User's Manual


39
1. Overview 2. Initial Set-up 3. DaiIy Operation
4. Additional
Information
5. Maintenance &
Troubleshooting
6. Safety &
Specifications
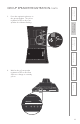
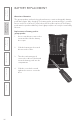
ALL PROBLEMS: most problems are
related to low battery power.
SOLUTION: check the batteries and
ensure proper charging.
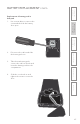
• Confirm batteries are properly
charged each night.
• Whenplacingacomponentina
charger, ensure the RED charging
LED turns on. The GREEN
charging light will turn on when a
full charge is reached.
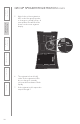
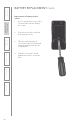
• Regardlessofbatterylife,theRED
light will turn on for 20-30 minutes
to check status. When battery is
full, the light will turn GREEN at
some time after that.
• Fullychargedbatterieswill
operate properly throughout a full
school day for a period of at least
1-2 years. If the batteries are older,
they likely need to be replaced.
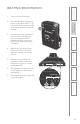
PROBLEM: No audio from group
speaker.
SOLUTION: follow these steps to
isolate and eliminate the problem.
• Ensure group speaker power is on.
o Turn the speaker on.
• Ensureheadsetisproperly
connected into the belt-pack
• Ensurethemutebuttononthe
remote is not turned on. The mute
button should be un-lighted and
the ALL and speaker number
buttons selected should be green.
• Ensurethegroupspeakervolume
is set to a nominal level. If it is
turned all the way down, there will
be no audio.
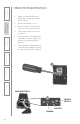
• Ensuregroupspeakerisproperly
linked as indicated by the
“READY” LED on the bottom.
o Try turning the speaker off, then on
again and wait up to 30 seconds
for it to properly link.
• Ensureteacherbelt-packisonand
“READY” for use as indicated by a
solid blue light.
o Turn the belt-pack on and wait up
to 30 seconds for it to properly
link.
• Ensureteacherremoteisproperly
registered.
o Press the ALL button. The GREEN
LED should light.
o If it doesn’t light, make sure the
belt-pack and group speaker are
both “READY.”
o Ensure the batteries are fully
charged. If the RED battery low
LED is on, it can experience
intermittent operation.
Note: Most problems are directly related to low battery power. Please run
through the “Battery Check” items first. For remaining troubleshooting, use
known good, fully-charged batteries.
TROUBLESHOOTING