
User Manual
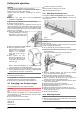
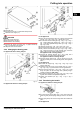

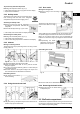
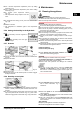
Table Of Contents
- 1 Appliance at a glance
- 2 General safety information
- 3 Controls and displays
- 4 Putting into operation
- 5 Control
- 5.1 Brightness of the temperature display
- 5.2 Child proofing
- 5.3 Door alarm
- 5.4 Temperature alarm
- 5.5 Freezing food
- 5.6 Thawing food
- 5.7 Setting the temperature
- 5.8 SuperFrost
- 5.9 Drawers
- 5.10 Shelves
- 5.11 VarioSpace
- 5.12 Information system
- 5.13 Drawer for herbs and berries
- 5.14 Cold storage accumulators
- 5.15 IceMaker*
- 6 Maintenance
- 7 Malfunctions
- 8 Decommissioning*
- 9 Disposing of the appliance
- l708619601_instructionmanual_SKBbs4210.pdf
- 1 Appliance at a glance
- 2 General safety information
- 3 Controls and displays
- 4 Putting into operation
- 5 Control
- 6 Maintenance
- 7 Malfunctions
- 8 Decommissioning
- 9 Disposing of the appliance
u
For a warmer temperature adjustment: press Up setting
button
Fig. 3 (2)
.
u
For a colder temperature adjustment: press Down setting
button
Fig. 3 (3)
.
u
To confirm: press SuperCool button
Fig. 3 (7)
.
w
The temperature slowly adjusts to the new
value.
u
To deactivate the setting mode: press the On/Off button
Fig. 3 (6)
.
-or-
u
Wait for 5 minutes.
w
The temperature is indicated again in the temperature
display.
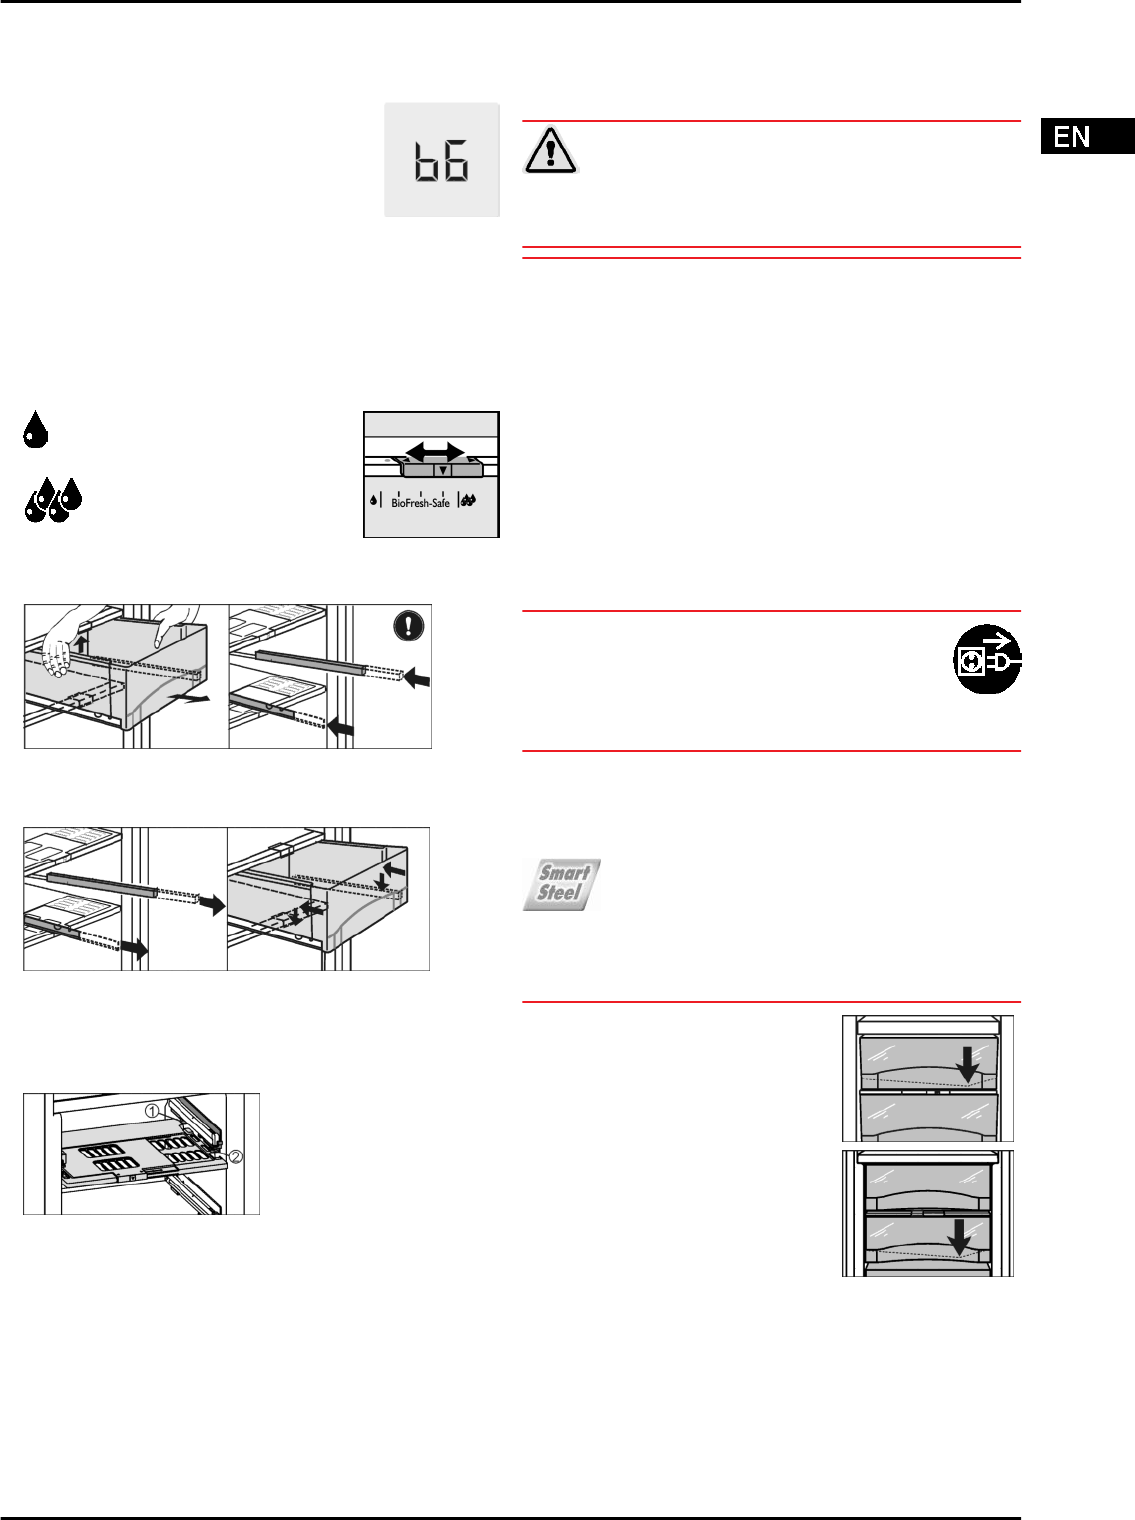
5.5.6 Setting the humidity in the HydroSafe
u
Low humidity: move the regulator to
the left.
u
High humidity: move the regu-
lator to the right.
5.5.7 Drawers
Fig. 17
u
Pull out the drawer, lift it at the back and draw it forwards for
removal.
u
Replace the racks.
Fig. 18
u
Pull out the rails.
u
Attach the drawer to the rails and push it in until it engages
audibly at the back.
5.5.8 Humidity control plate
Fig. 19
u
To remove the humidity control plate: Having removed the
drawers, carefully draw the plate forwards and lower it for
removal.
u
To insert the humidity control plate: Insert the cover mould-
ings of the plate into the rear holder
Fig. 19 (1)
from under-
neath and engage them in the holder
Fig. 19 (2)
at the front.
6 Maintenance
6.1 Cleaning the appliance
WARNING
Risk of injury and damage as a result of hot steam!
Hot steam can lead to burns and can damage the surfaces.
u
Do not use any steam cleaners!
NOTICE
Incorrect cleaning damages the appliance!
u
Do not use cleaning agents in concentrated form.
u
Do not use any scouring or abrasive sponges or steel wool.
u
Do not use any sharp or abrasive cleaning agents, nor any
that contain sand, chloride or acid.
u
Do not use chemical solvents.
u
Do not damage or remove the type plate on the inside of the
appliance. It is important for the customer service.
u
Do not pull off, bend or damage cables or other compo-
nents.
u
Do not allow any cleaning water to enter the drain channel,
ventilation grille or electrical parts.
u
Please use soft cleaning cloths and a universal pH-neutral
cleaning agent.
u
Please use cleaning and care products suitable for contact
with foodstuffs in the appliance interior.
u
Empty appliance.
u
Pull out the power plug.
u
Clean plastic outer and inner surfaces with lukewarm
water and a little washing-up liquid.
NOTICE
Risk of damage from stainless steel care products!
The stainless steel doors and stainless steel side walls are
finished with a high-quality surface coating.
Stainless steel care products will damage the surfaces.
u
Use only a soft, clean cloth to wipe the coated door
surfaces and side walls. In case of stubborn dirt, use a
little water or a neutral cleaning agent. Another option is to
use a microfibre cloth.
*
u
Clean drain hole: Remove deposits
with a narrow instrument, e.g. a
cotton bud.
*
u
Most of the parts can be dismantled for cleaning: see the
relevant chapter.
u
Clean items of equipment by hand with lukewarm water
and a little washing-up liquid.
u
Only use a damp cloth to clean the telescopic rails. The
grease in the runners is for lubrication purposes and must
not be removed.
After cleaning:
u
Wipe dry the appliance and items of equipment.
u
Connect the appliance and switch it on again.
Maintenance
* Depending on model and options 13