
User Manual
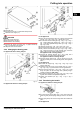

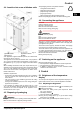
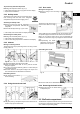
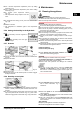
Table Of Contents
- 1 Appliance at a glance
- 2 General safety information
- 3 Controls and displays
- 4 Putting into operation
- 5 Control
- 5.1 Brightness of the temperature display
- 5.2 Child proofing
- 5.3 Door alarm
- 5.4 Temperature alarm
- 5.5 Freezing food
- 5.6 Thawing food
- 5.7 Setting the temperature
- 5.8 SuperFrost
- 5.9 Drawers
- 5.10 Shelves
- 5.11 VarioSpace
- 5.12 Information system
- 5.13 Drawer for herbs and berries
- 5.14 Cold storage accumulators
- 5.15 IceMaker*
- 6 Maintenance
- 7 Malfunctions
- 8 Decommissioning*
- 9 Disposing of the appliance
- l708619601_instructionmanual_SKBbs4210.pdf
- 1 Appliance at a glance
- 2 General safety information
- 3 Controls and displays
- 4 Putting into operation
- 5 Control
- 6 Maintenance
- 7 Malfunctions
- 8 Decommissioning
- 9 Disposing of the appliance
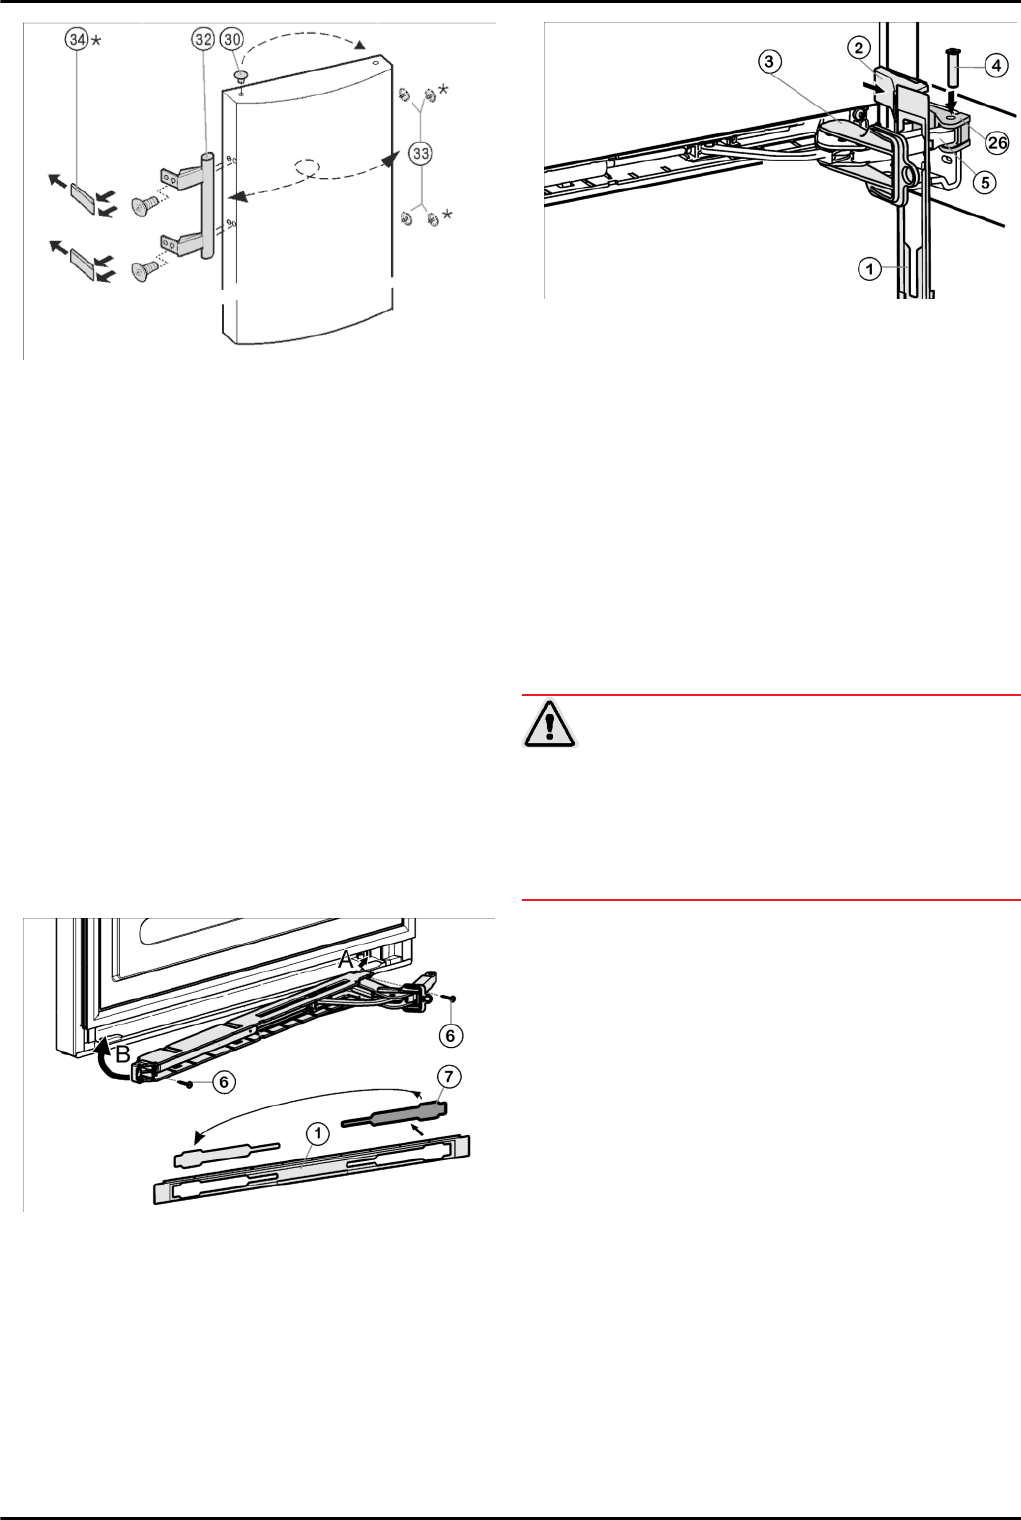
Fig. 10
u
Lift the stopper
Fig. 10 (30)
out of the door bearing bush and
transfer it.
u
Dismantle the door handle
Fig. 10 (32)
, stoppers
Fig. 10 (33)
and pressure plates*
Fig. 10 (34)
and transfer to
the opposite side.
u
When fitting the pressure plates on the opposite side, make
sure they snap properly into place.*
4.3.5 Fitting the door
u
Place the door from above onto the lower bearing pin
Fig. 7
Fig. 7 Fig. 7 Fig. 7 Fig. 7 (22)
.
u
Close the door.
u
Insert the upper turn hinge
Fig. 6 (12)
in the door on the new
hinge side.
u
Screw the upper turn hinge
Fig. 6 (12)
firmly into place (with
4 Nm)(2x Torx® 25)
Fig. 6 (13)
. Possibly make preliminary
holes with a bradawl or use a cordless screwdriver.
u
Snap the cover
Fig. 6 (10)
and cover
Fig. 6 (11)
into place at
the opposite side.
4.3.6 Fitting the soft stop unit*
For appliances with a closing damper.
For appliances without a closing damper continue with this
point (see 4.3.7) .
Fig. 11
u
Remove the cover
Fig. 11 (7)
from the faceplate
Fig. 11 (1)
and re-insert it at the other side.
u
Engage the soft stop unit with the joint pointing to the hinge
side (A) and swivel into place (B).
w
The screw holes at the left and right have to register.
u
Screw down the soft stop unit (2x Torx® 15)
Fig. 11 (6)
.
Fig. 12
u
Attach the faceplate
Fig. 12 (1)
to the soft stop bracket so
that the catches face forwards and the front faces the appli-
ance.
u
Draw the soft stop bracket
Fig. 12 (5)
towards the bearing
part
Fig. 12 (26)
and re-insert the pin
Fig. 12 (4)
from above
so that the square sits in the recess.
u
Attach and engage the cover
Fig. 12 (2)
.
w
Pay attention that the cover fits properly so that the door
closes properly and the pin is secured.
u
Twist the safety lock
Fig. 12 (3)
for removal.
u
Snap the faceplate
Fig. 12 (1)
onto the door.
u
Close the door.
4.3.7 Aligning the door
u
Align the door to the appliance housing by way of the two
oblong holes in the bottom turn hinge
Fig. 7 Fig. 7 Fig. 7
Fig. 7 Fig. 7 (25)
. To do so, unscrew the middle screw.
WARNING
Risk of injury due to the door dropping out!
If the bearing parts are not screwed into place firmly enough,
the door may drop out. This may lead to severe injuries. What is
more, the door may not close and therefore the appliance may
fail to cool properly.
u
Screw the turn hinges firmly into place with 4 Nm.
u
Check all of the screws and retighten if necessary.
Putting into operation
8 * Depending on model and options