
User Manual
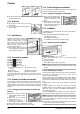
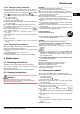
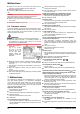

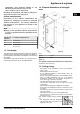
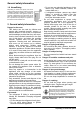
Table Of Contents
- 1 Appliance at a glance
- 2 General safety information
- 3 Controls and displays
- 4 Putting into operation
- 5 Control
- 5.1 Brightness of the temperature display
- 5.2 Child proofing
- 5.3 Door alarm
- 5.4 Temperature alarm
- 5.5 Freezing food
- 5.6 Thawing food
- 5.7 Setting the temperature
- 5.8 SuperFrost
- 5.9 Drawers
- 5.10 Shelves
- 5.11 VarioSpace
- 5.12 Information system
- 5.13 Drawer for herbs and berries
- 5.14 Cold storage accumulators
- 5.15 IceMaker*
- 6 Maintenance
- 7 Malfunctions
- 8 Decommissioning*
- 9 Disposing of the appliance
- l708619601_instructionmanual_SKBbs4210.pdf
- 1 Appliance at a glance
- 2 General safety information
- 3 Controls and displays
- 4 Putting into operation
- 5 Control
- 6 Maintenance
- 7 Malfunctions
- 8 Decommissioning
- 9 Disposing of the appliance
u
To store frozen food directly on the shelves: pull the drawer
forwards and lift it out.
5.10 Shelves
u
To remove the shelf: lift up at the front
and pull out.
u
To put the shelf back: simply push in as
far as it will go.
5.11 VarioSpace
Apart from being able to remove the
drawers, you can also remove the
shelves, creating space for large
items of frozen food. Poultry, meat,
large pieces of game and high
bakery products can be frozen in
one piece and prepared.
u
The maximum load of frozen food
for the drawers is 25 kg each and
for the shelves 35 kg each.
5.12 Information system
Fig. 15
(1) Ready-made meals, ice
cream
(4) Sausages, bread
(2) Pork, fish (5) Game, mushrooms
(3) Fruit, vegetables (6) Poultry, beef/veal
The figures indicate the storage time in months for several
types of frozen food in each case. Storage times given are
guide times.
5.13 Drawer for herbs and berries
In the drawer for herbs and berries you can freeze, berries,
herbs, vegetables and other small items of food without them
sticking together. Items being frozen will largely retain their
shape, and it will be easier to remove exactly the right quantity
later on.
5.13.1 Using the special drawer for herbs and
berries
u
Spread the items out loosely
in the special drawer for herbs
and berries.
u
Allow the food to freeze
through for 10 to 12 h.
u
Transfer the frozen food to
freezer bags or containers.
u
Store freezer bags or containers in a drawer.
u
To thaw the items, spead them out loosely again.
5.14 Cold storage accumulators
The cold storage accumulators prevent the temperature from
rising too fast in the event of power failure.
5.14.1 Using cold storage accumulators
u
Place the cold storage accu-
mulators in the special drawer
for herbs and berries to save
space.
u
Place the frozen cold storage
accumulators on the frozen
food in the upper front area of
the freezer compartment.
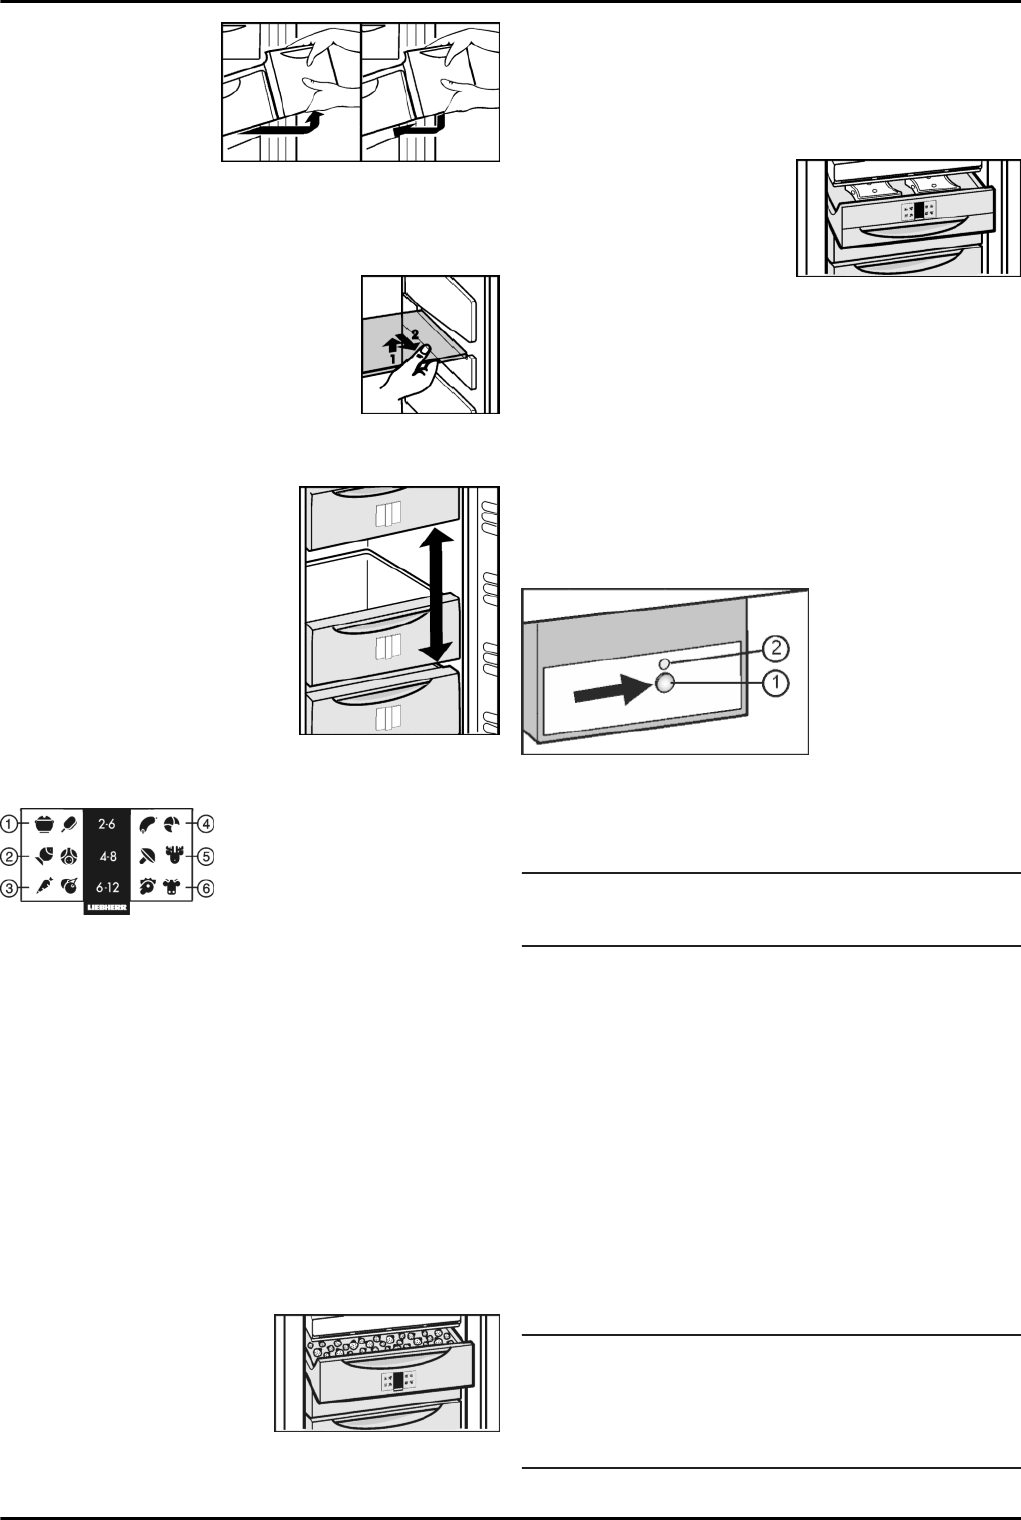
5.15 IceMaker*
The IceMaker is in the fourth drawer from the top. The drawer is
marked “IceMaker”.
Make certain that the following conditions are met:
-
The appliance is level.
-
The appliance is connected.
-
The IceMaker is connected to the water supply.
5.15.1 Switching on the IceMaker*
Fig. 16
u
Pull out the drawer.
u
Press the On/Off button
Fig. 16 (1)
so that the LED
Fig. 16 (2)
shines.
u
Push in the drawer.
w
The IceMaker symbol
Fig. 3 (13)
shines.
Note
u
The IceMaker produces ice cubes only if the drawer is fully
closed.
5.15.2 Producing ice cubes*
The production capacity depends on the freezer temperature.
The lower the temperature, the more ice cubes can be
produced in a specific period.
The ice cubes drop from the IceMaker into the drawer. When a
certain filling level has been reached, no further ice cubes are
produced. The IceMaker does not fill the drawer right up to the
brim.
Distribute the ice cubes evenly in the drawer to increase the
capacity.
If large quantities of ice cubes are needed, the complete
IceMaker drawer can be exchanged for the adjacent drawer.
When the drawer is closed, the IceMaker automatically re-
commences production.
Once the IceMaker has been switched on for the first time, it
may take up to 24 hours until the first ice cubes are produced.
Note
When the appliance is used for the first time and if it has been
out of use for a long time, particles may collect in the IceMaker
and/or water conduit.
u
Do not use or consume ice cubes that have been made 24
hours after the first ice cubes are made.
Control
12 * Depending on model and options