
Operation Manual


Using menu options
You can use some the choices on the Format menu to anchor, align, arrange, and group selected
Fontwork objects, wrap text around them, and flip them horizontally and vertically.
You can also right-click on a Fontwork object and choose many of the same options from the pop-
up menu. The pop-up menu also provides quick access to the Line, Area, Text, and Position and
Size dialogs. The Text dialog offers only a few options for Fontwork objects and is not discussed
here. On the Position and Size dialog, you can enter precise values for size and position. For more
information on all of these menu options, see the Draw Guide.
Using the 3D-Settings toolbar
If the selected Fontwork object is a 3-D object, you can also use the options on the 3D-Settings
toolbar. You can also change a 2-D Fontwork object into a 3-D object (or change a 3-D object into
a 2-D object) by clicking the Extrusion On/Off icon on the 3D-Settings toolbar. For more
information, see the Draw Guide.
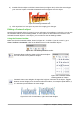
Figure 321: 3D-Settings toolbars
Moving and resizing Fontwork objects
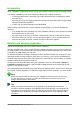
When you select a Fontwork object, eight colored squares (known as handles) appear around the
edge of the object, as shown below. You can drag these handles to resize the object.
A yellow dot also appears on the object. This dot may be
along an edge of the object, or it may be somewhere else;
in the example on the right. If you hover the pointer over
this yellow dot, the pointer turns into a hand symbol. You
can drag the dot in different directions to distort the object.
Hovering the pointer over other parts of the object turns the
pointer into the usual symbol for dragging the object to
another part of the page.
For precise control of the location and size of the object, use the Position and Size areas of the
Type tab in the Properties dialog.
334 | Getting Started with LibreOffice 5.1