
Operation Manual


Text boxes
Create a bulleted list in a text box as follows:
1) Click the Text icon on the Standard toolbar and draw a text box on your slide.
2) Click the Bullets On/Off icon on the Text Formatting toolbar.
3) Type the text and press Enter to start a new bulleted line.
The default list type is a bulleted list. Methods for changing the appearance of a list are explained
in “Changing list appearance” on page 178.
Creating a new outline level
In AutoLayout text boxes, create a new outline level as follows:
1) If necessary, press Enter to begin a new list entry.
2) To demote a list entry (move it to the right), press the Tab key or click the Demote (right
arrow) icon on the Text Formatting toolbar or use the keyboard shortcut Alt+Shift+Right.
The list entry moves to the right and is indented to the next outline level.
3) To promote a list entry (move it to the left), press Shift+Tab or click the Promote (left arrow)
icon on the Text Formatting toolbar or use the keyboard shortcut Alt+Shift+Left. The list
entry moves to the left and is indented at the next higher level.
4) To create a new list entry at the same level as the previous one, press Enter again.
In the AutoLayout text boxes, promoting or demoting an item in the list corresponds to applying a
different outline style. The second outline level corresponds to Outline 2 style, the third outline level
to Outline 3 style, and so on. A change in level and style produces other changes, for example, to
font size, bullet type, and so on.
In text boxes, a new outline level can only be created by using the Tab key to demote the list entry
and the Shift+Tab key combination to promote the list entry.
Note
Do not try to change the outline level by selecting the text and then clicking the desired
outline style as you would in Writer. Due to the way that presentation styles work in
Impress, it is not possible to change the level in this way.
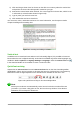
Changing list appearance
You can fully customize list appearance by changing the bullet type or numbering for the entire list
or for only a single entry. All of the changes can be made using the Bullets and Numbering dialog
(Figure 153), which is accessed by going to Format > Bullets and Numbering on the Menu bar or
by clicking on the Bullets Icon or the Numbering icon on the Text Formatting toolbar.
For the entire list:
1) Select the entire list or click on the border of the text box so that the resizing handles are
displayed.
2) Select Format > Bullets and Numbering on the Menu bar or click on the Bullets or
Numbering icon on the Text Formatting toolbar.
178 | Getting Started with LibreOffice 5.1